By Hamish MacDonald
 UPDATE:Hamish has started a DIY Book podcast!
Back in 2000, I wrote an article for this website about how to produce your own book. Things have changed considerably since then, both in the technology available to individuals and in the services available in the marketplace. It’s all good news for us independent publishers.
The original article was called “DIY Book Production.” Aside from being a clunky term, you now have more power than that: You can be your own press. I now produce my own books at home from start to finish, and in this article will explain what I’ve had to learn and acquire in order to do that.
Generally, self-publishing involves an inverse relationship of work to money: The more work you’re willing to do, the more money you can save; the more you want to just skip to an end product, the more it’ll cost you.
Self-pub: Four times more options than in 2000.
When I self-published my first novel, doubleZero, in 1999, I wanted to create a book to sell in stores. A big folded-over photocopy sandwich didn’t appeal to me, but I really didn’t know how else one could make a book, so I laid out the pages and the cover, then paid Coach House Press to do the production work.
There may have been other ways to do it, but having written a book about Y2K, I didn’t have the time to find out. Now, though, there are four main options available:
- Offset printing
- Print-on-Demand
- Hand-bound hardcovers
- Perfect binding
Here’s a summary of each (with special emphasis on the ones I like!):
Offset printing.
Offset printing is a high-volume printing method that uses large machinery to transfer text and images from metal plates to rubber pads then finally to paper. Coach House Press is a sterling example of a traditional press who care about their work. Their price was also the best I found — cheaper by $1,500 at the time than any print bureau.
Cynthia pipes in: I second that recommendation wholeheartedly. The moment I walked into Coach House to discuss the printing of Some Words Spoken, my nervousness dissolved. They are crafty elves who understand the feeling and flavour of books.
One of the largest parts of the printing cost is the set up of the colour press. Once it’s up and running, leaving it to print 1,000 covers instead of 500 is not that much of a difference. We printed extra covers and stashed them, so when our books sell out (!) and we need another 500, the covers are ready to go. We’ll only have to pay for the black and white guts of the book, and the binding.
The colour of the cover might shift when it goes to press. Your pretty proof from the designer might not match the final product. Make sure you get a proof from the printer and make any colour adjustments at that point. Once they’ve burned printing plates, it’s too late for you to be fussy.
|
Pro:
|
|
|
Con:
|
|
What you need:
|
|
A completed manuscript on disk, formatted the way you want it to appear in the book (or “typeset”). |
|
|
A finished cover design on disk. |
|
|
Cash. |
Print-on-Demand.
Newer digital printers don’t need to be mechanically adjusted to switch between jobs, so PoD publishers can print copies of work as needed.
I’m fussy about how my work looks, and the one PoD service I looked into seriously (the reputable CafePress) involves turning your pages into funny-sized PDF files and uploading them to the invisible maw of a webpage. I’m generally comfortable with Internet anything — online banking, making purchases, auctions — but I’m used to revising and reviewing and revising and reviewing until I like what I’ve created; I didn’t feel confident about what I might get from this method and took it no further. So my discussion of Print-on-Demand ends here.
|
Pro:
|
|
|
Con:
|
|
What you need:
|
|
A completed, typeset manuscript on file to upload. You may need to have it in PDF format, which I’ll talk about in the “Software” section below. |
|
|
A finished cover design (unless you choose one of the publisher’s designs, which is usually cheaper). |
|
|
Cash. |
Ultimately I’m happy I didn’t go this route, because instead of tying my work into a company’s PoD service I learned the following two methods, which have been a fun breakthrough in my career.
Hand-bound hardcovers.
It’s easier than you might think to create a hardcover book of your work. There are endless fun ways to adapt the handmade book process, too: For Christmas 2005 I made all my own presents — journals, photo albums, even a pop-up stage with a wee cartoon actress for a friend of mine who’s in the theatre. These were a real hit. (Don’t ask me what I’m doing next year to top it!)
|
Pro:
|
|
|
Con:
|
|
There are good explanations of the process here:
DIY Planner – Bookbinding
Toby Craig’s book assembling photojournal
To be honest, though, it took me a while to get the hang of “saddle-stitching” pages together. I found it hard to follow even the best of diagrams. I finally got it when I read Peter and Donna Thomas’s excellent Making Books by Hand.
Now that I have the hang of it, it’s actually fun, almost therapeutic, to sit and stitch a book together. Producing a novel this way, though, is not so much fun. Where my wee book of short stories or a journal contains ten or twelve “signatures” — sewn-together groups of pages — my third novel makes up twenty-six signatures. That’s a very, very long thread, and a lot of bits of folded-up paper to keep organized while sewing them together.
Here’s how to do it yourself:
For these next two sections, I’m going to divide the materials section into two options: “Minimum” and “Press”. The minimum requirements will allow you to get started and learn without much initial investment, if any (depending on how much craftsy material you’ve got lying around the house). The “Press” materials are in case you decide, as I did, that you wanted to produce store-quality books at home, without having to go out and pay for commercial print shop services anymore.
What you need:
|
Minimum
|
Press
|
||
| A completed, typeset manuscript printed out. | |||
| A finished cover design. | |||
| A sharp blade and ruler. | A rotary-blade guillotine. Your pages will be much more even using one of these. | ||
| Hard paper board for the covers. I was using matting board like you’d get from a framing shop until I found large grey boards in an art shop that cost a fraction of the price.
Bookbinding board is available, but the board will never be seen, so it doesn’t need to be fancy. I’ve tried corrugated cardboard, but it’s too puffy; it doesn’t feel like a proper hardcover. |
|||
 |
An awl for punching small holes in your pages. Or you can also sink a needle into a piece of dowelling. |  |
I use a model-maker’s drill, which is like a watch screwdriver with a 1mm drill bit, and drill through all the pages before folding them. You can also get eggbeater-like hand-drills that will accept a small bit, but I found this harder to control and snapped several bits. |
| Heavy thread. You can run it across beeswax to make it easier to work with and less likely to tangle. | |||
| Paper. Regular copy paper will do, or you can use an ivory stock for an antiquey look. | |||
 |
Heavy paper or paper-backed cloth for wrapping around your cover. Ordinary cloth can work but lets the glue leak through, which looks spermy. | ||
| PVA Glue.
I thought this must be something special when I bought it from a paperie, then discovered is the same old stuff that we peeled off our hands as kids. |
|||
| A bone folder. This helps you make sharp creases in your pages. More and more art supply shops have bookbinding materials like these. | |||
How I do it:
| Print out the book. (More on this in the “Software” section below.) | |
|
|
|
 |
Cut the pages in half (I prefer to make smallish books). |
|
|
|
 |
Fold the top sheet in half to see where the spine is, secure all the sheets together with bulldog clips, then drill four holes along the spine of the pages.
If it’s a really thick stack, I break it into smaller chunks, because the drill can go off at an angle or not get all the way through. You can also just use an awl to punch holes through your pages. Make one mock-up page as your hole guide and use it on smaller groups of pages. |
|
|
|
| Fold the pages with your finger, or bone folder. | |
|
|
|
| Group the folded pages into stacks of pages, no more than five or six pages per stack. | |
 |
If you look at any hardcover book in your house closely, you’ll probably find that it’s made up of folded-over groups of pages like this. These are “signatures”.
If all the pages were just stacked and folded over, they’d bulge out in a U-shape on the right-hand side. Using smaller groups of pages, or signatures, prevents this. |
|
|
|
 |
Sew the first signature:
This makes Signature One. |
|
|
|
 |
Sew the second signature so it’s joined to the first:
…And so on. (This is the bit that takes practice and is difficult to describe. Others do a better job; see the resources above.) |
|
|
|
 |
Once all the signatures are stitched, tie the two ends of the thread together, clamp the pages between two hard pieces of board with the spine sticking out, and glue the spine fairly heavily with glue.
Leave this clamped together and put it aside to dry. |
|
|
|
 |
Cut two pieces of board, each the same size as one of your folded pages, and cut a third board just smaller than the spine-width of your sewn-together signatures (which now make up a “book block”).
Cut a piece of cover cloth or paper a little bit larger than the size of these boards, allowing some gutter-room between the boards since your cover will need to hinge open and closed easily. |
|
|
|
 |
Cut a small bit off the four corners diagonally so they won’t bunch up when folded, brush glue on the inside edge, and tuck them in, pressing down so they stay flat. |
|
|
|
 |
Cut two pieces of decorative paper the same size as your book’s pages and fold them with their fancy side facing inward.
When your book block has dried, put a small amount of glue on either end and glue these “end papers” to the block. |
|
|
|
 |
Smear glue on the inside of your cover and stick the outsides of your end papers to the cover. Close the book and clamp it between boards or put it under something heavy, and leave it to dry overnight.
When it’s dry, open your book, separate the edges of any pages that are stuck together, and sign it! |
Here’s how my books look in hardcover:

Perfect binding.
This is ultimately the same technique that any press uses to make a paperback book. It didn’t occur to me until recently that I could do this, too.
|
Pro:
|
|
|
Con:
|
|
After years of trying to go the traditional publishing route, I wanted to jump back into the indie game and recapture the fun and proud spirit of producing my own work. Making 400-page novels using the hardcover method is so time-consuming, though, that I couldn’t reasonably charge a cover-price equal to the time spent making each one. And I want to make it easy for someone who might be curious to buy my books.
My mum stumbled across a site called Gigabooks.net, started as a project by a man named Chet Novicki, who found himself giving self-publishing advice to so many friends that he decided to make equipment and handbooks to help others self-publish. I’m wary of anything online that targets aspiring authors, but this guy is giving good information and selling quality gear. I bought a hand-binding press from him, which wasn’t cheap, especially when you add duty to it, but it’s been just the greatest boost to my self-publishing efforts.
Of course, you could make one of these yourself — or in theory, one could. I can’t, though; I haven’t got the tools or materials to do it.
Copyshop versus ownership.
From Jim: An option I used with Infinity Points, a hundred page novella I published in ’95, was to use a copy shop. They photocopied the guts of it and I supplied thick stock, full colour covers that I got an outputting service to do from an Illustrator file.
The copy shop perfect bound and trimmed the books which ended up being 5.5×8.5 in size. 500 of them cost about $1500. However, I really had to hunt for a copy shop that would do it this cheap, I basically called every one in the yellow pages and left a message telling them the best quote I’d got and asking them to call back if they could beat it.
As happy as I was with the final product, I wouldn’t do such a high-end novella again: you can’t really price 100 page books at much more than $10, and if it’s selling in the store that means that $4 goes to the bookstore, $2 goes to the distributor, $3 goes to the copy shop and the remaining $1 is probably swallowed up by incidental costs — the copies you gave away, etc. In the best case scenario that your print run sells out you’ll barely break even.
As I mentioned before, I paid $3,000 in 1999 to have my first book printed by an offset press. I’m sure it costs more now. I’ve blown a fair amount of money in the past few months setting up a press at home, filling up my bedroom with all manner of strange equipment. But even after having bought all the “Press”-level of gear and having the capacity to do this all myself for any book I want to print, I’ve still spent about a grand less than what the print run of a single book cost (and that book is now topically out-of-date).
What you need:
|
Minimum
|
Press
|
||
| A finished cover design. | 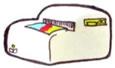 |
A colour laser printer to print your own covers. They’re a lot cheaper than they used to be. (Mine’s a Xerox Phaser 6100; ) | |
| Cover paper (card stock). | Spray varnish to keep the toner from flaking off laser-printed covers. | ||
| Printed-out inside pages. |  |
Paper-folding machine. Instead of the hour it can take to fold the pages of a full-length novel, this machine cuts the job down to minutes. (Mine’s a Martin-Yale 7200.) | |
| A sharp blade and ruler. |  |
A heavy-duty guillotine paper cutter. These can cut through hundreds of sheets of paper at once, and can make the sides of your book perfectly even and smooth. | |
| Contact cement. | |||
| Some sort of clamp or frame to squeeze your folded pages between. |  |
A handbinding press. This holds your pages together, along with the cover, so you can clamp them together tightly then glue them. (From Gigabooks.net.) | |
How I do it:
| Print out the book. | |
|
|
|
|
Cut the pages in half. |
|
|
|
| Fold the pages. | |
|
|
|
| Stack the pages. | |
|
|
|
 |
Put the pages into the press along with a printed cover. Put contact cement along the spine, making sure to cover all the page-edges, then fold the cover over the spine.
Let dry. |
|
|
|
| Fold the trailing edge of the cover paper in, or trim it off. | |
|
|
|
| You’ve got a book! | |
Perfect-bound copies of my books:

Joe Ollman adds: Here’s how I perfect-bind my books by hand. The cover stock must be thick enough to hold a crease. Make a creasing board with a piece of wood, xacto knife and ruler. Cut a groove a millimetre deep and wide where the creases of your cover need to be, then use a butterknife to score them. Once they’re scored they’ll fold easily and without cracking. Apply a bead of glue to the inside of the spine, insert your pages and rub it down so the contact point is made. Then stack them spine down on a bookshelf, putting pressure on the sides and the top, for an hour or so. You can leave it untrimmed (decal style) or you can go to a print shop and use their trimmer to give it a smooth edge.
For detailed instructions for perfect binding, you can also visit Chet Novicki’s site at Gigabooks.net. He’s very generous when it comes to answering questions about the process.
Software for designing and printing the pages of your book.
In my first version of this article, I said that you had to have access to the (very expensive) program QuarkXPress to do the typesetting of your book’s inside pages. I was wrong. I was working as a graphic designer at the time, so that’s what I was accustomed to using. Now, though, I’m a copywriter, and I have seen the scope of today’s word processing programs. You can do just as much to lay out your text, and more easily, in programs like:
- Microsoft Word ($399, Windows, Mac)
- Softmaker’s TextMaker ($49.95, Windows, Linux, Pocket PC)
- OpenOffice.org ($0 — free, open-source software, Windows, Linux, Mac)
Justification and footers.
Most books have their text “justified”, meaning that it’s balanced from left to right so that both margins are square. I tried to do that in Word recently and learned that the program is very bad at it. If there are only two words on a line, you end up with something that looks…
| like… | …this. |
Badness! So if you’re using Word, use the left justified option (straight along the left side and “ragged right”). I believe that TextMaker handles this much better.
Also, make sure to put page numbers at the bottom of your pages. This will help immensely when you’re printing and arranging them. It was really fiddly work to set it up, but I think it was worth the trouble to create separate “sections” in my books so I could just have page numbering on the story pages and not on the title page or the “About the Author” page. (In Word this is found in “Insert/Break/Section break types/Next page”, then mucking about the options in “View/Header and footer” until you get the proper pages to number themselves.)
An imposing program.
One of the big stumbling-blocks for the self-publisher until recently was a task called imposition. If you take a look at the sheets of paper that make up a book, you’ll see that what’s printed on them is actually jumbled up so that when the sheets are folded together they make one continuous book. Back when I did doubleZero, the QuarkXPress extensions to do this cost a thousand dollars or more.
Since then, a company called Blue Squirrel has developed a program called ClickBook ($49.95), which will intercept any job you can send to the printer and rearrange it into books, booklets, posters, and all sorts of other formats. I can’t say enough good things about this program, because it makes something possible from home that just wasn’t before, and it makes it straightforward. (The math of working out imposition makes my head spin.)
ClickBook can now also save your whole job as a PDF file. Normally you have to be very careful about bringing all the fonts and images you’ve used along with your file if you’re going to use a print service. Nothing’s worse than seeing your favourite typeface disappear and be replaced by a system font! (Okay, perhaps trade injustice is a bit worse.)
If you’re concerned about this but won’t be using ClickBook, you can use the freeware program PrimoPDF on Windows to ‘print’ to portable files that will look exactly the same on any computer, and on the Mac (OS X) you can choose to “Save as PDF” from the Print dialogue box.
About duplexing.
ClickBook works by dividing up the pages into smaller pages and laying several of those out on a single piece of paper. You’ll also need to run the pages through the printer again to print the back of them; this is called duplexing. My first laser printer wasn’t designed for duplexing, so it smudged the sheets the second time they went through, and it often mangled a page, which is really frustrating and wasteful when it’s just one of sixty sheets of paper you’ve already printed one side of. So look for a printer that has duplexing as a feature.
Creating your cover.
When someone picks up your book, yup, it’s Judgement Day. Err on the side of simplicity when designing your cover. Not too many fonts, no garish colours unless you’re really confident that you’re making a deliberate choice others will also appreciate, and make absolutely sure that the images you’ve created or adapted for your cover are not only ones you have the right to use, but are also at a high enough resolution for print. What works on a web page will look like some blocky thing from Super Mario World if you send it through a proper printer. Your images should be more than 200 dots per inch (dpi). And, sorry, you can’t just up the numbers in Photoshop; they have to start at a high resolution.
Think about teaming up with a designer whose work you like. See if there’s anything you can do for them, and set up a clear agreement with them: How many revisions are they willing to make? Get samples of books you like or images that convey what you’re after. The more you give your designer, the more in-tune their work will be with your feeling of the book.
Adobe Illustrator, Macromedia FreeHand, and Adobe Photoshop are the leading graphics packages. They cost lots. There’s an open-source alternative called Gimp, which I really want to support and use, but like so much opensourceware it seems painfully complicated. Or else I’m just stuck in thinking modes patterned by the commercial products. There’s also a new program called Paint.NET, produced jointly by students at Washington State University and Microsoft.
ISBN and UPC: Making your book easier to sell.
The International Standard Book Number is a unique identifier assigned to books. Getting your own ISBN helps bookstores keep track of your book. It also feels damned cool when you get it, ’cause it means you’ve produced an officially real book!
When I made doubleZero, I was still living in Canada, and got wonderful help from the National Library of Canada. It was years ago, but if it’s a typical government department, the same staff might still be there until the end of time. In this case, you’d be lucky, ’cause they were great to deal with. They can set you up with your own run of ISBN numbers and provide you with the Cataloguing-in-Publication data to put on the inside cover. In exchange, they’ll request two copies of your book for the National Library of Canada archives, which is actually kinda cool to imagine (though it did make me think of that scene in the giant warehouse at the end of Raiders of the Lost Ark).
You can reach them here.
I live in Scotland now, so it didn’t seem right to use the library’s services this time. I was also working on my cover layouts on the weekend and wanted to get my ISBNs instantly, so I went searching and found this site, where I bought mine. ($55 for one, $47 each for two, $44 for three, and so on.)
Once you have your ISBN, you can get a barcode to include on the back cover of your book. Lorie La Fata wrote in response to my original article with a helpful link to a website that will generate a barcode (or UPC symbol) for you. You can reach it here. (Many publishing services would charge you for the production of this graphic.)
A word on copyright.
Some people are so concerned about protecting their unique story ideas (even though there may only be six stories) that they liberally sprinkle the “©” symbol throughout their documents. In publishing, this is generally considered the mark of an amateur, because it insults the professionalism or ethics of whomever you’ve decided to share your work with. One copyright mark at the beginning of the book is sufficient.
How do you register your copyright? You don’t need to. The moment you create an original work, you hold the copyright to it. If you really feel paranoid, you can mail a copy to yourself or someone else and keep it sealed. The post-mark will officially place your work at a point in time.
In lieu of copyright, you might consider protecting your work with a Creative Commons license. It promotes a fairer, more modern approach to intellectual and creative property by allowing people to use and share your work according to your wishes, not the dictates of a publishing, recording, or movie corporation. When you go to the Creative Commons website, you can choose from a menu of allowable uses for your work, which will then be rolled into a license that you can include inside your book.
Freedom is yours.
More and more people are becoming frustrated with the traditional publishing industry. Getting out of that corporatised voodoo and back into self-publishing has made me excited about being an author again, given me the engaging and rewarding craft of bookbinding to play with, and opened the floodgates of my imagination: I’m not concerning myself with being “publishable” anymore, I’m getting on with being the author I am.
Now when people ask me “Are you published?” I don’t get huffy and whinge about “the state of the publishing industry.” I smile and say “Actually, I publish my own work. By hand.”
You can, too.
Hamish MacDonald is a novelist and copywriter who lives in Edinburgh, Scotland. He is the author of doubleZero, The Willies, and Idea in Stone. You can read his stories, download free e-books of his novels, and follow his blog at hamishmacdonald.com.
359 responses to “Do-It-Yourself Book Press”
Very impressive, and a great all-round introduction!
dj
This is the most comprehensive and accurate instructions on the net. When the other ones promises to show you how to write, print or publish your own book, you get all excited to open the links. And when you open them, all you find are bunches of baloneys about print on demand, Lulu, whatever. No one teaches you how to do anything on your own, all of them keep on referring you to what you already know.
Love it. Great information and some gorgeous final products. We’re thinking of doing some chapbooks for a convention and I’m glad I found this early in my search.
Great article! Check out http://www.guerrilla-press.com for some more DIY bookbinding info.
A post script: I quickly stopped using spray varnish when I discovered that it turned my covers grey and seemed to actually dissolve the toner, making it all speckly.
Instead, I now use the porous side of glossy card stock, since I find it’s got a finer grain than regular card stock, making for a nicer print job.
I also found that trimming my perfect-bound books in the blade-arm guillotine crushed the spines, and on a few occasions led to me ruining a book that was *so* close to being finished.
Now I wrap my perfect-bound books in plain, slightly heavier paper, then put a printed ‘flyleaf’ cover around that, gluing it at the spine. Handmade work will never be perfect — maybe shouldn’t be, or what’s the point — but this process now gets rid of the biggest visual “gotchas” that used to bother me.
Oh my, its very consistent article. Pictures could be bigger. Thanks!
I actually came to this site to find ways on creating my own cd jacket and cover, autonomy of this process
in the music business even with independents is nearly impossible. I’ve yet to find any information on a alternative so I thought I’d search for DIY book publishing. The process for stiching your own book could easily be adopted by the true and faithful song writer to make a cd jacket. The problems are basically the same, “how can I make my own handmade jacket cover that looks respectable?” I’ve seen some attempts at this it’s usually the same product basic paper from a photocopy folded into a sleeve. Mind you I’m no marketing executive but the “final Judgement,” results in condemnation where your art is thrown into the consumer hell fire which is usually reserved for the refuse that ends up at the dollar store. I’ll have to make some adjustments to apply the process but this article has given my soul and art a new way to live and be expressed, thank you very much as god as my witness I cant begin to tell you how much I love this website, it has such a good spirit behind it one that gave me the ability to breath. thank you once again and god bless you
This guide is amazing! You just answered all of my questions! Thank you so much.
As most home laser printers won’t take a thick cover card (usually a minimum of 250gm is needed), it’s usually an inkjet printer that is used for the job. Trouble is, unlike laser print, the ink will run if any moisture (even from sweaty hands) gets anywhere near it. Has anyone tried laminating their covers (either cold or hot lamination). There are some pretty inexpensive laminating machines out there, and it could solve the problem.
Nice site, good instructions to get you going. Leaves out all the details of rounding & backing (forming a curved spine that used to be required with old glues if the book would stay together) that are not essential now with modern glue (I use woodworker’s PVA).
Certainly there’s no exccuse for not making a book.
One gripe: the details of sewing the signatures could be plainer, I use a different method and I’d like to se if yours is better/easier.
Actually I Googled for kettle stitch and found the following eminently clear explanation.
http://michaelshannon.us/makeabook/index2.html
Sorry for not drawing a better illustration of the stitching process. Others have described it already better than I could have here, so I’m happy that someone’s added another link to instructions in addition to the ones I provided in the article.
As for card stock, my laser printer is admittedly a big beast of a thing, but it’s pretty good with handling card stock. I wouldn’t use a bubblejet specifically because using water-soluble ink just seems like asking for trouble.
I looked into lamination, but I had several problems with what I saw:
– The big, blank overlapped edge needed around a page to seal it closed.
– The rigidity (folding it nicely would be a challenge).
– The feel: laminated stuff seems ‘officey’ to me.
All this said, it would be nice to be able to produce a cover at home that felt a tad more polished and was more durable. But people seem to like my books as they are already, and are impressed that I made them. There’s a level of polish beyond which I think they might lose their personal, handmade quality.
Hi, nice article… cleared a lot of things to me. Just one question: What printer do you use to print the inside pages? (That Phaser 6100 which you mentioned?)
Yes, I use the Xerox for the inside pages. The beauty is that it has duplexing (it prints one side of the page, pulls it back in, then prints the other).
With my previous printer, I had to print one side, flip the pages over, then run them through the printer. This frequently resulted in one page getting jammed and crushed halfway through the job. AARGH!
I think the Xerox is a model from a few years ago. I wouldn’t be surprised if there was something newer, better, and maybe even cheaper available.
I’m about to move house, and I’m really not looking forward to shifting that thing. It’s like having a Lada parked in my bedroom.
1. Excellent starter for dummies
2. What is wrong with aiming for perfection?!
3. Is leather covers put of bounds for amateurs like me?
4. Where do I start looking for instructions to restore some of the old, well-worn books I collected through the years and still like to refer to often with fear of them falling apart in my hands.
Excellent site
Thanx a million
1) Thanks so much!
2) Perfectionism, in my experience, usually leads people to either do nothing because they’re afraid of falling short, or to discredit their efforts. Doesn’t mean I don’t still try to do my best, but I find the definition of “my best” often expands as I learn more. So I think it’s always better to just do *something* and learn from that.
3) I try to avoid animal products, so I haven’t worked with leather. I imagine it would be a lot tougher to work with than paper, although ultimately more durable, and perhaps the thickness of it would hide some mistakes.
4) I’ve got a book at home that has a section on restoration, but I’m on vacation at the moment in PEI, so I don’t have access to it and can’t remember the title. I’m sure Googling for the term “book restoration” would bring you lots of information, some of which would be directly available online. This would be a great application for home bookbinding, though.
lyx would also be a good choice for a free, opensource software to write a book with. it uses latex which is really good at formating the text for printing.
Definitely the best artice I have found (in years of study) on the business – and the pleasure – of making books by hand. Now I must confess. I am a publisher, based in Wales and specialising in… guess what? Yes! hand-made books!
I started doing this in 2002, and publish mostly poetry collections. I too have had to learn the whole business from the ground up and, happily, I have made a (minor) success of it so far, with over two thousand copies of seven separate books sold so far. Marketing and selling is another world, however, and requires a lot of patience and even more courage.
I, like you, would be happy to share my experiences, knowledge and insights with others: all they have to do is get in touch.
Lastly, if you will be kind enough to let me have a postal address I will consider it a privelidge to send you a copy of my last publication for your pleasure. (I don’t write the books by the way, I just publish them.) Thank you again for a wonderful website: a real pleasure!
Congratulations,
Mike.
Wow. I am an amateur author who’s just gotten into bookbinding. I wish I had found this site before putting my first book together. I’d decided to make a few copies of my own by hand for my friends and me before I tried to approach a publisher. I had taken out a book on binding, but there were still a few things I found out the hard way.
Now that I’ve decided I really like binding my own books, I have a few journal projects in mind as well, but I’d really like to be able to find some fancier materials such as papers or covering fabrics. The closest I’ve got is my local craft store. I’ve been looking online, but they still seem difficult to find. My main problem is not being able to find full sheets of specialty papers large enough to cover the whole book without covering the spine separately. I’d also like to try making my own.
I like the way your site is laid out, by the way. Very attractive.
Wow! What great comments. I love the idea that other people are out there doing this, too.
To Mike Byrne: I’m very interested in what you’re doing (publishing hand-made books), and would love to talk more. I’d particularly be interested in learning how you made two thousand books without exhausting yourself! And then, of course, I’d love to pick your brain about how you’ve publicised these works. I’ve found it so much easier to promote myself in Canada than in the UK; there seems to be more resistance here to DIY/non-corporate projects… Or something. (And you can find my postal address on HamishMacDonald.com!)
The book I mentioned earlier, which contains many examples of traditional, more formal binding (including the rounded-spine variety that was asked about earlier). It’s called Hand Bookbinding, and it’s by Aldren A. Watson.
But I found this one much more fun and useful: Making Books by Hand, by Peter and Donna Thomas.
To Eric Ellis, who was looking for CD sleeve suggestions: I found an amazing book in a shop down in London that specialises in books full of royalty-free images. The book is called Folding Patterns for Display and Publicity, from The Pepin Press. It’s a huge tome filled with hundreds of packaging suggestions, and includes a CD-ROM with all the patterns as EPS files. There are several different layouts for CD sleeves, nearly all of which can be made from a single sheet.
Hi Hamish! What a great resource. (NMK rocks!) I’ve been DIY publishing and zeening for decades now, but have never made my own books by hand (well, back in the day I copied and stapled my zeens…those were good handcraft days). Oneathesedays I’m gonna make my own books! Take back the craft…show my kids the reality behind the keyboard-clicking. I might even get my own small press, trimmer, binder, etc., and really do it up. I find that working on a computer makes me appreciate handwork that much more. So there’s handmade art editions in my future. Anyway… I see that you dismiss PoD. Now, I’ve never done PoD in the full service sense but I find it to be a necessary and wonderful thing. Maybe we’re not talking apples-apples here, but your options list jumps from DIYing a dozen labor-intensive art editions to offset printing 500+. We need a 20-200 unit option, right? Right! Well, there is one and it’s great. I’ve worked with DOCUTECH printers many times now. I have to say that http://FidlarDoubleday.com is the cheapest I’ve found. I upload any PDF to them and they send me back perfectbound paperbacks with full-color covers a couple weeks later. That’s what I call PoD. They cost about $4 each for 20-200 units of a 6×9 200-page novel. (Far cheaper than CafePress!) This is a commercially viable print-cost! You can wholesale these to retailers at 40% off a $10 cover price and still make a profit (well…). At a $15 cover price you can work with the normal book trade (wholesalers and Amazon want 55% off) and not lose your shirt. (FYI, a standard in the book biz is to have cover price be 6-8X printcost—one reason for offset!) You can fill DocuTech books with B&W photos if you like—they come out great. Basically, you can’t distinguish them from offset—cover or text. To me, DocuTech is a form of PoD that is essential. It leaves all control up to you. Nothing else covers the 20-200 print-run range acceptably. Whattaya think? Cheers, JP
PS: As regards offset, I found http://colorhousegraphics.com to be the cheapest by far. They can print 2000 units of a 6×9 200-page novel from uploaded PDFs for about $2K. That’s the way to do it! –JP
There is a great freeware program that I found at ToolsCenter.org. It is a front-end processor for LaTeX documents. It lets you concentrate more on your document, book, article, etc. and much less on the mechanics involved. There are many templates available that make the output very publish-worthy. It is necessary to learn a bit about LaTeX (pronounced “lay-tek”)but the result is worth it.
EEK! No, LaTeX is not for me. I don’t want to have to do any kind of manual markup when I’m in writing mode. But if that’s what you like, great — go for it.
As for Print-on-Demand, I do see the point. I had a book launch this summer in Toronto, and I slaved for about two weeks when I got back to Edinburgh to make enough books to fill the orders from the event. So for higher-volume runs, I get the sense of it.
It’s just not how I wanted to go about it this time, when the whole exercise of publishing my third book was about DIY and not having to process my art through a company. I like being able to produce a book whenever I want without needing to rely on outside resources. It also adds a distinction to my work, which, as an unknown author, is always helpful.
Regarding your comments on Word and justification… what’s happened in the case you described is that Word has introduced a line-break rather than a hard return/paragraph break at the end of the line. If you had WordPerfect instead of Word you could hit Alt-F3 and see it directly, but it’s easy enough to get rid of. Go to the end of the line, hit Delete (bringing the next line up to the end of this one), then hit return. That’ll fix it. If it’s often a problem, even though you can’t see it in Word, you can get rid of it wherever it appears. Hit Ctrl-H to bring up find and replace, type ^l – that’s a small letter L – in the Find What box, and ^p in the Replace With box, and click on Replace All.
I’m not a huge fan of Word, it’s much easier to do these things in WordPerfect: because you can see *all* the formatting in your document; because Word can introduce much more troublesome formatting than this, that’s impossible to get rid of – in Word – open the file in WordPerfect and you can handle it readily enough; because WordPerfect will format your pages for book printing (it’s under Format, Page, Page Setup – the Layout tab); send the proper instructions for 2-sided printing to whatever printer you’ve got; let you reprint 1 page – with the proper imposition – to replace the page that got messed up in doing 2-sided printing with a printer that can’t do it automatically; let you embed your fonts with your document; let you publish to PDF; etc. etc.
I’ve only printed two perfect-bound books so far, and I’ve got a lot to learn, but WordPerfect has made it much easier. I can’t help proselytising; I’m a huge fan.
Steve
This is more specific to making journals but looks like a really great stitch-by-stitch tutorial:
http://curiouslycrafty.wordpress.com/tutorials/
This has helped me immensely! Great article, Thanks!
Thanks for your article. This type of publishing might be best for me since I will probably find a smallish audience for my books, which are translations.
My main question so far: Isn’t it much more expensive to print books on printers instead of on a press? Is there a printer out there that does the job most economically? I’ve ordered Gigabook’s handbook and hope this matter is covered. But I’ll take all the opinions I can. Your Xerox 6100 seems to be quite the investment.
It’s a matter of scale. There’s a minimum charge for the printer to set your book up at all; you have to figure out for yourself where the break-even point is on the raw cost. No matter how cheaply you value your own labor, printing and binding yourself is not really cheap overall.
Check out the messages up above from Jeff Potter for a couple of alternatives.
There is another consideration though. As Hamish points out just above, sometimes it’s a special one-off, and sometimes you just *want* the experience of doing it yourself.
Steve
As a retired Compositor who set books and magazines by hand with metal type, I find it amazing that it is now possible to set, print and bind a book in colour in ones own home. There were no computers in my working days, the composing room having changed very little in the last 400 hundred years. Your articles are excellent and have given me a new interest in life. Many thanks for giving your time.
Victor
On 5 October at The Radical Book Fair in Edinburgh, I’m going to be heading a panel discussion about self-publishing/DIY culture. Following that, I’m giving a demonstration called “Quick ‘n’ Dirty Bookbinding”.
In preparation, I’ve made a wee take-away guide that, hopefully, makes the process simple with some illustrations and instructions.
I’ve made a printable PDF of the guide, which you can download from my website. It just needs to be:
– Printed on both sides of the paper.
– Cut along the middle of the page (side to side, not top to bottom).
– Stapled.
Quick ‘n’ Dirty Bookbinding: A4
Quick ‘n’ Dirty Bookbinding: Letter
Fantastic article. It gives hope and insight to the budding author and renews determination to keep cracking away without corporate reliance.
Hamish
Wow! I am just getting ready to begin self-publishing, and this article was the best. Thank you for taking the time to pass on the information, including the links for ClickBook and the ISBN’s. Other than cost, do you have any other issues with QuarkXPress?
Susan Helms
Gosh, thanks for all the nice comments.
Susan, it’s funny you should ask me about Quark, because I’ve been using it for years, but I tried its main competitor, Adobe InDesign, for the first time yesterday, and… wow.
People love to hate Quark, mainly for the company’s reputation of having become complacent and surly because of their long-unchallenged monopoly in desktop publishing. I don’t know about that, but I can say that my experience of InDesign is that it’s a much better product. Switching to it was definitely an adjustment, but with every change I thought, “Oh, that’s so smart!” I don’t have that reaction with Quark.
Hi Hamish, I’m not sure how I stumbled upon your site, but I’m SO glad I did! I have a question for you, and I’m glad you lived in Canada, so hopefully you know the practices here. I checked out the website link you included for Canadians to get the ISBN. (thank you) Here’s my *dumb* question of the day: Do you need a barcode to sell in a bookstore as well?
From what I remember when I checked a few years ago, getting a barcode was quite costly? I’m concerned about the cost of setting up barcodes because we have so many books. If I’m hoping to sell to bookstores, do I need the ISBN AND the barcodes?
Thanks for the input!
Hi Jennifer. Not a dumb question at all. It’s difficult to find all this information, because it’s splattered over several different organisations (government agencies, commercial printers, etc.). That’s why I wanted to bring what I’ve learned together in one place.
The barcode is generated from your ISBN. It’s helpful to people working in bookstores, ’cause then the clerks can just use their flashy-red-light-gunny-thing on the book instead of entering the details manually. It likely helps the store with their inventory control, too.
There’s a link in the article where you can go to get a printable graphic of your ISBN for free. Just search back for “barcode”.
Good luck with your project!
Thanks for the info. I enjoyed reading it.
I found your site while searching for more information about what kind of glue to use in binding perfect bound books. PUR seems to be in use by large print houses, but I don’t need a 55-gal drum of it or even a 5 gal pail. So, maybe you or others know where to get PUR in, say, 1 pound lots.
My use for this is in binding daily logs (diaries or journals) each year. The least satisfying part of this has been the gluing process. I print covers using glossy photo paper in 13″ by 19″ format on a Canon S9000. Admitedly, the color can smear if it gets wet, but it looks fine for my one-of-a-kind use and easily fits the 5 1/2″ by 8 1/2″ format I use. Printing of the inside also done on the Canon but I have to manually flip each page end over end to get two-sided printing to come out right. And I do use and enjoy Adobe InDesign. I have a textbook (printed commercially, but I am my own publisher and distributor), so InDesign lets me do all the formatting I need and does a great job. For the first three editions, I used MS Word, but InDesign is far superior for such a large project (504 pp all tolled).
Well, I tend to write very long emails but will bridle back for now since this site seems to not include really long responses. Again, thanks for a very nice web site.
Oh how much I want to thank you for fully explaining how to make a pressed book as I have been trying to do this as I am my own Publisher and Author of my Children’s Books. I didn’t want to use staples as i want to make it a safety issue because of the age group I cover. I had been surching a way and keep coming up with bining with my bining machine but knowingthat a child would easily take it apart 2 minutes or less. Other websites don’t make it clear and I found many confusing cause they don’t explain or missed a step. I am just starting off with my books. Doing it CD, DVD and wanted to do my books as well (I have them already in hard copy for a while, just was missing this part of the link) again oh so much again I thatnk you!! Lea Sorensen
I just bought one of those model p7200 paper folding machines after I realized that it could easily pay for itself and make it possible to produce a lot more books in general. One question, though: When I tested the thing today it got jammed a couple times. It did not come with a whole lot of instructions, so I was wondering if you have any tips about how to make it work more relialby. After all, I expect to it to fold a million sheets for me.
Also, after shopping around and finding a very large price-range for the machine, I was very pleased to find it at OfficeMax.com for about $236 and delivered in less than 3 days.
I can’t remember the model name of my paper folder, but it’s a Martin Yale. I’ve not had any problems with it jamming at all.
The tricky part for me is that I’m folding A4 paper in half. While you can configure the device to make all manner of folds (three-panel pages, letter folds, etc), I’ve adjusted it to fold A4 to an A5 size, and since my guillotine cuts aren’t quite precise, the folds can be a bit wonky at times.
The biggest hurdle, though, is how sensitive the machine is to changes in the weather. Some days (like today, thank God) it shoots pages out into nice, neat stacks. Other days, however, it spews them out all over the place like some mad invention gone wrong.
Expensive experience in the field:
My colour laser printer is breaking down. It seems to need a new transfer belt or drum — either one of which would cost half the price of a new printer.
Add to this the fact that its text was never as nice as my old cheap laser printer, and its colour output couldn’t match my mum’s home printer.
So I’m taking a step backwards: I’ve ordered a mono (black and white) Kyocera printer that’s supposed to be “environmentally friendly” (ozone-free, the only consumable bit is the toner cartridge, which is rated as lasting longer, etc.). That’s for the pages.
For the covers, I’ve ordered a standard inkjet printer, and will be testing out various papers to find one that will withstand being touched, getting damp, etc. (I’ve found a waterproof paper, so we’ll see how that works as an overleaf.)
The bottom line? A low-end-of-the-high-end machine can be inferior in many ways to high-end-of-the-low-end equipment. If I were doing this again (and I’m more or less having to), I wouldn’t buy a colour laser printer.
I loved this article and was a bit amazed that nobody mentioned Scribus. This is an open source program for making printed stuff. Take a look at
http://www.scribus.net/
You can also find a portable version somewhere that allow you to run it from a USB flash drive.
Not bad to have something like this for free 🙂
Thanks for mentioning that.
I’ve been playing with Scribus for the past few days, and…
It’s hard.
This is my beef with a lot of opensourceware: it works the way programmers think, not the way those of us used to commercial programs think.
I really do want to use it, because it seems powerful and could potentially replace all those dodgy copies of expensive commercial software, which we could all feel better about.
But, for instance, today I tried to import the Word document of my novel into Scribus and all the text styles disappeared. There’s no way I’m going through to find every instance of a character thinking to himself and update the italics.
So I tried opening the file in OpenOffice, saving out in its native file format, then bringing that into Scribus. Now I had text styles, but Scribus complained that every font in the document wasn’t loaded on the system (the same system that produced the document).
So it’s not there yet. But if that was all you knew from the beginning and weren’t mentally hobbled by another ideas of how it’s supposed to work, I bet you could do everything with it. And it’ll only get better.
There’s also a vector illustration program I’ve been told about called Inkscape. (Again, though, its differences from Illustrator and Macromedia Fireworks bugged me so much today that I had to stop using it. “How the hell do you grab a single point on a shape?!” Basics like that.)
Programs mentioned:
Scribus (http://www.scribus.net)
OpenOffice (http://www.openoffice.org)
Inkscape (http://www.inkscape.org)
For short run books, professionally printed and bound, I find http://www.createbooks.com great! You can get 50 perfect bound books… 200 pages, colour cover for $299, (less when the quantity goes up). Get an ISBN, bar code, into Google Book Search, and Books in Print while you’re at it.
Awesome resource. For someone like me, just getting into the whole world of self-publishing, this is a great alternative site to something like lulu.com. I’ve done one book on my own but now that I’ve got some of the great wisdom from this site I’m going to keep trying.
Thanks for all the advice.
Julie
That’s great to hear, Julie! It’s gratifying that so many people are catching on to this idea, but it’s even better when they reach the point of actually producing real, live books.
As an addendum to my printer experience, the dedicated mono laser printer I got does, indeed produce far, far crisper text — so much so that I may need to change to a font with a heavier weight.
And the colour cover overleaf sheets I’ve printed on a joe basic DeskJet look amazing. There’s just no comparing the old laser ones to these.
So this is the setup I’d recommend to anyone starting their own press at home. What makes me happy is that it’ll be cheaper to start and to maintain — meaning the whole arrangement is more accessible to more people.
Hi Hamish, I’m sorry to go on about the paper
> folder – I had got it working much better after
> making an adjustment, but then I printed my book
> 336 pages, or 86 actual printed pages. After
> running them through the laser printer, they get
> hot and warped which makes them difficult to
> send through the paper folder. Have you had
> such a problem? Maybe its because I’m printing
> such a thick book…Clay
Hi, Clay. Yeah, I have had this problem, moreso with other printers I’ve had, the ones that didn’t duplex. By the time I manually put the paper through again, the pages were pretty curly.
Of course, the obvious thing to try is to let the pages cool off and to curl them in the opposite direction. I had some success with this, but the odd jam nonetheless.
Ultimately, I have the odd page on which the text isn’t perfectly straight-looking after I trim the book, but I figure these are hand-made books, and people appreciate that, so I try to resist my perfectionism and think of them as “character”.
But, no, I have no quick fixes for that one. Sorry.
Thanks! I guess it’s all part of the fun.
A crazy question: Does anyone actually create these handmade books with an ink-jet printer. If so, what are the considerations involved.
As I said above, I’m making the overleaf covers for my books on an inkjet printer now, and the results are amazing. I’m sure the ink won’t go far and will be pricey to replace, but the result justifies it.
Printing the inside pages though would be prohibitively expensive. For a poetry chapbook you would be fine, but a novel would kill so much ink that you’d have to charge a ridiculous price to cover the cost of making the book.
Hi.. I trying to create a 40 page 8.5×11 poem book for a client… they will only need about 10 copies at most so going the pro publishing route is just not cost effective. I was tyring out blurb because I like the way their hardcovers print.. but their software is buggy and terrible. I was wondering if anyone had any advice or options.. I was hoping for a nice hardcover with slipcover.. I don’t like the shutterfly/my publsiehr look. thx.
Createbooks will build hardcover Smythe sewn books in small numbers. These are lovely hand made bindings and worth the wait. createbooks.com
This is exactly the kind of article I’ve been looking for. Thank you so much!
Thanks for putting up such a well thought out site. It’s a great jumping off point for people wanting to get into self publishing. If I’d found it years ago, I wouldn’t have had to learn so much stuff myself the hard way.
There’s something I’ve been trying to figure out for years myself, and I don’t see it here either. Many of the professionally bound books in my collection have a strip of cloth attached down the spine of the signatures. This cloth strip is not attached to the hardcover spine, and allows the signatures to flex as they want when the book is opened, thereby reducing stress on the stitching and improving the durability of the book. This, therefore, seems a worthwhile technique for the home book binder to know.
I have not discovered the method by which books are bound this way. I do not know if the cloth strip is stitched or simply glued into the signatures or how it is attached to the cover boards at the edges. Thus far I have resisted the temptation to disassemble one of my precious books to learn this technique. Do you have any thoughts or ideas on this technique, or know where I might learn more about how to duplicate it in my own books?
I also notice no mention of the free open source Postscript Utilities that other people here might want to know about. These utilities include two programs that I have found invaluable. They are psbook, which handles all the matters of imposition, and psnup, which shrinks and rotates the pages onto the printed sheets of paper.
With them I can take any program that produces postscript output (I use OpenOffice and Word) and, with the right command line options, they will produce an output postscript that can be sent directly to the printer. They are even capable of rotating and flipping the sub pages on the printed sheets so that your second step of cutting your pages in half becomes a simple quadrifold and cut on the guillotine once the pages are bound.
Figuring out the correct command line options for them can be tricky and requires a bit of trial and error, but once that’s solved, they’re a “fire and forget” solution. I’ve got them set up on my computer as a virtual printer. If I want to print out a book, all I need to do is select the “BookBinder” virtual printer instead of the default printer, and my signature pages come out of my printer all ready for folding and stiching.
This is just something I though worth mentioning.
Thanks for your insights, Susan.
The gauzey cloth you’re talking about is called mull, and I’ve seen it in art shops where bookbinding tools are sold. Personally, I haven’t felt a need for a third layer of reinforcement (stitching, glue, and mull).
I had a quick flip through Hand Bookbinding by Aldren A. Watson (my ‘serious’ bookbinding book, which I don’t often refer to because his methods are laborious and involve various exotic racks and binding supplies). His methods use mull as well as a fourth type of reinforcement, cloth tapes.
In Watson’s description, he says to “Cut a piece of mull 1 inch shorter than the height of the signatures and 2 1/2 inches wider than their bulk combined with the two cover boards.” Then, after gluing it over the signatures (and reinforcing tapes in his example), “trim the mull and tapes back to within 1 inch of the hinges.”
(Hand Bookbinding, A Manual of Instruction by Aldren A Waton, Dover Publications, 1986, pp 82, 83. ISBN 0-486-29157-X)
As for your PostScript tools, I’d never heard of these. They sound useful, if you’re the type of user who isn’t scared off by command-line tools. I like ClickBook’s graphical interface, which lets you choose your page layout and see what the result is going to look like before sending the job to the printer (and using paper, toner, etc).
Also, I wonder how PostScript tools will work with home printers. The situation may have changed, but I remember my old Apple StyleWriter 2400 couldn’t understand the jobs I tried sending from Quark (a layout program that uses PostScript). That said, I’m having no difficulties printing from Quark to my HP DeskJet, so maybe modern printers don’t have an issue with PostScript information.
I tried, yet again, to switch to open-source tools for my books, OpenOffice for my novels and Scribus for a graphical ‘zine I was working on. OpenOffice wouldn’t play nicely with ClickBook and the jobs kept vanishing before reaching the printer. And Scribus seems to lack some layout features I needed. Maybe they’re there, but I’m too goal-orientated to spend lots of time learning a new program.
The same is true with book-binding: I have no doubt there are superior bookbinding methods, but if the result is the same to the end-user, I’m not interested in invisible details. For some people, though, the finessing, the craft itself, is the big reward. So I suppose one’s motivations will ultimately shape their process.
So it’s called a “mull”. Thanks for letting me know. The ones in my professionally bound books look more like thick ribbon than gauze, but now that I know its name, further internet searches will probably be a lot easier. Thanks also for the bibliographic information. I’ll look into Watson’s and the Thomas’s books the next time I’m in Portland, Oregon, or, failing that, on Amazon.
When I first started teaching myself the art of book binding several years ago, there simply weren’t the resources on the web like your excellent site (or I couldn’t find them because I didn’t know the terms to search for). I probably should have kept looking. I’m glad to see the art is becoming more common, and there are good sites like yours to help people avoid learning the hard way.
I suspect your problem with ClickBooks and OpenOffice probably came from using the windows edition of OpenOffice. I, myself, only have experience with the unix version of OpenOffice, and ClickBooks is not available for unix. OpenOffice is itself theoretically capable of handling the tasks of layout and imposition, and I fought with it for some time before giving up and just knuckling down and getting the Postscript Utilities to work.
They were not easy to figure out initially (though much easier than OpenOffice), and I wasted quite a few sheets of paper in the process of making my first book with them. Once I figured out all the settings and got my scripts working, though, I haven’t had to touch them since. If I want to print folios, I print my document to the “Bookbinder” virtual printer, and all the layout happens automatically in the background. If I want to print quartos, I use the “Quarto” virtual printer. I haven’t bothered figuring out the command line options for printing octavos because the resulting pages from a letter or A4 sheet are simply too small.
Finally, for home printers that don’t understand the postscript output from the Postscript Utilities, there is another free program called Ghostscript that acts as a postscript interpreter. It can translate postscript into the native printer language of almost all major consumer level printers.
I guess, as in so many things, it’s a trade off between how much you’re willing to learn and work versus how much money you’re willing to spend. Open source software is free and does work, but you pay for it with mental sweat. I never intended to become a unix nerd when I started binding my own books, but, for me, it was a choice between spending money on expensive commercial software or spending it on a good high quality duplexing printer. Granted, I had to learn to use these user-unfriendly programs once a few years ago, but I’m also not constantly fighting paper jams today.
Thanks for all the extra info, Susan. Two quick corrections:
I believe I’ve led you astray in talking about ‘mull’, which is gauze-like material that goes over the spine, when I think what you were actually asking about is a headband, that decorative strip across the top under the cover. In modern bookbinding, to my understanding, it’s purely decorative. I’ve seen them for sale, little sticky bits with cloth at the top in alternating colours.
And to clarify, I’m just a contributor to this site. It was started — and I believe is still mostly run by — Jim Munro, an author-friend I met when I lived in Toronto. I’m with you, though: he’s done a neat thing in providing this forum for DIY culture.
There’s something else I neglected to add above:
Since I only produce at most two or three copies of each book I write, durability is paramount over production complexity. Obviously, self publishers who intend to sell their work put a higher value on speed.
On that note, however, there is one relatively quick modification you might want to add to your Perfect Binding instructions above that I discovered during my own trial and error learning curve. After you’ve stacked the pages, put the stack in the press WITHOUT THE COVER and cut a series of very shallow notches into the spine every quarter inch or so with a thin saw blade (I find a miniature metal cutting saw with the teeth pointed backwards works best). Then put the cover into the press as normal, making sure to keep the pages stacked, and glue everything up as before. The notches and roughened paper greatly improves the long term holding strength of the glue. A very light scuff sanding on the inside spine of the cover also helps, depending on the glue you use, but not as much as notching.
Once you get the technique down, this extra step adds less than a minute to the production time of each book. I have never had a page come out of a book I bound this way, even with a lot of wear and tugging.
Finally, there is a combination glue bottle and roller that wood joiners use which makes glueing up fast, easy, and very tidy. They come in various widths and don’t cost more than a few dollars each (without glue). I’ve never seen any in the craft stores I frequent, but they are readily available from most cabinet maker, veneer, or woodworking supply shops. Once you get the hang of them, you will never go back to using a brush.
As to mulls: I’ve done a bit of online research now that I know what they’re called. Apparently, in the past mulls were somehow serged and stitched over at the top and bottom of the spine. The headbands of today are a decorative attempt at duplicating the appearance of this technique, but do not provide the same strength.
I have a lot more research ahead of me to find the original technique, and I will no doubt need to learn yet another stitching method. You’ve definitely given me the start I need to know how and what to look for.
Hamish, Good article on Micro Publishing…
Like Susan, I also use free software and Linux for my Micro Publishing needs. Some other useful software tools are LyX, mpage, pdfTeX (texexec).
I like to compose my books using LyX on A5 size pages.
Then I can output my books to either postscipt or pdf and use the psutils or mpage to impose the postscript files and pdfTeX (texexec) to impose the pdf files onto letter or A4 size paper.
Also, once the files are converted to pdf, I can use acrobat or other pdf viewer to print them anywhere.
Once printed, I either fold or cut the pages and use Chet’s gigibook method to glue them together and cover them.
I should probably write a new article about Micro Publishing with the new tricks I’ve learned since my old article in the Linux Gazette.
Is it possible to print A5 pages side by side in Word without a program?
I don’t know about doing this in Word, but most of the postscript command line tools discussed earlier are available on freeshell.org
You can get a Unix shell account there for $1 US.
congratulations for the article. My english is awful. Im from argentina. I want to stamp gold letters on the cover. how to do this. thank you very much and merry christmas.
How do you get the pages in the right order? I’m trying to print a book 4.25×7 in with 2 pages/side and 4 pages per sheet. No matter what I do to stop it, I keep ending up with the pages out of order somehow. One is nearly always NEXT to two rather than on the back and so on.
If you could help me straighten it out, I’d be eternaly grateful.
Here’s a nice manual technique for mapping page locations learned from an old-timer. It’s pretty foolproof (which is why I like it!?)
Mock up the pages with scrap paper, folded to the right number of pages, 4up in this case.
Once you have a facsimile of the pages laid out in ‘book’ form, (reader’s spreads), number the pages in order, (I like to use unmistakeable BIG numbers on each page).
Unfold and voilà, you have printer’s spreads in signatures.
Enjoy
April:
Actually this is answered up above; do a search (Ctrl-F) for imposition, which is the proper name for it. A possible shortcut for you: some printers have the capability built in – look to see if yours has the option “Print as booklet”. Also, WordPerfect has the option built in to the program as well.
Steve
Yeah, the imposition question was covered above, both in my original post and in subsequent comments that mentioned some free/open-source PostScript alternatives to the ClickBook program I use.
As for the gold lettering, I’m afraid I don’t have any experience with that. I’m (mostly) vegetarian, so I don’t use leather when making my books, and leather is what’s usually used when doing embossed lettering and decoration like that. I believe it’s usually done with metal letters hammered into the leather to make an impression, then filled in with some sort of adhesive and gold leaf.
Maybe do a search for “bookbinding, gold-leaf, embossing” (though I suppose “embossed” lettering is raised, not indented, so this may not be the correct term).
Anyone else know more about this?
Some material for practicing your book binding skills…
Here’s a modest repository of Project Gutenberg texts, converted to PDF and LaTeX:
http://www.sandroid.org/GutenMark/MarkedTexts.html
LyX and LaTeX source can be found here:
ftp://ftp.sandroid.org/GutenMark/MarkedTexts
These books are formatted for half US letter size paper and should scale nicely to A5, or 2up on A4.
good info…I have self published 6 booklets so far in the past 16 years. I learned a few things here….Not sure what I will do next but I have hand made hundreds of my booklets and sold all I made. I had the first experience with a professional printer and do not recommend it. Do it yourself. I thought of POD Publishing actually back in 1994 and developed a creative soluton that I have used since. Anyone wana chat about self publishing or writing?
Make a follow up comment (of course) and Ill write back.
Cheers!
BG, thanks for your comments. I’m definitely interested in hearing from other people who are doing this crazy self-publishing thing, too. Solidarity and community — you can’t get too much of these when swimming against the tide.
I had a friend ask me — and this is someone I’ve worked on ‘zines with in the past, who’s pretty familiar with this stuff now — what someone has to do to have a *real* press.
“It’s a made-up distinction,” I told her. “Your press is real as soon as you declare it such. The only difference is maybe the amount of money and attention you have, but there’s no difference.”
We want our efforts to be acknowledged as equal and valid, yet sometimes it’s easy to buy into to commercial bumpf — the industry contests and other livestock shows — and to forget that “real” is made up and begins with us declaring ourselves as the real thing. And being in conversation with others who are doing the same thing helps. Jim, whose site this is, was my introduction to that. I still marvel at his ability to make ‘the establishment’ hungry for his fringe thing.’
(I’m writing from a hotspot at Halifax airport, where I’ve got time to kill. Sorry for babbling.)
So, in short, if you want to know more, talk more, or share your experiences with me (because I’ve still got lots to learn, especially about how to reach an audience for a finished book), feel free to contact me at:
postbox AT hamish macdonald DOT com.
thanks, your website is great!! I was wondering if you could post more about duplexing and arranging the pages in a signature. Thanks!!!
Can you explain how to set up the book prior to printing. I need to know everything you do after typing the text, please.
Also, I’ve printed a cover with a color laser printer before and had problems with the ink chipping off.
Re: printing/duplexing
Well, as I said in the article, I use a program called ClickBook to do this. You lay the page out in a word processing program, then print to this program, which sits between the word processor and the printer’s software; it rearranges the pages and resizes them according to the format you choose. Then you fold them in half (or smaller) and bind them together, either by sewing the pages together in groups, or by folding each page individually and gluing the folded edge into a cover.
Over the course of this year, I’m going to create more detailed manuals about my writing and publishing processes. I see there being three workbooks (which I’ll distribute as printable PDFs and bound copies), outlining the three steps in the process:
1) The Idea to Novel Process, outlining how to get from an idea of a book to having a finished manuscript (including character, theme, story arc worksheets, etc).
2) The Novel to Book Process, which explains how to turn that manuscript into a book in your hand by printing and perfect-binding the book at home.
3) The Book to Reader Process. This is the part I know the least about; I’d be very happy to collaborate with someone to create this.
P.S. Again, I’m Hamish MacDonald, the author/self-publisher who wrote this article. Credit for the website belongs to Jim Munro, who is its owner/creator/editor.
As for your laser printer toner flaking off, I had this, too, when I was using a laser printer for my covers. Regular card stock, it turned out, wasn’t porous enough, or the finish was too rough — or something — and spray fixative, I found, discoloured the paper and eroded the ink.
What worked for me was buying photo inkjet paper and printing on the wrong (non-glossy) side. Ultimately, though, I switched to printing with an inkjet printer onto the proper side of photo paper, and I’m very happy with the result.
Sorry, one more note: I tried ClickBook with OpenOffice.org, and it didn’t work. Other comments here offer an alternative that should work if you’re going the freeware/Open Source route(search the page for “Post Script”).
Right, Clickbooks. How is the book laid out before you print to it?
I just lay the pages out normally in Word, then print them to ClickBook. Here are a few ‘gotchas’ to think about:
– Set up styles for different page elements (chapter heading, chapter subhead, body text); then you can change the text throughout the book without having to manually select and change each element.
– Use single-spaced lines and indent new paragraphs. The stype I’ve learnt is that you *don’t* indent the first paragraph of a new chapter or new section. (By “new section”, I mean a scene that’s set off by a double carriage return, like something that happens later that day — still related enough to be in the same chapter, but needing to look separate. You might even put a bullet or graphic in that space to make the transition evident. (I don’t know why, but I use tildes: ~).
– ClickBook shrinks the pages to fit several onto a folded sheet, so you need to make your text bigger. I use the font Berling Antiqua for my body text, and make it 20 points high.
– Number your pages, but not the Cataloguing-in-Publication/Copyright pages, title pages, or credits pages. You might try setting up separate sections in Word to do this (I always struggle with getting this right, and re-learn it each time, so I’m not the guy to teach anyone about Word stuff).
– ClickBook prints pages in multiples of four. I wondered why I kept getting blank pages, but it turned out this was why. If you’re printing out to group your pages for perfect-binding, use the “4-up Book” template, go to “Layouts/Modify Layout”, check “Sub-booklets” and enter “4” for the “Pgs. per” option. Then check to make sure the “Scaling” option is set to “One-to-one” so your text doesn’t get stretched, and double-check that you’ve chosen the correct paper size.
When printing little wee stitched signature books, I use the “Address Book (folded)” template with 16pp sub-booklets.
– I’ve increased the margins on my pages to 1.25″ all around, just to give more white space on the page and to allow for trimming. (I’m using A4 paper.)
I hope that helps. Unfortunately, some of this you just have to learn by trial-and-error, as you find what works and looks best for you.
I’d like to put a word in for Lightning Source, Inc., a P-O-D company that is great those who don’t want to make books by hand but are computer savvy and can design books themselves. LSI doesn’t charge ridiculous fees and is very cost-effective. You have full control of the design inside and out (B&W or color). And they also place all their titles in the big online stores.
FYI, in 2006 I wrote a guidebook to the entire process called Do-It-YourSelf-Publishing, (see http://www.dianalaurence.com/diyp.html) which I sell direct in ebook format for $2.54.
Diane Lau, Publisher
Living Beyond Reality Press
(also writing as Diana Laurence)
I was thinking about the phrase “your laser printer toner flaking off”; isn’t that also an humidity issue ? Most print shops I know of are obsessed with relative humidity in their quarters, especially where the stock their paper. Maybe the paper is in some cases too dry.
I often make small brochures or handouts for clients, used in somewhat rugged conditions (outdoor fieldwork). The booklets pages are laser printed on not too absorbing paper, while I print the cover w/ inkjet on stiffer card paper. Then I either laminate the covers or use a method I’ve progressively elaborated. Which consists of taking the inkjet printed page and saturating it in clear silicone solution (spraying is easiest), leaving to dry overnight. Then overpaint v/ clear turpentine based varnish, two coats. Spraying is easy but with brush one can play a little bit with strokes and texture.
Curiously this silicone treatment makes my HP inks last much longer, notably the magenta one. And even longer if the varnish has some kind of sunscreen in it.
One last thing (see October 23rd, 2006): Scribus is really trying to be a full fledged “Quark-like DTP program” (their own words). I think they’ve gotten it right, and there are great things produced with Scribus today (mags, books, etc). My problem with the program has moreoften been the professional DTP jargon, also present in Quark and alikes, not any programming thing.
Good resources you have here! Thanks 😉
One thing that was not mentioned here at all was keeping in mind the grain of the paper. All paper has a grain, and if you fold along the grain it will look better and the book will be easier to handle in general. Also, for something thicker like the thicker cover paper, folding along the grain negates the necessity of scoring the board first. When folding signatures– if you hold the paper so it’s like you have it on “landscape” view (in MS Word), that is, text running left to right on either side, the grain of the paper should be running VERTICALLY. This will make it easier to fold, and will make the book fall open nicely, rather than curving outward.
I realized I didn’t really explain the grain– if you take the corner of a sheet of paper and bend it vertically and horizontally abot 1 inch from the edge, one direction should be drastically more flexible. The grain runs that way. For example, on 8 1/2 x 11 printer paper, the grain runs vertically.
It’s true that paper cut for laser printers is usually ‘long grain’ but you can order paper ‘short grain’ too, depending on your needs. 11×17 or larger sheets cut for offset or docutech are often short grain (grain running the 11″ dimension) because they’re folded or cut to size along the grain.
I have to confess that I’ve not paid much attention to grain. I need to cut my paper a certain way, so I just do that.
Picturing it, I suppose I do end up folding with the grain, but I’ve also made smaller books where I’ve folded against it, and it didn’t make a difference.
So for someone starting out, I don’t think this is something to be too concerned about (i.e. your book won’t be “broken” if you fold against the grain). It strikes me more as a “book artist” concern.
Hello,
Your information is very helpful. Just wondering how I can insert page numbers in my manuscript without putting them on every page? Thanks.
Check your word processor’s Help file for information about “Sections”. Setting up different sections will allow you to have numbering in some part and not others (and have the numbering in the body of the novel start at 1 as well, instead of, say, page 5 if there were preceding pages).
I went onto Bookland and made up an ISBN barcode but I don’t know how to put it on the back cover of my book.
I’m not familiar with Bookland, but presumably they give you a graphic of your ISBN. How you incorporate that into your cover is a matter of what program you use to design your book.
With most layout programs, you use one type of box and fill that with text, and another type that you can insert graphics into (“File>Insert”, “Get Image”, or something along those lines).
I really, really wouldn’t recommend using a graphics program to create the whole cover (e.g. Photoshop). Try using a trial of Adobe InDesign, which should work for about a month and produce a PDF of your graphic that you can keep, or else learn one of the open-source programs like Scribus.
I’ll stop here because I don’t really know anything about how you’re creating your project. If you have a specific technical question, though, feel free to ask.
Hi. Regarding comment #45… sounds like a humidity issue during the printing phase – hot fuser, in a room with a bit of humidiy, could result in the curled pages. Hope this helps.
Wonderful! I was looking for “Book Press” (as in a ‘binding press) and stumbled on your article. I have my design students make books, and just recently was explaining/ discussing “signature bound” bookmaking with them. You site/ article with all its pointers will be very helpful to them. Its a great thing you did, and we all thank you for it.
Thanks very much! If you post any pictures of the work the students create, do put a link here — I’d love to see them, and I’m sure others would welcome the inspiration.
Hello,
When using a inkjet printer how do you stop the printer from making lines on the book cover?
Sorry, Kevin, I don’t understand your question. Could you please rephrase it? Do you mean crop-marks from your layout program, ink-smears, or–?
Please provide a bit more information about your working environment, like what’s causing the lines.
Thanks.
I made my book cover using a photo which I had scanned onto my computer. I set it up with script putting my name and title, etc., but when I print the cover using photo paper (medium) and my deskjet printer the printer makes very prominent lines on the picture where the cartridges go back and forth across the paper.
Thanks,
Kevin
Hmm, that’s hard to diagnose without seeing it in person. A couple of possibilities come to mind:
– The picture is not at a high enough resolution. If it’s been resized to make it larger, the quality will degrade.
– Something could be up with your ink cartridges.
– The program you’re printing from is sending odd information to the printer. (For instance, if I print from my image editor, it puts a funny line along one side of the program. When I print from my page layout program, I don’t get this.)
I’m sorry I can’t be of more help over a distance. This isn’t really a publishing issue as a tech support problem. You might want to check the inkjet manufacturer’s website to see if they have any support answers about this issue.
Hello,
How do you get your printer to print every book cover the same? and
I refill my cartridges. Do you recommend this?
I used a page-layout program to design my cover, and I print from that to my DeskJet. They look the same each time because… well, they’re supposed to.
What I really wouldn’t recommend to anyone is creating a picture of your cover (that is, put all the elements together in an image-editing program like Photoshop, and printing that as the cover. Then the printer is no longer dealing with text as text, but as pixels, and you can run into resolution issues.
Another option is to design the cover in a vector art program. This kind of image-creation software describes the elements in terms of geometric shapes, so that you can scale them to any size and print them without worrying about resolution. The other type of image program is called a bitmap editor, and deals with images as blocks of colour, or pixels, that are fixed at a specific size — such that, if you tried to stretch the image larger, it would start to look like that portrait of Lincoln that’s made up of coloured blocks.
I don’t know if any of this relates to your set-up, because you haven’t said what program you designed your cover in or what elements are involved. But the ‘one big picture’ cover is the commonest design mistake (I made it back in the day, working on a friend’s movie poster, which, having laid it out at a resolution of 72 dots per inch, I discovered could only be printed about 2 inches high).
As for ink cartridges, I go to a shop that exchanges spent ones for refilled ones, which make in vacuum chambers. I used to refill my colour laser cartridges, but that was a terrible mess and involved soldering in a replacement chip — and then I discovered that the coloured toner had a biological component to it, and the guys at the refill shop wear respirators when refilling them — ACK!
There’s nothing I hate more than going to print a job and discovering that one of the colours is missing, so I just let the pros refill my cartridges. They’re about half the cost of a new one, and if they don’t work it’s not my problem, it’s theirs!
Check with an attorney on the copyright symbol use in the U.S. who’s practiced in copyright/IP issues.
The reason I say this is a quick comment I overheard an attorney say that, yes, you do own the copyright by just creating a work, but that registering and using the copyright symbol means you can collect statutory damages and other redress that the mere ‘common’ copyright may not afford you.
Failure to register and mark your work presumably means you are not necessarily entitled to protection and redress specified under the statute.
Granted, I heard this comment years and years ago, and copyright practice and law has certainly changed in the interim, so, as I said, give a quick check with a lawyer versed in that practice and they can give you a bit better guidance than even what an informed lay person could.
I do agree that just displaying it once is sufficient. If you’re that touchy about it, draft a non-disclosure agreement and pass it out to everyone you show your work to (and see if anyone signs it!)
If your looking to learn how to do some more traditional binding with raised bands and leather coverings check out the bookbinding books online at http://www.aboutbookbinding.com
I first started bookbinding when I picked up a craft encyclopedia from the 70s at my highschool library. I have made a handful, but recently I started a series of scale model handbound books, about 1.5 by 2.5 inches. So I went back to my research- and found your site.
A lot of it I already knew- that is, about one of the processes of binding the books. But self publishing? Getting a REAL ISBN? Very cool. I will link your site to mine(when it’s done) as a “Here’s how you can, too” kind of resource. Great work!
Thanks very much, Brie.
Yeah, I must say that I love making little wee hardcover books. My handwriting is miniscule, so they’re actually useful for me, but other people seem really taken with them, too. There’s just something cute and twee about them — aside from the fact that most people don’t think of books as something you can actually make yourself.
But the ISBN-registered books are paperbacks. They take a fraction of the time a hardcover takes to make — about half an hour now, since I’ve got my process pretty refined now.
I’d love to see that Seventies craft encyclopaedia. I bet it’s a hoot now. (I say “hoot” in honour of the macrame owls that I just know are featured somewhere in there.)
The book is written, the printer awaits! Can you tell me the weight of paper most suitable for book printing. I print newsletters (one side) on 80gsm where it is possible to see the printing on the reverse side, so I realise a much heavier paper would be required.
Victor
I actually made a point of buying *cheap* paper, about 70gsm, so that the books wouldn’t be so thick. (Just shy of 500 pages, it’s still a bit of a brick.)
I print with a laser printer, so the toner just sits on top and there’s no issue with bleed-through or the text on the other side of the page being overly visible.
Many thanks, Hamish. My printer is ink-jet. Would you recommend switching to laser for cost and quality (eg. ink and paper)? Your articles are great!
Victor
Thanks so much, Victor.
As for using a laser-printer for your inside pages… absolutely! A laser toner cartridge will give you thousands of pages, whereas inkjets are nowhere near as efficient or as fast. And you can likely find an inexpensive laser printer that will do duplexing (printing on both sides), which speeds up the process a lot.
I do still have an inkjet for doing my covers. I’m amazed at the quality you can get from a home printer nowadays.
Power to the people!
(Okay, I’m embarrassed I said that, but I am happy to see it happening in publishing.)
In reply to Michael’s post about copyright (#96), if someone steals your work you have to sue them, whether you have registered a copyright or not. Having a registered copyright just makes it easier to prove when you wrote the work. And on a different subject, I’ve found Epson printers – the ones that use either DuraBrite or DuraBrite Ultra ink – to be the best for printing on coated stock. The ink is (apparently) waterproof – once dry it won’t smear, even if you wipe it with a damp cloth.
Chet, hello! Everyone, this is the guy who produces the great perfect-binding presses (available at GigaBooks.net). You changed my life, man! 🙂
One caveat about Epson printers: I bought one recently, and could NOT get it to work at all with my computer, as I’m running Windows Vista. Their Vista drivers are incomplete or something, and after a full day of fighting with it, I finally exchanged it for a Canon printer.
Hopefully this will work the same as my previous HP: I found when I printed on matte or glossy photo paper, the covers could be handled normally and the ink didn’t smear. But as Chet says, the new Epson inks are designed especially to seal the inks into the paper so that they’re reasonably waterproof.
I have something new I recently discovered to contribute.
I think I mentioned above that I differ in my binding technique from the method given here. The instructions on this website say to cut the sheets first before folding, stacking, and binding them. I fold my sheets first and stack them before cutting them.
To do this I use a really big wooden clamp (that looks like an antique but which I bought at my local big box building supply store) and a very wide 2½ inch chisel (as wide as I could get from the big box). I clamp the stack of folios with the edge I want to cut sticking barely above the clamp and then trim all the pages at once with the chisel using the body of the clamp as a guide. It took a little practice but once I got the technique down it’s a LOT faster and produces a cleaner book than cutting individual sheets (especially if you’re printing quartos). The one really important thing is that you need a very sharp chisel. I’m talking beyond hair splitting sharp. Much sharper than they come brand-new from the store; you will need to sharpen it yourself before using it.
Which brings me to my discovery: I recently learned a laughably easy way to quickly achieve the required level of sharpness (and beyond) with just a glass plate, glue, and sandpaper. It’s much easier, cheaper, and a lot faster than sending my chisels out to be sharpened. It’s called the Scary Sharpâ„¢ system, and it fully warrants the “scaryâ€. I won’t go into the details because very good instructions can be found here:
http://www.shavings.net/SCARY.HTM
and also elsewhere just by searching for “Scary Sharpâ€.
I just recently trimmed my first signatures with my new Scary Sharpâ„¢ chisel. It was so fast and easy I couldn’t stop giggling for half an hour. In less than a minute I had cut and trimmed what might have taken me an hour or more cutting the pages individually on the paper guillotine, and the page edges line up beautifully. They line up so well that I am now itching to experiment with gold edging (but I have resisted so far).
I thoroughly recommend this technique to anyone interested in speeding up and improving their book production. Just be REALLY careful with the chisel; you could have a finger off without even knowing it. And the cleanly cut pages might leave a nasty paper cut as well.
Now, as to your printer problem:
The Epson inks and print quality are definitely superior, and (depending on which specific printer you have) surprisingly cheaper. I have little doubt that any printing problem you experienced were the fault of Vista, not your printer; it’s been my unfortunate experience that Vista simply isn’t ready for release (and my experience with Open Source has given me a keen sense for identifying incomplete software), and Vista was not originally created with the end user in mind in any case. You may need to wait a year or more for the Powers-That-Be at Microsoft to fix your problem for you.
Personally, I would have kept the Epson printer and dumped Vista for an older OS. The whole point of our hobby is producing high quality hand-made books (for which we need good printers and good inks), not submitting to Microsoft’s endless cycle of expensive forced upgrades.
Thanks for your post about the ‘scary-sharp’ chisel. In the end, I put up the money for a blade-arm guillotine (not the crushing kind you see in school photocopy rooms, but basically a sword attached to a small metal platform). I clamp a book in this baby, pull down the arm, and it slices through my 500-page novel like it was butter.
But I can understand if someone doesn’t want to drop the money for that kind of gear, and it isn’t strictly necessary. In fact, I just went in the opposite direction and bought a super-sharp piece of custom-cut ragged lucite for tearing deckle edges. It’s great for making old-looking blank books or treasure maps 🙂
I won’t get into the OS religious wars here. Suffice it to say that these machines are great, and make this kind of home production possible in the first place, but every brand and non-brand does ask a lot in terms of expense and maintenance time.
If you’ve got the money (and already have a duplexing printer), an industrial blade arm guillotine is the way to go for speed, though the chisel and block clamp method still produces cleaner edges.
However, the instructions at the top of the page call for a “rotary-blade guillotine”, not a blade arm (though I now notice you mention industrial guillotines in the Perfect Binding section). I have a rotary blade cutter (made by Fiskars, I think) which I used to use, but I found it very tedious cutting even ten sheets at once (which don’t always cut all the way through). It’s also incapable of cutting anything like a full stack, much less separating bound pages at the folds.
What I was getting at was that the Fold-Stack-Cut order of construction is a lot faster and cleaner than the Cut-Fold-Stack method given here, and a very sharp chisel with a clamp make it not only possible, but also very easy and economical for the home bookbinder (who has better things t spend money on, like duplexing printers). And this Scary Sharpâ„¢ system can quickly and easily give you a chisel sharp enough to make it *really* easy. Of course it does require your software to be able to rotate pages during imposition, but isn’t imposition always the main stumbling block for all self publishers? Also, depending on your guillotine, you can probably also use the Scary Sharpâ„¢ system to bring its edge up to snuff.
As to OS Wars, that wasn’t really my intent. I’m no Open Source zealot (a lot of them are twits); I think XP is just fine, but I also use Open Source stuff because of it’s attractive price (which lets me spend money instead on more tangible equipment – did I mention duplexing printers?). I’m just confused as to why you’d exchange a printer with significantly more durable inks much better suited to printing covers while keeping an unnecessary “side-grade” OS which is no doubt the actual source of your problem. After all, it’s the printer that ultimately produces your books, not the OS.
I also find it interesting that someone so dedicated to helping people liberate themselves from the perversities of the publishing industry would be so willing to make an accomodation like you have to the perversities of the commercial software industry. But then I work with machinists who are still using DOS because it still works for them (and the machinery they work with is better than the newer stuff driven by newer operating systems), so maybe my perspective as to the necessity of “upgrades” is a little different from yours.
Also, Treasure Maps:
Have you tried using a “wood burning kit” (basically a big soldering iron) to blacken and singe the page edges for that “mysterious historical document” look? I’ve found they work great, allowing you to define whatever edge you desire, without the potential risks of using something as random and uncontrollable as a candle or torch.
Now if only I could find a safe and reliable way to artifically fox paper…
I guess my original intention in writing this was, initially, to give people a way to bind their own work that wouldn’t require extra or expensive equipment. That was about a year and a half ago, and since then my own production system at home has evolved and become more complex — yet simpler, as I’ve acquired specific tools for specific tasks.
There’s nothing I’d rather spend money on than expanding my creative capabilities, so it’s a priority for me. But I understand if someone doesn’t have those resources or doesn’t make bookbinding a priority. Or if they want to do any of these steps their own way — great! Whatever works for you. I’m sure there are dozens of different ways to get to the same result, and I thank you for sharing one of yours with the community here.
~
Why do I use Windows? Because I’m a huge fan of mobile computing, and no other mobile computer/synchronisation technology is as mature as Windows Mobile.
I used to use a Newton, but Mr Jobs decided that nobody wanted a “scribble pad” and killed off the line, even though it was a beautiful OS. And the iPhone is not the computer people are trying to hack it into being; it’s a browsing/messaging/music device.
I love being able to put my office in my pockets and be able to work anywhere, and I also need to know that the chapter I just wrote (not to mention my contacts, to-dos, etc) are going to synchronise properly and not get lost. I’m sure there are third-party hacks to synchronise with other OSes, but I’d rather use the one out of the box that I can trust.
Likewise, when I switched to Windows from Mac, it was like waking up one morning and not being gay: suddenly the world was made for me. I realise there are those who think that’s a betrayal of all things independent, but as far as I’m concerned my computer is just a machine, a tool, not an identity or an affiliation.
I paid for Vista, and have been paying for all the software I use commercially for the past year (which felt much more in line with my personal standards), so I wasn’t going to just write off that money, and sure enough, the glitches are settling down and it’s just working for me. Great: I just want the machine to be there and work.
If somebody has the time and the inclination to learn how to unpack ‘tarballs’ and configure things from a command-line in Ubuntu and find community-created applications because they enjoy doing that or it’s important to them, great. But I’m not interested in fighting with my system to get it to approximate what existing software already does. I just use the industry-standard programs my copywriting clients do, and everything’s easy. I’m happy there are people working to open up standards and create free alternatives, but that’s not my battle.
This is coming up lately, the question of whether I’m “independent enough” (despite the fact that I bind my novels in my bedroom, receive no corporate support for doing so, and don’t really exist on the publishing radar). I’d rather others not focus on me but take that energy and use it to package up their own work and put it out into the world.
It’s me again. I think maybe I’m continuing to be insufficiently clear. I’m not suggesting you keep the good Epson printer with it’s superior inks and use it with an Open Source system. Instead, I’m suggesting you might have kept the Epson printer and used it with fully functional and proven Windows XP.
I don’t blame you or anyone for using commercial software. I’ll be honest, what you don’t pay in dollars to use free software you do pay in mental effort and frustration. What I am confused by is why you would specifically forego a superior printer simply to use Windows VISTA. Windows XP continues to work quite well, and I have yet to see a compelling reason to pay to upgrade to Vista, while at the same time I’ve seen some very good reasons (such as your printer driver problems) to stay with XP.
What can I say? My gear works. I’m happy that it produces a quality result. If something else works for you, super.
Really enjoyed your site. I’ve just completed my first full color children’s book and couldn’t believe the cost for getting it printed through a PoD service. Your article and the links have really inspired me to try and produce it myself.
Thanks, Angela. Your project sounds great. If nothing else, DIY publishing will give you a prototype to generate further interest, and the ability to give copies to the friends and family you really want to share it with.
If anyone happens to be in the Edinburgh area, on Sunday, 28 October, I’ll be giving a free perfect-binding tutorial at The Radical Book Fair.
You can find details about this and other events at the Fair here:
http://www.word-power.co.uk/book_fair
I think your article on home publishing is fantastic.
I’ve spent over 20 years trying to interest publishers
literally all over the world in my various works.
Now me and my wife and kids have decided to go it alone. I have written a book of Rhyme and illustrations for kids, and am currently working on an adult rhyming book too. Your advice is an inspiration to all new and old authors. Jsy wish publishers would catch up. Thanx
Aww, thanks! That’s really nice to hear.
I was at a small press fair at the Scottish Poetry Library today, where one presenter talked about his experiences of publishing poetry through the years. This involved setting up rows of type letter by letter, typing words on to metal plates, squishing around messy jellied inks, hand-cranking presses… It gave me a real appreciation for how easy it is for us to produce work now.
I wanted to again thank you for doing your website.My last entery to you was #36 nearly a year ago. I wanted to show you how my books turned out etc etc. I ended up stapling them because of the shortness of the books they turned out all so very well!!
I continue reading replies that everyone has put…It shows we’ve all ran into something or other and manage to get through it. Thanks again!
Lea
Thanks very much! Yeah, I’m very happy that this article is still being noticed and (hopefully) helping people see the options that are available to them.
One self-interested note to make, though, is that this *website* was created by author/filmmaker/games designer/friendly-guy Jim Munroe, whereas the article was written by me, author and micropress publisher Hamish MacDonald (http://www.hamishmacdonald.com).
Just wanted to let you know that we tried and succeeded with your plan on our first 2 mock up books.
They worked fine, and we’re now ready to press on so to speak. Will update you in a few months and hopefully send you a first ed of the book entitled “Rhymes for all times” best wish’s DDay and kids.
I have really enjoyed and learned quite a bit from reading all these postings. Just thought I’d add something for those of us who use Macs… there’s a lovely little piece of software called CocoaBooklet which will let you take a pdf file and make it into a booklet. A booklet is a book that’s folded in the middle. I’ve used it to make booklets of all sizes and lengths and it works great and it’s free (donations accepted).
http://www.iconus.ch/fabien/cocoabooklet/
I was having trouble sending in comments here, so I just posted a bunch of information I just found on my blog, here:
http://www.hamishmacdonald.com/blog/?p=151
Hi! Great NMK article! (and discussion!) Is there an easy way to trim the outer margin nicely for a saddlestitch book?
One that’s, say, 20-40 pages thick?
My usually-good lever-arm paper-cutter MANGLES these kinds of cuts. This is a small job.
I don’t want to buy a pro paper guillotine. Well, I do, but haven’t yet. Do I need one?
This NMK report shows a pic of a rule and blade for the “minimum”—will that really work? My hunch is that there’s a TRICK out there to make this cinchy. (I posted this at Hamishville also.)
Hi there, Jeff.
Yeah, good question. When I was doing hard-case binding at first, I was actually filing the pages down. It’s a bit rubbish, to be honest.
I’ve also tried using a craft blade/scalpel to try to do the job, which is worse.
One person who wrote in to the NMK website said that she was using a wood-plane to do the job. But 20-40 pages — that might not be thick enough.
I printed up the publishing e-book I was talking about here and was reading it again tonight, and noticed it’s actually a bit light on tips about actual binding techniques, and just shows one. Oops. So I kinda feel like I need to print a retraction here. Chet Novicki, who makes the hand-binding press that’s sold at GigaBooks.net also sells a book showing quite clearly how to do perfect binding (which doesn’t specifically require his presses). His is the technique I’ve been using, though now I’m going to also try working with a heavy-duty stapler instead of glue.
Anyway, back to your point. The website e-book did suggest using small signatures, though, as a way to reduce how much the pages stick out. But I presume you’re already using signatures and not just sewing the thing down the middle, right? If not, that’s something to try.
Re Jeff’s question about trimming the outer edge of booklets. Some Kinko’s and other large copy shops/quick print shops offer trimming services. Usually they charge by the cut, so you could get several 20-40 pages thick
books trimmed at once, reducing the cost to a few cents
per book. And if you’re looking for the best price on a manual clamping cutter (in the US) try factory-express.com. I have a Martin Yale 7000E I bought from them a few years back. They were as much as $200 cheaper than other places I looked. Also, eBay has clamping cutters for sale from time to time, sometimes for as little as $100. Usually these require some minor repairs and blade sharpening.
Chet! Long time…
Now here’s a man I owe a lot to! Your perfect-binding press is what made it possible for me to now produce my own perfect-bound novels in about half an hour each. And, just to clarify what I wrote above for others, Chet’s book also demonstrates the “invisible staple” binding method I’m about to learn (though not today, because apparently when you buy a stapler they don’t give you any staples).
Here’s a sample of what I’m producing now, with a big shout out to my man, Chet:
http://www.hamishmacdonald.com/blog_images/booksample.jpg
Very complete article. Thanks.
Hamish, I am a former educator and first time author seeking someone to publish my 14 page children’s book in cardstock boardbook pages. I cannot seem to find any self publisher that will publish boardbooks, and this is vital for it’s durability and longevity. The picture book is targeted for children toddlers through age 10. Are you interested? Do you know others who would be? The sooner I find the right publishing match, the sooner I will be able to market it! Let me know? Thanks. Have a great day.
Hi Hamish- I need to make 25 smallish books for Christmas present project. What would be the best method? where do I start? How much time?
Thank you
Martha
Hmm, it’s hard to know, since I’ve not seen your project, but here are a few options:
– folded and stacked single sheets, stapled down the spine, then covered with a piece of card that’s glued to the front and back pages, and scored so it’ll open nicely
– a booklet of nested pages with holes punched through the spine and cover then sewn, or stapled through the spine with a cover glued on
It all depends how thick the books are, but these are the two methods for binding that come to my mind.
I read in one of your comments you stopped using the spray varnish. I have mine bond and ready to print cover (Heavy Card Stock Glossy)but I cant figure out what I can put on it to make last the wear and tare aside from varnish.
Yeah, I just used that briefly because it actually messed up the colour laser toner in my covers at the time.
Since then, I’ve switched to printing my covers with a regular home photo printer on matte or glossy photo paper, and the result looks great and is pretty durable.
I’m not sure how commercial printers apply their matte or glossy varnishes to covers, but it seems to be a completely different process to the spray art stuff we get.
Ha. I guess what I’m saying is I have no insight whatsoever on this! Sorry.
re Michelle’s post about what to put on her covers – don’t want to sound too commercial (since I sell the stuff) but self-adhesive laminating film is an easy way to do this. Library folks claim it will increase the lifespan of a circulated paperback 4-5 times.
Thanks Hamish for the quick reply! The paper I have for the cover looks very nice I just may go with that.
Thanks Chet I will consider looking into that more. Its kinda sad I have friends that work at the university library but I never thought to ask….
I came to this site because I want to print and hand-bind some exhibition catalogs for my gallery. You give a lot of great info. Thanks!
You are a LEGEND!!! thank you for so much wonderful help, from my heart this is the best website I have ever had the fortune to discover, (and i’ve spent months trawling, believe me)
I received this response about copyright and wanted to pass it along:
– – – – –
Mr. MacDonald:
I was looking at your article on “Do It Yourself Book Press” found on No Media Kings. Overall, it is an excellent article and I found it very interesting. There are, however some inaccuracies regarding
copyright you may want to correct.
1. “One copyright mark at the beginning of the book is sufficient.”
Actually the 1976 Copyright Act retracted formalistic procedures such as a copyright notice. While one mark is sufficient, it is not even necessary (although certainly no harm can come from it).
2. “How do you register your copyright? You don’t need to.” Well, yes, and no. One does not need to register the copyright to receive copyright protection; that is true. As you noted, “The moment you create an original work, you hold the copyright to it.” On the other hand, one does need to register a copyright to file an infringement suit.
3. “If you really feel paranoid, you can mail a copy to yourself or someone else and keep it sealed. The post-mark will officially place your work at a point in time.” This ifallacy has a hard time dying. It’s simply not true and would be frowned upon by a court. Besides:
(a) fixing the moment of creation is usually not an issue in copyright cases’ and, (b) the copyright needs to be registered to file an infringement suit. If someone is really paranoid, my advice would be to spend the $35 on registration.
4. “In lieu of copyright, you might consider protecting your work with a Creative Commons license.” A Creative Commons license does not exist in lieu of a copyright; it coexists with the copyright. As you
correctly noted, “The moment you create an original work, you hold the copyright to it.” Therefore the work is copyrighted whether the author likes it or not – there is no way to “un-copyright” the work.
The Creative Commons license governs how people use another’s copyrighted work. It is a license precisely because the work is copyrighted.
Things might be slightly different in Scotland, but since both the U.S. and Scotland are signatories to the Berne Convention and WIPO, substantively they are similar.
I hope you find this useful.
Very truly yours,
Martin W. Klingmeyer, MSL
United States
Jim received this comment via e-mail, passed it along to me, and I’m passing it on here. I haven’t seen the program mentioned, so I can’t give any advice about it.
> Joseph Francis wrote:
> Have you ever tried Ventura Publisher? I find it to be the
best book publishing
> program. It makes Microsoft Word look like the joke it is.
> Features includes Table of Contents, index and figure
generation. It also has
> built in imposition tools.
> I am currently using a Brother duplexing laser printer (model
HL5250). This
> printer prints 30 pages per minute with auto duplexing. Cost
me under $200.
> I use an Epson inkjet for color covers. I have tried both
overprinting spray
> and laminating. My current choice is uncoated cover stock.
Coated cover stock
> is too likely to smear. I perfect bind my books. In use a
simple woodworking
> clamp (under $20) to hold books for gluing. Three knife trim
makes it a real
> book. Cutter is absolute necessity to make a real book.
Whoa! This is a very inspiring read. You’ve enlightened me to the numerous options available out there that i didn’t know about before. Simply brilliant! i’m definitely keeping a tab on this!
Thanks to share all your knowledge about book crafting, men you really inspire me, and give me the strength of finish my first novel. Greetings from Costa Rica
You gave a very illustrative step by step procedure. It becomes very easy when you can see the pictures along with instructions.
Good Work
Until coming accross this site i didn’t realize that home bookbinding was possible.
My question is this:
I want to print out my text using my monochrome laser printer and have my illustrations printed on the same pages with my photo inkjet printer. Which software will allow me to achieve proper alignment? Also will there be trouble with using laser paper with inkjet printer or vice versa?
I saw a trick in something I read recently for getting colour images into black and white pages: print the pages once to the laser printer, but tell your program that the illustration is a “non-printing object” (if you program allows for this; the major page-layout software packages do). Then run the pages through your colour printer, only make the illustration printable and change your text to white.
It’s fiddly, but that’s the only way I’ve seen so far to do this.
As for paper, the colour printer is going to need a finer finish on it (so that the ink doesn’t bleed), whereas the laser printer will print fairly crisply on anything. You could, perhaps, use a finer finish paper just for the illustration pages, since it tends to be more expensive.
Hi Hamish,
What size paper do you use and what size is the end product of your paperback. I’m assuming that you print on A4 cut in half then fold, which would give your end result a measurement of around 105mm Width and 150mm Height, or do you use a different size paper to A4.
Many thanks Chris
Yeah, I use A4 chopped in half then folded. I’ve had a number of readers say that they really like the size this produces — something fairly pocketable. (Okay, except that my last book was on the lengthy side, so it’s pocketable in the way a brick is.)
Cool, thanks for the quick reply…
Hi all, great posts and info here. Well done. I have been home-printing and making books for a while now. I use programs such as Open Office, MS Publisher, GIMP, etc depending on what I am doing and for printout I use the excellent Fineprint utility, which I gather is like Clickbook utility. For binding I have a Dahle reamcutter which cuts up to 550 pages at a time. My printer is a Cannon i865 (love it!) which I have set up with bulk inktanks (Continuous Ink Supply – cost about AUD$65) and ink savings of some 90%. Refilling is too easy and less frequent and hardly any purging! To bind my 291 pages books I use a Fellowes 250 Thermal Binder – initially with the recommended glue sheets cut to size but am now working with hot-melt glue which is even cheaper. I can (background) print around 100 books a day whilst I do other computer tasks and bind about 40-50 books a day. I think using contact glue may be slightly stronger and will try this next. For larger runs I have a Risograph GR3550 printer which will print in single colour at 120 pages per minute….in case I need to do a run of 10,000-250,000. I understand there are gold and silver inks around also. regards, Theo
Wow, Theo, you’re doing this on a whole other scale. Thanks for sharing all the details of your setup.
One question about the thermal binder: I looked at these a while back and am still not clear about how they work. Do you have to use “thermal covers” on them? (Which seem to be pre-folded covers at set sizes with a glue strip already integrated in them.)
I ask because my books are all different lengths, and I print my own covers, so this wouldn’t work for me. Or can you bind in-between sized books with your own paper? It sounds like that’s what you’re doing, but I’m not sure how that works with the hot glue (since that seems to come in long cylinders).
Could you say a bit more about this part of your process? This sounds like it could be handy — faster than manually clamping and gluing pages (which is still a fiddly, imperfect process for me, even though I’m more experienced with it now).
Hi Hamish, thanks for the reply. The thermal binders require ‘glue sheets’ especially made for them. They can be cut to any size you require. They are a plastic compound designed for book binding and it melts in the binder, which is basically a “toaster” with the element just on the bottom only. There are demos on UTube of how they work. For my 291 page books they take about 30 seconds to melt and then you stand them on the edge for 5 minutes to cool while you make more in the meantime. I ran out of glue sheets material and have been trying hto melt glue, but it is not as strong, although much cheaper. Yes, you can buy pre-glued covers but they are too expensive for me. Itt is easy to make you own, much the same way as outlined in your posts. The finished product is similar in every way to commercial paperbacks. But I have yet to find gloss 200-250gsm cover paper that I can use with my Canon inkjet printer. (in Australia) I have already printed some 600 books (listed on my website for free). But, I am always eager to find even better ways of doing things so I will keep an eye on this forum for ideas, etc. By the way, for a good laugh I recommend everyone read about the Scary-Sharp article listed above…(that sharp it splits atoms?!) Regards all, Theo&Robyn
Hi Hamish,
I have just bought Clickbook and am looking to print my books in the same way as you. A4 folded twice. What layout do you use to achive this in clickbook, as i can’t seemed to get the layout right on my mac. Hope you can help.
Many thanks Chris.
Hi Chris. I use the layout “4-up book (folded)”. Under Layouts/Modify layouts, make sure that “Sub-booklets” is checked and the value there is 4 pages per section, if you want separate sheets (otherwise they’ll all have to nest into each other like a booklet, which gets unwieldy if you have too many pages).
Thank you for your tips on how to publish books yourself, I was once worried that I may never get my work published. Also, I was led to belive that it would cost me a fortune to do it myself. Thanks again!
Superb article and links from those leaving feedback! I must try the scary-sharp method of trimming pages! In the past I have hand stitched the signatures to my hardback books, and perfect bound softbacks. I have married the 2 techniques – I perfect bind the bookblocks, make a hardback book case and using endpapers and cheesecloth or scrim I glue the endpapers to the case. This way I get the durable hinge of a glue soaked scrim spine with a hard cover with the speed (and perfect edges) of perfect binding. When I get around to getting my website live I’ll write a fuller, illustrated, how-to.
Whilst on the subject of hardcovers – I have discovered inkjet printable canvas. I can now produce full colour covers to my books with a fabric hardcover. (On my A3 canon printer). To protect the ink from smudging and water damage I use an inkjet fixative spray (Ghiant make one in matt, satin or glossy) which also helps protect from finger marking! I also make dust-covers using self adhesive laminate to make the seperate pieces of paper used appear like one! – I really must get out more!! hehehehe
This web site is almost too good to be true. I have been searching for information like this for awhile and I just got very lucky by finding you.
Thanks for all of your hard work.
Thanks, folks, for your very kind words here. It’s most gratifying to think of contributing something to all these projects getting created out there!
Hi everyone,
Look what I bumped into….
http://www.fastbind.com.au
Awesome. See the videos too on utube.
Also, do a search on MEMJET if you want to see the future of printing in action.
Can’t wait for these printers to become available!
However, I still get good and fast results with my thermal binder and hot-melt glue, which is also suitable for repairing books.
I did 50 x 291 page books yesterday.
Regards to everyone.
I’m on a Mac and using Illustrator 10. I have a 20 page book planned. What kind of production is involved and what would I need to give a publisher? Are Inkjet pages
proper to make and give physically or electronically? May electrtonically be hard to transmit due to resolution transmission?
Donald, an inkjet will be fine for proofs or samples, but if the publisher decides to take on the production of your book, they will most certainly ask for digital versions of your illustrations.
The resolution remains unchanged when sending digital files, whereas every time your print your illustration and it’s scanned in, the quality will degrade.
I hope I understood your question, and that my answer is of some help.
Hi – I came across your website looking for information on how to make a book press. Did you know that there is a free desktop publishing programme called Scribus. (Type Scribus into a search engine) It works for me, and I’m just above a beginner in creating books. I don’t know if it has a tutorial with it though. For someone on a budget, it’s worth a try.
Hello! I am a former magazine publisher and even though I have sold my business, I cannot get over my love of bound paper. Since I had a large operation, I was not intimately involved in the printing process — and it involved very different tools anyway. So I thought it might be fun to make a few hard bound books myself, using a combination of colored silk handmade papers and a thicker handmade cotton paper as the main elements. Initially, I scored, folded and tore the sheets to get the unfinished edges I wanted. I then assembled them into signatures, clamped them together and used a saw to make the holes to sew the signatres together.
None of this required more than hand tools.
However, now that I am editing my grandmother’s autobiography, I want the nice tight results discussed in this forum — rather than the artsy books I was doing before.
My questions revolve around ClickBook and the paper folding machines. Since I want this book to have 9 foios per signature (each folio will be a letter-sized (8.5 x 11) sheet folded in half (4 pages per folio), will ClickBook allow me to assign these details?
My second question, RE paper folding machines, is that I cannot find one that will allow me to fold more than 3 folios at once. This is a pain since the book has about 450 pages and a signature with 12 pages (4 pages per folio x 3 folios) will amount to 38 signatres that I will need to sew. That’s toooooooo much sewing. Assigning 9 folios per signature means sewing 13 signatures — but I can handle that. I don’t want to fold 3 sets of 3 and then fit them together because the interior-most sheet of paper has a tight crease that will not conform around a folio nested inside it very well.
Anyway, I thought I might contribute a few of my own resources since I am interested in fine binding, not just a way to “get my work out there.”
Books (in order of my preference):
– Author Rosati, Paola.
Title Bookbinding basics / Paola Rosati.
Publication info. New York : Sterling ; London : Orion, 2001
– Author Cambras, Josep.
Title The complete book of bookbinding / Josep Cambras.
Publication info. New York : Lark Books, c2004
This is a great tutorial with photos that go through the different steps.
http://www.davethedesigner.net/booktut/index.html
Hi Jennifer. Thanks what you’ve contributed here. That bookbinding tutorial is really clear — I like it!
As for ClickBook, yeah, it can do imposition for a vast array of projects, from tiny wee books to multi-page posters. Letter-sized folded in half will be no problem for it at all.
You can assign it to put a varying number of pages on a sheet, then also tell it to divide the book into a certain number of sub-booklets (their term for folios). There’s a math to the pages that’ll fit on a sheet (has to be a multiple of eight for you to not get blank pages), but how many pages are in a folio should be up to you. It might take some experimenting.
The paper-folder I have is from Martin-Yale, and it’s really designed for direct mail-type jobs, like a gatefold pamphlet. I’ve had to fiddle with it quite a bit to get it to do a dsingle fold on an A4-sized sheet. Now that I have, though, it’s immensely helpful. I’m sure you could do the same for your letter-sized project.
This machine folds pages one by one, and can take up to fifty sheets in its tray at a time. It doesn’t make folios per se, you’d have to assemble those afterward.
The paper-folder wasn’t cheap, and it is fiddly getting it to fold the pages evenly, so you may still want to fold the pages by hand, depending on how many of these books you wanted to produce.
Good luck with the project!
I don’t know if it’s been mentioned here before, but I had real problems with the paperfolder because after printing with the laser printer the 50 or so stack of pages became somewhat warped and the paper folder did not perform well at all. It turned out to actually occupy more time due to having to reprint ruined pages. Another observation, one of my books had 300 pages and the large staples required to do the binding (which was too firm for a book that size with staples) were hit and miss as far as actually properly going through all of those pages. After about 15 books the stapler broke altogether – I could still use it for smaller staples but not the real long ones. In short, fold by hand and forget the staples for thick books. Extra glue is a better option. This book-making process is fine for making a small number of books, but if it looks like the book will sell on a large scale, its time to have a factory put the books together.
Hi everyone. If anyone uses a folding machine then a hint is to wait (overnight) after printing before folding to let the paper dry/cool off and settle. It makes life so much easier. Another mention of ‘Fineprint’ program. I do all my printing via this driver. You really need to check this out. All my books are put out through this great utility. Go to Google and find ‘fineprint’. And I love the http://www.davethedesigner.net/booktut/index.html flash tutorial. Awesome! I will do this when I get time. If anyone wants our excellent free book to download you can get it here http://www.go-ers.org/HeLovesMe.html
God bless you all.
This is a great article but what i don’t get is why yo have to cut the pages in half. If I just print the pages straight off Word as A4 sized sheets it’s all in separate pages. I don’t really want to make the book smaller by cutting it in half. So can you explain why … ? Thanks.
I started off cutting the pages in half simply because that’s the only way I could then also print a cover at home that would fit around it (US Legal size will wrap nicely around US Letter pages folded in half, but the next size up from A4 in the ISO/European paper sizes is far too big to print on a home printer).
Since then, several people have commented on liking the size of the half-A4 format, which seems to be nice and pocketable/messengerbaggable.
I love this blog and your personal site. I have a question about you experience with Aardvark for buying ISBN numbers. Have you had any problems with buying the ISBN number from them? My understanding is that Aardvark is the publisher of record when you buy an ISBN from them. How does this affect the writer’s rights? Do you know if this might create problems with selling publishing rights to a comercial publisher later?
Thanks!
Yeah, it looks like you’re right about Aardvark being listed as the publisher. They state that you retain all rights and control, so I suppose it doesn’t matter; you’d have complete freedom to do whatever you wanted with the title, including selling it to a publisher.
Some people like the idea of a third-party name appearing on their books, and Jim invites people to use the No Media Kings ‘label’ if they feel they need one. But it’s still a bit weird that they do this unless you buy the more expensive self-publisher’s package.
Personally, I’m going to buy a string of ISBNs for myself in the UK from Nielsen Book Data; if you’re in Canada you can get them from the National Library. In the US it seems you have to use one of a number of commercial sources. I’d say “be picky”, but you already seem to have an eagle eye for details like the ones you caught on the Aardvark page.
Thank you, Hamish. I’m still not sure of what to do but your response was helpfull. Sometimes I find that I am too picky, a condition that all to often end in procrastination <– a demon that I need to exersize from time to time.
At present I’m working on a hardcover version of my book, Project War God — I don’t expect to make more than few of them so I won’t be needing an ISBN number for it but if I’m successful at making the paperbacks (I want to be a paperback writer [shameless Beatle song referance]) then I will need the ISBN – though, I’m tempted to be a nonconformist and publish without it.
As an aside; I found some photo print paper that is made to look like artist canvas. I printed my book cover, just the front, on this and I’m hoping to us it on my hardcover book.
And lastly, Thank you Hamish for all your help. I am soooo happy I found this site with all your wonderful advise. Many Kudos to ya.
PS: I volunteer at a local Community TV station (CCTV54) in Colorado, I’m on the Board, I direct live shows and just about everything else that is needed in putting together a live show. My reason for mentioning this is to entend an invation to you for an interview. So if you are ever in Colorado look us up, or write to me, and we’ll put you on the air. We a are small INDI enterprise so this is no be deal but it would be fun. You can check us out on youtube – just search on CCTV54 or check us out at http://www.cctv54.org
Hey, thank *you*, Leanette! I’m about to self-publish my fourth novel, and I gotta tell you, I still find it a challenge to muster the gumption to do it. So your feedback means a great deal to me, and reminds me of what’s important about doing this myself and telling other people how to do their own thing, too!
Good luck!
I hope this isn’t too intrusive but do you make a full-time living printing your own books and, if so, did it take a long to time for the price of the equipment to covered by book sales? You mentioned that major bookstores won’t sell PoD books. Do they sell your self-published efforts? Have you had any feedback from them on the quality of your books versus their general standard?
Finally, have you thought of doing a seminar and getting some of these folks in the same room to trade ideas and to demonstrate your process? Thanks! Suzanne
Hi there, Suzanne. Okay, so, to tackle your questions in order:
1) God no, I don’t make my living from selling novels. I get my main income from being a copywriter — writing newsletters, articles, and marketing copy. The novels are a labour of love, about sharing ideas and imagination; there’s no measuring return on investment there. I don’t bother calculating any of that stuff. (I do keep receipts and write it off, though!)
2) I’ve recently read an interesting editorial by one writer flying in the face of what you’d expect about bookstores, saying that he found small stores wouldn’t carry his books because they didn’t think they could sell them, while apparently Waterstone’s (a large chain in the UK)allows its individual store managers to make their own judgment calls about what books they order, to a certain degree.
I’ve had my last book in a indie shop here, but frankly, I’m not bothering this time because it’s up to me to check and see if they need to be restocked and to chase them for the money they owe me, and they haven’t really done anything to promote my novels, because they’re more interested in angry political stuff. Fair enough.
When I finished writing my first book in Toronto, a friend slipped me the e-mail address of the owner of Canada’s biggest chain. I e-mailed, and she said they’d carry my book. They didn’t in reality until I got a distributor, then her underlings were actually able to act on her promise. (They generally aren’t equipped to set up accounts with individuals.) Alas, that distributor no longer exists.
I sell the most books when I do readings. I’m not sure what’s at work there, but it seems there are more “sales conversions” when the work is backed up by a personality or presence. I guess that makes sense: if you read half-decently, and from the introduction and general chat, people will get a sense of the tone of the book and whether or not it’s for them. It’s something to go on, as opposed to nothing — which is the other challenge: not just getting the book onto the bookshelves, but off again!
I just attended a ‘zine and small press fair here in Edinburgh — which I was very happy to see happen in this city. CanZine was such a huge affair when I lived in Toronto, and it seemed we had no equivalent here. That seems to be changing. I was the only ‘zine novelist — most of the other material was comics or commentary — but the crowd was very receptive to what I was doing. So I’d recommend any events like that for sales.
3) Feedback on my books versus the general standard — no. And I wouldn’t be particularly interested in that. My books are different from what’s on the stand — they’re close, but they’re imperfect, and the dimensions are different. Readers have told me they really like the format, and with my most recent book I actually went out of my way to make it *look* handmade, and the people at the ‘zine fair I mentioned really went for it, and I sold out, meaning five copies of the new novel, one of the previous one, and a couple of blank art books, just to give you an idea of the numbers here. (Read: “Don’t quit your day job” and “Do it for love”.)
Before I was trying to match what was on the shelves, but now I realise there’s acres of that if people want it; what they’re hungry for is originality and ‘realness’. So trying to compete or compare — I don’t think there’s any joy to be had from that activity.
4) I have done some workshops about writing, hardcover binding, and paperback binding. As for gathering people together from these boards, I don’t think it’s possible because we’re from a pleasantly surprising variety of far-flung places. I’m in Scotland, so if you think you might be in these parts, I’ve got a sign-up on my website now (hamishmacdonald.com), ’cause I want to offer workshops more regularly.
While I’m keen to get my work out into the world — like my new novel, Finitude, which I call a “lighthearted climate change adventure story about an insurance salesman at the end of the world” (sorry, had to plug) — I’m equally excited about helping other people produce their own work and get it out.
I hope that was helpful. All the best,
– Hamish
http://www.hamishmacdonald.com
How nice of you to take the time to answer and keep up this helpful site. Blessings to you.
there’s another, free imposition program available now. here’s the link to the mac version: http://mac.softpedia.com/progDownload/Cheap-Impostor-Download-7726.html
I’ve just switched to a Mac, and I have to second Andrew’s commendation of Cheap Impostor. It’s well worth paying for the extra feature set (which lets you move your text around the page, add a gutter, zoom the text up or down, and choose different paper sizes.
ClickBook exists for the Mac, but the jobs I sent to my laser printer from the program kept making the printer spaz out and forget what it was doing partway into the job.
Also really liking Pages, which you can do your inside pages *and* cover in for a pretty reasonable price.
Thanks for your fabulous posting here. I wondered if I could ‘cheat’ a bit by having Kinkos, a local print shop here in USA, ‘book bind’ the letter size sheets of my book. What they do is drill tiny holes along the edge and put a black plastic strip with tiny fingers that go into the holes, that they tightly fuse to another strip on the other side, effectively binding it. I’d just have them drill the tiny holes, toss the plastic strips and then stitch the sheets together. I’d proceed from that step to sealing the spine and attaching the cover. I really want to make my book letter size so that I won’t have to bother cutting the sheets– I can print them out or copy them and immediately bind them. I want the books to last a long time and have looked at professional Thesis binders, but I’d really like to do them myself. They will be about 70-80 sheets to bind, and I’ll be publishing 15 to start with. It’s a crazy idea, but I wonder if it would work. The holes would be really close to the edge, and it seems to hold up pretty well when they bind things that way. Thanks!
I’m trying to picture this. So you’re talking about wiro-binding the manuscript then putting a cover over it? Oh, gotcha, but then using a heavy linen threat or something to replace that.
Hrm, well, it might work, but the pages will fight being opened because this kind of binding will hold them tightly together side-by-side, where most bookbinding stitches the pages together outward from the spine.
If you go this route, the trick will be to create a good, wide gutter in your word processing or page layout program so the text doesn’t get lost in the narrow valley between the opened pages.
The other challenge is fixing the cover to the “book block” you create by stitching the pages. If you glue endpapers and a cover over what you’ve described, you’d be creating another obstacle to opening it up. Instead, maybe you’d want to look into Japanese “stab-stitch” binding — which operates along principles very close to what you’ve described. It consists of making two covers, each with a hinge, and stitching your pages to those. The results can be really beautiful.
And specify “wiro” binding, which will made little round holes instead of the wide ones used for plastic “comb” binding — it’ll look nicer, in my opinion.
Good luck!
Hee. I said “threat”. I meant “thread”.
Now I’m picturing WWII propaganda warning us about the Heavy Linen Threat — some kind of frightening race of invaders who wear durable summer suits.
The holes are really small, smaller than the ones in spiral binding, so they shouldn’t be problematic. And I’ll keep the page set up so that there’s a lot of space in the binding, and I won’t lose my text. I hadn’t thought of that. I like the look of Japanese stab binding– good idea. I’ll make up some of each and see how they look. Thanks for your opinion on this.
I have just stumbled on your site. A lot of good info here. I have only scanned the posts so far, so forgive me if I step on some previously posted info.
I have just completed my most major project: The story of my ancestors, which comprised 136 pages of text and 384 pages of Appendix, photos and pictures of documents; 520 pages total, plus end papers, etc.
I used two techniques that I haven’t seen in this site. For book covers I have been using reclaimed covers from hardcover books I get from our local thrift stores. I just remove the contents and re-use the covers. I will put new cover cloth or paper on them if necessary, but often I can just use them as is. I have a supply of about 80 covers of all sizes and colors. And, I’ve only paid from $.25 to $1.00 for each book—which I read before I tore it’s insides out. Double pleasure. Uncut boards plus cover paper or cloth will cost a lot more than this.
For this project I wanted 12 copies of the book for Christmas presents for my kids and grandkids. I found a set of Encyclopedia Britanica in a local thrift shop, sweet talked them in to letting me have the whole set of 13 for only $5. The covers were in perfect shape, and covered in a very attractive leatherette. They also worked out to be just the right thickness, so I could even save the spines intact. I just printed a new spine cover on a leatherette paper from the scrapbooking store and glued it around the existing spine. All you have to do to save a cover is to carefully remove the old contents by stretching the front board back and break the glue between the and second first end papers, then very carefully cut the spine super with a razorblade; then repeat the process with the back cover. I even save and reuse the headbands.
I made this particular book to fit the encyclopedia covers, so the pages had to be trimmed to 8 5/16” X10 7/8”—which I did on a guillotine paper cutter. I used an opaque paper straight from the office supply store at about $6 per ream. I used my home-made combination finishing/binding press to square up the pages. If you set the top and front edges of your contents against the press bottom and side bars, you will put any uneven edges at the spine and bottom of the book. I did all the text, pictures, illustrations, and photocopies on my old HP Office Jet All-in-one. I was even able to do montages. When I printed them out I used the “book” setting on my printer and printed odd page/even pages in sequence as programmed by the printer. I printed only about 40 pages, or 20 sheets at a time to get around having to reprint a lot of pages if the printer slip-sheeted a page. I used a ton of ink, but I refill the cartridges with either HP or generic kits where I can get about 3 refills for under $10.
When I “deconstructed” the encyclopedias, I discovered a method of using a cotton duct cloth for the super which, combined with a saw-kerf/sewing process gives a very strong binding and nearly indestructible hinge. To sew the loose-paged contents, I put it in my finishing/binding press, leaving the spine edge about ¼” above the edge of the press. I put a thick layer of glue on the spine and let it dry, then another layer of glue to add the super. I cut my super 2” wider than the thickness of the spine, leaving a 1’ flap on either side when it was glued to the spine. When this glue dried, I glued about ¼” of the flaps to the inside end page, which I had included as the first and last pages of my contents. I let this dry in a press.
The final step was the sewing. Instead of drilling holes I used a Japanese thin-set saw to make a series of kerfs 3/32” deep and ¾” apart from one end of the spine to the other. I then “sewed” the spine by burying the thread in the kerfs in a back and forth pattern, up then back down the spine. A final tie-off and the process was done, except for a final light coat of glue to fill in the kerfs and attach the spine liner. You then have a very strong binding at the spine and a pre-set hinge with a ¾” flap to glue to the book boards, to then be covered with the end papers. The end papers are not folded as with a perfect-bound contents. One half of the front and one half of the back end papers are glued to the book boards, covering the ¾” super/hinge. The other half is sewn in with the contents. This leaves about 1/8” of the super showing at the very edge of the inside edge of the book board, but it looks very professional.
As for uneven edges left by a guillotine cutter, I just clamp the glued up contents in a press and use my recip. sander with an 80 grit paper. After the dust cloud settles, you have a very smooth edge. If the edges are very uneven, I use a 7” wood plane to shave the edge down, then finish it off with the sander. I believe in using what’s on hand, when possible.
In my previous post, in the next to last paragraph, I mis-spoke. I used “perfect-bound” rather than “signature-bound.”
THANK YOU! THANK YOU! THANK YOU! I found this site at the perfect time and am now looking at ten finished, perfectly bound books on my dining room table. I also visited gigabooks.com and ordered supplies (contact cement and 8 1/2″ x 14″ coated paper for my covers). I also purchased the book binder but after about 4 sample versions I found it easier to use binder clips to hold my book securely. I print the text of my book on an Epson Work Force 30 (I bought it for $66!! I’m able to print a minimum of five books with one ink cartridge, so that puts the cost at about $3.00 per book). I print my covers with the Epson, too, then I spray them with a waterproof, smudgeproof sealant called “Preserve It!” It also protects against UV rays and prevents yellowing. I can get anywhere from 6-7 covers sprayed with one can, putting the cost at about .75 cents a cover. You can actually pour water on your cover and it just beads up and then rolls off! I know, because I tried it! hee hee I use ClickBooks and use the “full book” layout. I print all of the front pages, then take the paper out and put it back in and print the back side. The Epson Work Force 30 is like a copy machine in that it prints the copies fast!!! And, I have yet to have even had one jamb. (knock on wood) I like the invisible bind technique with the heavy duty staples. It gives a very solid feel to the book and I don’t feel the need to pull on the pages to see if they’ll come out any more. Yes, I did that. I’m nothing if not a tester!!! =)
I am just so thrilled that I found your site and that you were willing to share information with us. It has changed my life. I have one book published through a POD publisher and did not want to repeat that experience. My books are not perfect, but when you place them next to other books, you really can’t tell much of a difference.
THANK YOU!!!
Oh, one more thing… I mean to mention that the Epson ink I use is waterproof and smudgeproof. I sound like I’m trying to sell everyone on this printer. I’m not! I just can’t believe all it can do for just $66!!!
Wow, thanks Merri! Your excitement is infectious: I’m happy all over again that we have the ability to do this.
Congratulations on your success! There’s something about having written a book that changes how people perceive you, and the effect is definitely doubled when they can hold that book in their hands.
YAY!
Great article.
I’m not a writer myself, but I read a ton. Unfortunately for my books, they go through a lot. Rather than spending another 30 bucks for new copies all the time, I’m planning on just rebinding them. I just did that with my softcover copy of The Fellowship of the Ring; I didn’t even need to make a new cover for it. I’m going to be rebinding old hardcovers within the next few weeks, though.
A note on Open Source: It takes getting used to, but it’s usable. The biggest thing is that everything works different. You need to adjust to the mindset. It goes with all FOSS, from Linux to GIMP to Open Office to Vim
Thanks for sharing all the useful info!
Hey Hammish, I’m totally unrelated, jumped in here from another blog & havent been able to leave after almost 3 hours. Great blog & the links are just fantastic. I’d like to know if you have anything like this on the topic of freelance writing for newsletters & magazines.
Keep it up! loved the ‘Power to the people!’ (post 103) moment;)
I’m a photographer with an early interest in hand made photo books. Having reviewed virtually everything on the internet, I’ve managed to accumulate enough pieces to start working. You are correct about the how difficult it is to explain sewing the signatures. Although incomplete, your short explanation was about the best I’ve found. I finally just tried to duplicate the steps with needle and thread. Since glue is used toward the end, it looks like just about any method that gets the separate signatures tightly stitched together is OK. It looks like a good bit of sewing practice is necessary, before doing a book. Mention is made of a sewing frame, without details. Do you use a sewing frame? Thanks.
Hi there, Alex. Sorry, I missed your comment. And, no, I haven’t got any articles on those topics. I’m a copywriter for a living, but I haven’t dealt with magazines or newspapers, just internal/promotional newsletters. There are some really good blogs out there, though, about writing and promotion, like Copyblogger.com and HelloMyNameIsScott.com.
(P.S. “Hamish” — Scots-Gaelic for James. “Hammish” would be “like unto a pig”.)
Oh, and just to clarify: I wrote this post a few years ago, but the rest of the site belongs to Jim Munroe.
Hi Hamish!
I just had a question for you. I’m working on a hand-bound hardcover, and I’m near the end where I am trying to get decorative paper on the insides of my covers. My friend was showing me how to do this because she took a class, but she instructed me to glue the decorative paper to the inside of the covers AFTER I’ve glued my signatures to the spine. I keep trying to glue the paper to the inside covers, but it doesn’t seem to be folding right and it just gets all crumpled when I close it.
Do I glue the decorative paper to the inside covers before I glue in the signatures? I’m a little confused about the difference between “book block” and the covers. The cover is the cover, but the book block refers to cover+spine+cover as a whole?
I have my decorative paper cut to the size of the pages and folded with the fancy side in…but then I don’t understand on what part of the decorative paper the glue goes, or whereabouts to stick it on the book block. Grr, I’m so close to being done with my first book and I have no idea what to do with the insides of the covers! It’s just not complete without it!
Sorry for this exhausted and lengthy question, but do you have any pointers for me?
Thanks friend.
Cadie
Hi, Cadie!
I get what you’re saying. The way I do this is to cut a piece of decorative paper so that, folded in half, it fits exactly onto the book block (which refers to the end result when you’ve folded the pages into signatures and sewn those together). I stopped using PVC glue for this and am just using a glue-stick (though lots of it), ’cause I find it makes the inside pages less likely to wrinkle.
Then I close this — so it’s a block of blank paper with one extra folded, coloured sheet stuck to either end. I put PVC glue onto the outside of the front cover paper, fit that into place inside the cover, then put glue onto the back, and fit that into place. Then I put something absorbent (like kitchen roll/paper towel) in-between the cover pages and the first blank page to keep the moisture out of them, and I clamp the whole thing in-between two sheets of hard plastic. Or you can just as easily put it under a heavy book.
I hope that helps!
Wow, thanks for responding so fast! I totally get what you’re saying now, thank you! When you glue the decorative paper down to the inside cover though, do you fold it into the little crease indent between the spine and the book cover? (That little room left so the book can hinge?) I feel like it’s essentially like gluing down the first and last pages to the inside of the covers, but when it dries, it will rip when you open/close the book. That is the effect I’m getting.
I also have little pieces of binding tape that I glued over the 4 stitches of the signatures, which, I think might be messing me up. They are sticking out a little, but my friend told me to leave them. Are they unnecessary?
I took a few pictures: http://www.cadiebelardo.com/bookbinding.html
I’ve practically ripped the book block off the spine trying different things lol…this will definitely need to be redone. I feel that as long as I end up understanding it, it was a worthwhile sacrifice.
So yeah, I understand your instructions now, but for some reason I still can’t get it to not crinkle! I was trying to use 110lb cardstock…too stiff maybe? I’m a little embarrassed to be posting this, its such a silly problem!
Oh, it’s not silly at all. It’s taken me years to sort out my process, and still I’m at a point where I’m going back to square one to teach myself the basics again so I can get a better result. Some people are great with instructions and love fiddling with all the little details, but I just want the result. As a consequence, some of the finer points escape me until I’m ready for them.
That binding tape looks awfully heavy. I don’t use anything across the pages like that. The instructional book I picked up at xMas has instructions for sewing across tape like that, but theirs is like gauze, not heavy material like that. Sure, if you were sewing up some giant Gutenberg Bible or skin-clad Necronomicon you might need that, but for a small book I’d think it would just get in the way.
As for the spine, the temptation is to glue the book to it, but practice has taught me that, no, the book should sit forward from it, so it’s further out than (and clear of) the crease you mentioned.
At first I wanted to fit all the pieces of the book tightly together, but I realised you need margins of about 5mm between everything — the spine from the covers, the book block and the edge of the cover, the cover from the inside edge of the book block, etc.
Sorry, it’s difficult to describe this!
I want to update this whole thing this year, do some kind of detailed webinar, but in the meantime, I hope this description will suffice.
Hey Hamish, apologies for the misspelling. It’s amazing what an extra ‘m’ can mean! thanks for the tips I’ll definitely try those. Keep on sharing the way you do, generosity always pays back: pressed down shaking together and running over(Luk 6:38)
Thanks for your comments, Gary. (Strange: I was just alerted to them now.)
No, I don’t use a sewing frame. It’s a bit embarrassing to admit at this stage, but I still don’t entirely understand what they’re for or what the advantage is of using them.
I’ve become online, virtual friends with an author in the US who also produces his own books — and does a beautiful job of it. He’s posted sewing and binding PDFs on his website which contain very clear photographs. You can find them (and his lovely fiction) here:
http://www.kvasirhousepress.com/
The link to KvasirHousePress.com is interesting if you want a soft cover, but it doesn’t explain how the mull (or mesh, as he describes it) protects the end papers of a hard cover book.
When I glue the mull to the spine the glue takes away the small gaps between signatures that result when you sew the signatures together. However it is the strings (or fabric tape, if that’s what you’re using) and mull that actually hold the book to the hard cover casing. The PVA glue just finishes the signatures nicely.
I use a sewing frame because I like to make hard-bound copies of my books. The sewing frame holds the strings in place on the spine of the book block while I sew the signatures together. I call these strings “Spine strings.” Take a look at this link to my favorite book “The Complete Book of Bookbinding”:
http://books.google.com/books?id=LZoDLUDYbFQC&pg=PA40&lpg=PA40&dq=%22sewing+frame%22+signature&source=web&ots=-y249GjK-2&sig=CkZGvBxDClS4TfGoktsPQxsNfm8&hl=en&sa=X&oi=book_result&resnum=5&ct=result#PPA41,M1
I don’t use a kettle stitch when sewing the signatures because there will be no support strings left to extend between the book board and the decorative end papers.
The post earlier about the binding tape caught my attention. Binding tape helps keep the decorative papers (end papers) from tearing. The tapes (and the mull) take most of the stress at the hinges so the end papers don’t tear over time.
With a hard cover book, the book block is smaller than the cover by a quarter inch (or so) on three sides (the fourth side being the spine.) So when the book sits on your book shelf, the book block is essentially hanging in mid-air. So the end papers need extra strength to support the heavy book block. So the mull and the strings/tapes provide the end papers that strength.
So if you want to make a hard-bound book, use a sewing frame. If you’re making a soft cover book where the cover is cut flush with the book block, you don’t need to worry about anything I just said. Hamish’s explanation says it all.
Hope that helps.
Brilliant! Thanks, Jennifer.
So there you have it.
Your Handbound hardcover instructions are amazing. I was wondering, though, what material you used for the cover of your books? In the picture it looks cloth-like.
Thanks, Kayla.
Yes, it is, in fact, cloth-like. Whenever I’m back in Toronto I go to The Paper Place and buy a roll or two of their “book cloth”. It’s cloth with a paper backing on it.
I tried to use just plain cloth one time, but when I glued it, the result looked… well, “Monica Lewinsky’s dress” might be a bit graphic a description, but that about covers it.
Very nice sussestions given and very helpful for print production students…. Thanks a lot.
Just a note to say thank you!
May the Gods of ink and paper, writing and prose, and of books and print Grace you with the joy and wonder suitable for an angel like you!
Thank you, Gracias, et al!
BG
Gosh! Thank you!
I plan to put out an updated version of this guide as a series of podcasts soon, so if you liked this, I hope you’ll find that even more useful.
I am very appreciative of the free knowledge you have offered here on this site. I hope you can help me with a paper issue that has me banging my head against the wall. I am in the process of getting all of the necessary equipment in place to print and bind my first book. I would like to use a type of book paper resembling that found in most novels. Do you have any advice?
Thanks in advance from deep in the heart of Texas.
Funny you should ask: I wanted that, too, the look of “paperback” paper. After much searching, I found an unbleached paper that looks like the pages of a pulp novel. It also folds better than the heavier writing paper I was using before.
I don’t know where you’ll find it in Texas, but it’s made by Xerox, so you should be able to source it out. Here’s a link to the place I buy mine from, which will provide you with some terms and images to look out for in doing a search:
http://www.greenstat.co.uk/storefront/evolution_product.html?Product=Recycled-Off-White/Grey-Copier-Paper-A4-80Gsm-122278&idProduct=122278
And congratulations on your project! That’s very exciting! Drop me a line via hamishmacdonald.com when you’ve made your book; I’d love to see it.
Hamish,
I have read and reread what you posted here, almost since you put it out there–what an incredible resource it has been for me. I printed (with my Epson inkjet) and bound my first novel and it was an awesome project, thanks to your help.
Recently I purchased a dell laser printer, with duplex capacity, and after consuming a cartridge of toner, I still haven’t been able to get it and MS Word to play nicely, and I’d rather spring for a better printer than a new word-processing program.
I know you have a Kyocera; what model is it? I was also wondering if you knew of any other brands and models that will do the job. I’m just dying to bind my new novel, and was hoping you might have heard from other DYI people what printers might be compatible.
Your time is valuable, and I hate to impose, but thanks in advance for any help you might offer.
Gratefully, Bridget
Thanks, Bridget!
My Kyocera is an Ecosys FS-1030D, and I’ve been really happy with it for a while now. I’ve had a bunch of others whose makes and models I don’t remember now (Canon, Brother…), but this one has proven to be the best, first because it can do the duplex printing I need and is relatively quick, and second because there’s only one part to change — the toner cartridge; they’ve made the toner in such a way that it actually polishes the drum so you don’t have to worry about changing it, and there’s no waste toner cartridge like on the horribly wasteful Xerox colour laser printer I had when I wrote this article). The cartridge is also quite small despite its capacity, in keeping with the printer’s “eco” theme.
I’m sure there are others, but this is the one I know.
Good luck with your book, and feel free to get in touch with me with pictures via hamishmacdonald.com when you’ve finished some — I’d love to see them!
I’m also working on podcasts to teach people all the things I’ve learned, so if you (or any of the other posters) would like to share your “DIY Book” experience in an interview, that would be great!
All the best.
Hey everyone,
I am trying to find a good, paper-back book cloth that comes in rolls that I can run through my Epson 4000. Does anyone have any suggestions? I used to buy Waterfast Polycloth from Ink Jet art but they stopped carrying it in rolls. Any advice is very welcome!
Jerad
Hi
I’m so pleased I stumbled upon this website quite by chance – it is really inspiring!
Last year I self-published a directory using an offset printer. I love the idea of being able to produce my own book.
I hope to publish the directory again this year – it
is perfect bound, A5 size – 132 pages – 500 copies.
After reading loads of the posts here – I’m a little confused as to what would work best. About half the book is colour and the other half black and white.
I’m thinking of
– getting a colour printer – one post recommends the Cannon i865.
– paper – would I use any local paper merchant – for an A5 size book is A4 paper best – but then what do I do about a heavier paper/card for the cover – does that need to be A4 too or larger and can it be printed by the same colour printer…
– cutting – what kind of guillotine – or do you think a local print shop will do it?
– what about collating all the paper?
– I use In Design to typeset and design the book – would I still need the clickbook software?
– a thermal binder sounds interesting but how would that work
Thanks so much
Stephanie
Hi Stephanie!
So, first — 500 books! Much as I like to promote DIY publishing, this job sounds like it’s a bit big for that. The way I figure it, making 500 copies of my most recent novel would take me from two weeks to a month if I worked on it full-time.
I’m just sayin’! But if you want to do that, wow!
Now, to your specific points:
– colour printer
Depends what your needs are. I’ve got a Canon MP510 (scanner, printer) and like it. But most home printers now can print with near-photographic quality. But my one big warning — especially if you’re doing a job this big — is not to print high volumes through a printer like this. The ink literally costs more than perfume per ounce, so for a big run, a laser printer is the thing to use.
– paper
Again, it depends on the look you’re going for. Regular copier paper (the kind you can buy in reams of 500 sheets) is fine, but won’t produce nice colour images. Most paper of that type has a weight of 80GSM, which is fine, if a little on the heavy side. If you don’t need a fine finish on the pages (like for colour images), go with a lighter stock if you can find it.
– cutting – what kind of guillotine – or do you think a local print shop will do it?
Again, for a large job like this, you won’t want to be messing around and ruining copies with a cheap trimmer. I’ve got a heavy-duty “blade-arm” guillotine I got off eBay. Even at that cheap price, it wasn’t cheap. Like you say, the local copy shop will probably have one and be good at using it.
– what about collating all the paper?
ClickBook for Windows will arrange the pages properly. I’m using PDFClerk on the Mac, and with that I have to manually re-stack every other page. It’s time-consuming; I won’t lie.
– I use In Design to typeset and design the book – would I still need the clickbook software?
Unless inDesign has an imposition setting, but I don’t believe it does (I haven’t used it much, or for a while). There might be plug-ins, as with QuarkXPress, but I know the Quark ones cost thousands of dollars.
– a thermal binder sounds interesting but how would that work
I looked into this and never found a solution I liked. It involves buying pre-glued folders of set sizes, then using a machine to hold your pages and melt them into the spine.
I hope this helps!
Hey, gang! I’ve posted the first podcast in my new “DIY Book” series, which is going to cover everything I’ve learned about writing, making, and selling your own books. You can get it here:
http://www.hamishmacdonald.com/DIYbook/DIYbook.html
Oh, Hamish, you are an angel! This information is exactly what I was hoping to find. It’s enough to birth a book – then to have to struggle or pay hugely to see it in 3D …. THANK YOU!
Thank you so much for this introduction to book binding.. i tried it for a project of mine and it worked out brilliantly…. i have you guys to thank for that… so once again thank you for your help..
🙂
Oh yay! That’s very exciting (both Leiah & hax’s projects). I’d love to see ’em if you’ve got pictures posted anywhere.
You have produced a load of useful information here. I’ve been binding my own stuff for some time and I have learned a few things from you. I build perfect binding machines from my home and sell them all over the country. I don’t want this to sound like an ad, but I thought some of your readers might be interested.
Thanks so much, Kirk! I don’t think it’s a conflict to mention your perfect binding machines here — we are talking about the best ways we’ve found to get the job done. Personally, I’d love to see ’em! Got an URL?
Wow! I am so excited I stumbled accross this forum; thanks so much for making it available to everyone! I am in Indiana, USA, and I will be self-publishing and creating my own books soon! Again, thanks for all the great information, and the great hints from your other readers!
Thanks, Marion (on behalf of all the contributors to this page). I’d love to see your books when they’re made!
thank you for this website very much it has been very helpful to get this information from someone who is actually an author himself and knows what another self publisher really wants to know throughout this whole site. But i have a question for anyone who is willing to answer at any time you may come across this blog. Q?: What type of software is best suited for designing book covers as well as book cover templates? I’ve decided to rule out bookcover pro it lacks the creative freedom that I need, it’s too basic.
These days, I use Apple’s Pages for both the insides and the covers of my books. Any program that’s capable of doing page layout from a blank canvas can do the job for you; you just have to do some measurement, and take a look around for the standard features you should include (title, author, blurb, ISBN, barcode — the list is pretty basic).
I didn’t know about any dedicated cover design software. Yet another market for cashing in on writers’ ambitions. Having looked at that package, I agree with you: a template-driven program is the thing to use only if you want to create a book that looks exactly like every other spiritless title cranked out of a publishing machine.
If graphic design isn’t your thing, you might be able to team up with someone to do a cover design for you. There are sites springing up like CrowdSpring.com (though it’s down at the moment), where designers all create a proof for you, you pick which one you like, and just pay that designer.
Here’s a helpful page I found recently; it discusses all the parts of the *insides* of a book:
http://www.thebookdesigner.com/2009/09/parts-of-a-book/
And this is the wonderful Book Cover Archive, if you’re looking for inspiration:
http://bookcoverarchive.com/
inkveins,
There are a few decent open-source (free) programs available online. If you can get your head around vector graphics, Inkscape works well. It is a poor man’s Illustrator. Gimp is another free program that may help you out. It is similar to Photoshop. You can shoot me an e-mail via my website if you have any other questions.
thank you guys very much that has been helpful, but it’s that barcode that gets me, would those programs allow me to insert that? how do i get it on there? quarkxpress8 just recently went on sale for a good price i was also looking at adobe’s cs4, would those be good programs to use for book covers as well? i have click book but i use that for the interior.
Good Lord, if you can afford QuarkXPress or InDesign, don’t bother looking at anything else; these are likely the same apps used by most commercial book designers. But you can find lots of lower-priced or free alternatives if you don’t want to spend thousands on one program. Anything that will allow you to freely compose a document on a blank page can do it.
As for the barcode, there are also lots of sites that will generate a print-ready version for you for free, like:
http://www.terryburton.co.uk/barcodewriter/generator/
…So don’t get suckered into paying for it. Depending on who provides your ISBN, you may get print-ready art as part of the deal. Here’s a guide to the various agencies around the world that can issue ISBNs:
http://www.isbn-international.org/en/agencies.html
ok wow thanks, but it isn’t thousands i don’t know if i can say it on this site or not but quarkxpress8 is $200 and adobe’s cs4 is $400 if you get it from academicsuperstore.com but if there’s really no difference i’ll go for quarkxpress8.
If you don’t mind dropping the cash, I would suggest the CS4 Suite. The Design package includes Photoshop, Illustrator and InDesign (much easier to use than Quark IMHO). I use the Adobe package all day long in my real job as a graphic designer. I also use a great little program called Xara which is PC only.
ok thanks my head has been spinning with this stuff, xara has a good price but it seems like another version of photoshop which i already have.
I’ve had a look at that site, and it seems legit — but you have to have proof that you’re a student. If so, wahey!
As Kirk said, the Adobe suite is the industry leader. I’ve used those programs in the past as a graphic designer, but now I’m printing from home and £1,500 is just a mad price to pay for software. I’m perfectly happy with the results I get with my wee iWork suite for £69 and a couple of bitmap and vector programs I’ve bought for about £50; I honestly have everything I need to do layout on a blank page right there.
The conflicts and limitations will start creeping in if you’re moving on to offset or other large-scale printing, but… that’s not what most people on this page are up to.
By the way, if you’re on this site and looking to do your bookbinding at home, click on Kirk’s name and go to his site (atomicpublishing.net). He makes an all-in-one bookbinding “machine” that is the dog’s bollocks. I’m producing all my paperback books now.
Erm, sorry, I meant “that’s how I’m producing all my paperback books now”.
yeah i am a student so i really try to get the most bang for my buck as often as possible but i got my clickbook from there so they are legit. i checked out http://www.atomicpublishing.net for the binding machine and it seems like a good product for the right price because the other guys i’ve looked at i thought were a bit too expensive for the same machine, i was almost ready to go to home depot and make my own, but i’ll definitely be purchasing from there, i don’t think it will get any better than that.
When you refer to “a completed, typeset manuscript on file to upload” (see your section on offset printing) are you talking about the manuscript typed in a special software program like Adobe Indesign or Pagemaker, or “Microsoft Word?”
I am under the impression that I have to take my already completed book typewritten in Word on my computer and transfer it to some print-ready software like Pagemaker, etc. IS THIS CORRECT?
Hi Does anyone know where I could get hold of some thermal binding glue strips – I’m looking for a supplier in the UK.
Have you heard about that new Espresso book publishing machine? What do you think of that?
Yeah, they’ve been around for a couple of years, actually (I think they’re on to Version Two now). They’re a great innovation, although they cost about (*checks*) half a Lamborghini… so I’m not quite sure who buys them.
Those are pretty cool machines, but I would hate to part with the half Lamborghini in my garage.
Which goes “Vroo–!”
Hey,
First off – Love your site! It’s a great resource for self-publishing; so much information.
I’m about to start self-printing in the coming months – can you recommend a paper that looks and feels like standard paperpack grade paper? You know the type – lightweight, has an almost embeded grainy texture, off-white but not dirty-yellow? I know it comes on huge reams in print shops, I was just kind of hoping they’d be available like regular A4 xerox paper packs?
Covers. For a long time I was considering Lulu. And then I ordered from Lulu. The book turned up on blindingly bright white paper… which looked and felt kind of… weird. And the cover was a shiny, thick stock that felt like a school text book. The overall impression was that the book belonged in the 70’s… which was a shame, because the content wasn’t half bad. Covers. I’m thinking matte. Can you recomend any card stock and, more importantly – printers, that can handle the job (with a pro finish)? When I say pro finish – think the Penguin Modern Classics range you can find in your local Waterstones – lightweight, floppy books; kind of edgy and almost indie looking. At the same time – totally pro!
NS
Hi, Nick.
Finding the proper paper is sort of the Holy Grail of do-it-yourself publishing. I’ve had some luck with a few papers. I currently use two types. If you have access to a paper cutter, I recommend 50lb sketch or drawing paper. It has a nice rough texture and is slightly off-white. Believe it or not, I buy spiral-bound acid-free pads from Big Lots (a cheapo discount store in the US). If you don’t have one of these stores nearby, try your local arts supply store.
I have also been using a 70lb Durotone white newsprint from French Paper. The newsprint isn’t as heavy as the 70lb label implies. It is a bit smoother than the art pad, and a bit darker, but comes in letter-size sheets. It’s expensive, though.
For covers I use an 80lb Lustro Cream. Sadly, this has been discontinued by the manufacturer, but certain varieties of Mohawk 50/10 are similar. Kromekote Plus Cover C1S is also quite nice and a bit glossier. Not all laser printers like this stuff, though.
Hope this helps.
To highlight something again and give credit where it’s due, just in case, I (Hamish MacDonald) wrote this article, but the site was created by Jim Munroe.
Okay… paper!
First, hello to my man Kirk — thanks for your helpful suggestions here. If anyone here’s looking to do paperback binding at home, you’ve got to check out his Atomic Binding Machine (atomicbinding.net). It’s the dog’s baws, as we say here in Scotland.
I’ve discovered a wonderful, pulp-like paper that I now use inside all my novels. You can buy it in the UK in reams for a decent price from this shop:
http://www.greenstat.co.uk/storefront/Steinbeis-PureWhite-Recycled-Copy-Paper-A4-80gsm-P-122279
It’s a “pulp novel” style paper that’s made from “de-inked low-grade post-consumer waste material, which is generally in low demand and hence more likely to be consigned to landfill. It’s 80gsm paper passes the Blauer Engel/Blue Angel certification”. It even comes with Greenpeace’s stamp of approval.
As for covers, I use black cardstock (with the title and my logo printed on it with a rubber stamp using white ink) then wrap an overleaf of printed matte photo paper around it. That way I can guillotine the book and not mind so much how the spine gets crushed, ’cause it’ll be covered by the photo paper.
My most recent book, Finitude, is about climate change, so I print onto a torn-edged piece of raw brown paper and wrap that around. All very recycled-looking, but that seemed appropriate to this book.
I hope that helps!
I wrote this article a while back. Since then, I’ve started a podcast, where I’m trying to unpack everything I’ve got in my head about indie publishing. It’s called DIY Book, and may be useful:
http://itunes.apple.com/WebObjects/MZStore.woa/wa/viewPodcast?id=330209475
Cheers!
Oops! I should have double-checked. Kirk’s site is:
http://atomicpublishing.net
Hi i have a book that i just want to make one copy of for myself, and so i was reading up on how to do bookbinding and i see in your explanation one of the first things you do is cut the pages in half, I’m guessing the size of the paper is A4 but i would like to know how this works, does the paper need to be in a format so that there are 2 pages on 1 sheet? This is the only thing im not sure about because my book is currently in word saved on A5 size paper. so what should i do before i print off my book? Any help would be great since i don’t want to print out all my pages and then waste so much paper since i started off completely wrong
No worries! You have two options here. Either stick with your A5 formatting and load your printer with A5 paper (which is just A4 cut in half) and print to that.
Now, I had some trouble when I did that because, while my laser printer tray could be adjusted to accommodate A5 sheets, they didn’t feed very nicely, so some pages got skipped. It was not fun trying to go back and reprint selected pages.
The alternative is to change your page setup to A4, resize your text (making it bigger, because the pages are going to be shrunk in doubling them up on one sheet), and print it out so they pages are 2-up — in other words, so the paper is in “landscape” orientation (the long edge on the top and bottom).
A lot of printers come with built-in settings for printing this way, calling it something like “booklet printing”. The one challenge with booklet printing is that it’s based on the idea of *all* the pages being stacked together in a V and stapled or stitched down the center fold (like a magazine). This should be fine if the book is short. If it’s long, the pages will creep further and further out toward the middle and it’ll be as hard to close as a screen door in the wind.
The solution to this is “imposition” — using software to number and print the books so the pages are printed on a “portrait” page (long edge on the right and left) with two pages on top, two paged on the bottom. Then I cut the paper across the middle horizontally and fold them. Then the pages are stacked one on top of the other, each folded singly, not together.
If you’re on a PC, ClickBook is a great, affordable option for doing imposition of every conceivable sort. If you’re on a Mac, stay away from it like it was a bag of Nile-born mosquitoes! There are options for the Mac that range from free (Cocoa Booklet and Cheap Impostor — the latter is great!) up to more expensive apps like PDF Clerk Pro (the one I use) or Imposition Wizard (which I just can’t figure out, and is ten times the price of PDF Clerk Pro).
I hope this helps. Actually, this is exactly what I’ll be covering in the next episode of my podcast — Episode 15. Except I haven’t made it yet. When I do, it’ll be available here:
http://www.hamishmacdonald.com/books/DIYbook.html
I love your article, the examples in drawing together with your immense reply to all questions in this website. I have question please HELP me, (if you know how to do it).
I have about four books, they’re very old and i cannot get those somewhere else to buy. So i don’t want to lose them, therefore i want to scan them to my PC and save or convert them as Ebook and save them in CD.
Someone told me to use OCR software after scanning, but i noticed that OCR is only recognized text. Two of those books of mine has colored photos and some colored text. I’ve been searching how to edit them after scanning… but all to no avail.
I hope you understand my question? Thanks for your urgent reply
Well, you’re absolutely right about the process of digitising a book: Your computer, via your scanner, scans each page — saving merely a picture of the page. To be able to edit the book, you have to convert the pictures of the pages into editable text by means of an OCR application.
I don’t know what the one that came with your scanner is like, but I’ve never used a totally reliable OCR program. Often the shapes of letters get interpreted wrongly, so, for instance, “colour” could be read as “cdoiir”. Sometimes the OCR just goes bugnuts crazy and produces something like:
“‘iF-//@!!hS”’.ns:’”.
There is no one format for e-books, just a couple of different files like ePub and PDF. You could make an e-book of your scans by collecting them together into a PDF, but if you want to edit the text, I’m afraid you’re going to need to either OCR them, re-type them, or do something that translates the book’s analogue text into digital text.
Scanned photos will be editable in a graphics program like Photoshop or Gimp, but can’t be edited within a page. In other words, you can scan the picture, edit it and put in into a page layout again, but there’s no one program that will let you edit the graphics in the middle of a page of text.
There’s also no definitive method of distributing books on CD, so what you’d be doing is saving an ePub/PDF/whatever file onto a data CD, and the same constraints and methods would apply to that process as to saving it to your PC.
Sorry to not have better news, but what you’re looking to do is rather complicated. We don’t have simple methods for entering books into computers the way we do with music CDs — well, unless you have the money to buy something like this:
http://booksnap.atiz.com/
Hello Hamish,
I am proberbly right at the bottom of the tree as far as getting my writings published, However, after many of my freinds encouraging me to give it a go, I finally (20 years forward from my first writing)picked
up the phone to talk to a publishing agent. I am not impressed with what he had to say,within two minutes of talking to him ( and without him even seeing my work) he was more or less telling me I would have to practually sell my house raise enough cash to publish
a book.Not that I want financial rewards for myself .
My idea was to give any royalties to ‘Help our Heros’
I have just retired at 71 years old so I find your web
site very helpful and having time on my hands I will give self publishing a go.You sir are an inspiration
to all the youngsters out there trying to publish.
Thankyou….a truly brilliant and unselfish person.
Gordon F Coggon.
DONCASTER
Hi,
I often print ebooks.
I have a great program for printing booklets (PriPrinter) and I could print a big ebook in sections (“signatures”?).
Since the printed ebook is just for my use, is there a quick and dirty way I can join the sections together?
I do not need a hard cover.
Thanks,
Dave
Rochester NY
i had click book and it gave me a problem,, then refused to work after a while,, could you tell me of any similar programs that use the 5 by 8 book fold,, and have a decent font size that people can read,, microsoft prints nearly size 10 all the time, and it turns it to a four page book,, do truely need a book program with a 5 X 8 type format that lets page 2 come on the back of page 1 thank you for any and all help in finding an easy solution.. heidi foley
Hi Hamish,
I’ve run into a bit of a pickle finding a self-publishing printing house to print my 14-page children’s book with 14 pages. The min. page is “24”. The crazy thing about it is, I know they do it!–I’ve seen the 14-page hardcover kid’s book on the shelf at the major retailer. So, my question to you is where could I go to get what I’d like printed without of course the astronomical pricing? Thank you in advance.
Cheers!
Misti
Hi, Misti. I’m sorry, I don’t know anything about working with commercial printers. My first book is the only one that someone else printed (a small press in Toronto), and my whole thing since then has been about doing it all myself.
The 14-page book you’ve seen in a large store would likely have been produced by a major publisher who has contracts with their own print brokers and would be doing a massive print-run of tens or hundred of thousands of books with them, so the economics and requirements are entirely different to what they are for an individual who wants to produce far fewer books.
I’m assuming your children’s book is full-colour, too, which is also an expensive proposition.
I’m really not sure how to advise you. If your dream is of major distribution and sales, perhaps the thing to do would be to mock some up yourself as a model to show publishers who could afford to pick up such a book and produce it. If you’re just interested in reaching your community, a short book like this would be an excellent candidate for DIY publishing!
wow! thank you, very informative. I’d like to know, do you have any idea on how I can make my own boardbooks? you know, like those thick children’s books? I’m wondering what sort of paper they use and glue and how they get the pages cut so evenly. Would you know if they have to use a laminate for that?
Hi, Kathryn. I’m sorry, I don’t know anything about the production of board-books. I do buy a similar paper for using inside the covers of hard-bound books, but I don’t know what the process is for sticking paper to it and laminating it.
As for cutting the pages, I imagine these are produced on an industrial scale, with die-cutting machines or big guillotines.
I need to get friendly with a print broker who can answer these advanced production questions!
Hi Hamish,
Been toying on and off with the idea of publishing my own stuff for some time now, but only recently was motivated to move ahead.
Several months back I came across “Clickbook” which helped me kick-start the process into high gear–they just launched a new version this month with a better interface and neat new features.
Secondly, I recently came across your nicely presented article and was amazed to find there are so many like-minded souls around, as demonstrated by the multitude of responses you get.
A special thanks to you for initiating this lengthy and friendly discussion and to all posters who contribute to this knowledge base.
Regards.
Thanks very much! I really miss ClickBook: I switched back to a Mac a few years ago, and the Mac version of ClickBook is awful — dated interface, and some critical bugs that make it unusable. I’ve been writing to Blue Squirrel for years and they still haven’t done anything about it.
I’m happy you’ve been able to move up a gear, though! I’m very glad if the conversation here has helped you make this idea a reality, and would love to see anything you’ve come up with.
(I finally threw out my first book-attempt when moving house recently; it was a dog’s breakfast, but it got me here, so I’m grateful for what it taught me — just not grateful enough to keep it lying around!)
I wrote this article a few years ago; since then, I’ve started a “DIY Book” podcast, in case anything in it might be helpful:
http://www.hamishmacdonald.com/books/DIYbook.html
Cheers!
Yes, first efforts are often less that stellar. My first attempt at gluing a book spine went with the wind, so to speak. I mistakenly used “wood glue”, but after a bit its brittle nature caused the pages to fall away. I recently found that Elmer’s FixAll flexible glue did the better job.
Just bought a Brother HL 2170W mono laser printer
and wonder what your experience has been with 24 LB paper weight for final output in terms of paper curl, or other issues. These lasers run hotter than a harlot on a Saturday night!
Did you ever get to visit the annual Word-On-The-Street event here in Toronto?
Regards
Hee! I do get back to Toronto about twice a year, but I never seem to be there when Word on the Street happens, so I’ve never seen it. CanZine really impressed me, though, when I went there back in the day with Jim and others when I was first self-publishing.
When I left Toronto, I criticised it as being just “a giant mall”, but now I go back and appreciate the powerful indie/creative community that thrives there.
As for paper, my preference these days is to use pulp-novel-looking recycled paper. Its weight conveniently feeds well through the laser printer and it folds well. I can’t picture what 24lb is like — we have GSM here. The paper I’m using is an 80GSM, which is about standard for office paper.
There are pockets of creativity here and there, but your comment on the city does have merit because, sadly. far too many small business shopping areas are being swallowed up by voraciously predatory mall builders, as well as by a rapidly expanding army of “fast buck” condo towers.
As for paper weights, this is what I found elsewhere:
“Use paper that is 75 to 90 g/m2 (20 to 24 lb)”
Regards.
I understand that CreateSpace.com provides on-demand publishing at very reasonable rates. A career counselor who spoke to our writing group gave the following scenario: She created her book with MS Word, created her own simple cover graphics/text, and saved both to PDF file format. Then she opened a free CreateSpace account, uploaded both, and generated a printed sample book for review for $10. After reviewing is, she made formatting changes to her PDF’s, updated them online, and generated another printed sample book for $10. Happy with this, she published. CS told her the raw printing cost for her 160-page book with some diagrams would be $4. For free, CS then obtained an ISBN number for, created a CS bookstore site for the book for her and also created an Amazon bookstore site for her. She set the retail for the book at $17.50, accepted what sales she might from the CS and Amazon sites but also ordered 50 copies of the book for herself for $200 and sells them from her professional site for $13.50 profit. Total out-of-pocket to get to this point (other than her sweat equity involved): $220.
Seems a reasonable DIY cost to me.
That sounds like a good option for people who don’t want to go completely DIY, or for anyone who needs to produce a large number of books quickly.
I’ve searched around and read some pro and con arguments about CreateSpace. Lightning Source seems to be the industry winner for low-cost large runs, but they don’t provide any hand-holding; you have to know what you’re doing in setting up a printable manuscript and cover. CreateSpace sounds like it competes well with Lightning Source on the price of small runs, but in typical Amazon fashion don’t give you any way to contact a real person.
Here’s a taste of users’ experiences:
http://jeremykeller.com/2010/01/23/the-createspace-issue/
http://forum.rpg.net/showthread.php?t=481004
There are lots of PoD companies appearing these days, and it sounds like Lightning Source, CreateSpace, and Book Surge provide a quality service to publishers. But there are also lots of “author services” companies springing up who offer to helpfully lift away all those odious post-writing tasks — layout, production, listing, marketing — from the author’s shoulders and turn them into someone’s who’s “published” (passive voice). With every level of their involvement come additional costs, and I’ve heard some sad stories about authors being suckered. Their ambition, inexperience, and wish to be “chosen” by some large outside entity left them vulnerable to unscrupulous vanity press companies.
Print-on-Demand doesn’t have to be like that, and increasingly it isn’t. But it’s not the DIY activity I was talking about in the article — where the creator learns to have the power to create the book in its entirety without having to engage with corporate entities.
I readily admit that the “DIY Book” model doesn’t scale well, but it’s a good way to experiment with creating books and connecting with one’s community of readers without jumping into illusions of “I will sell millions and millions of copies and become rich and famous”. Because writing and publishing books is really, really not the way to do that.
All of which is beside the previous poster’s point, which is that there are readily accessible, affordable, relatively simply commercial means for authors to produce hard copies of their books.
For anyone who might be interested, I’ve just posted a guide for making the very cheap and very easy yet mightily powerful “DIY Book Press” that I’m using now (PDF download):
http://j.mp/aRmovn
It also contains instructions for using it, but it’s probably easier to get it from watching the video in my podcast. That and the rest of the series is here:
http://www.hamishmacdonald.com/books/DIYbook.html
Very cool Hamish! will be trying this in a few weeks
I’m creating a short book for my mom for Christmas. I plan on it being around 100 4.25 x 7 size pages. (So about 50 printed pages.) Would the self-binding method still work for me? I also wanted to use a piece of embroidered fabric as my cover design, would this be workable>
Any advice would be greatly appreciated!!!!!
That sounds like a really great gift!
Yes, absolutely, you could bind a project like this. There are a number of ways you could go about it. The fabric cover might be a bit more of a challenge, as you’ll have to fix it to cardboard to make a cover, and glue tends to seep through fabric.
I’ve posted some videos of different bookbinding methods as part of my “DIY Book” podcast; they’ll do a better job of explaining how you could do this than I can here:
http://www.hamishmacdonald.com/books/DIYbook.html
Have a look at episodes 15-18 and the “Perfect Binding Supplemental.”
I hope that helps!
I just found this site last evening, right after we went to pick up an HP laser duplex printer that works for $50!!! Including a new toner cartridge still sealed in the original HP box!!! What a deal, saw it for sale on Craigslist. Chet Novicki (Gigabooks) has been an awesome help with his materials, books and book press. I have been practicing binding by making blank journals for sale in my flower shop. That way I should be better at it when my book is finished. I am looking at an Epson 1400 photo printer as it will print larger sizes of photos for the one piece covers. I am an Epson fan due to the durability of the inks.
This is a great site full of information! Thankyou.
That’s very exciting, Debbie! I’d love to see some of your creations.
Just to add another possibility, I’ve seen lots of handmade books for sale on Etsy.com. It’s like eBay for crafts, and it’s easy to set up a store on the site to sell your stuff. The books I’ve seen there range from very basic, looks-like-they’ve-been-made-with-a-kit ones to high-end, master bookbinder tomes I could only hope to match some day — and they’re priced accordingly!
Meanwhile, good luck with your book. Funny you should mention having a flower shop, because that’s the real-world business example indie author Zoe Winters always uses to make people reconsider their position on self-publishing:
“I wonder if people like this think that every entrepreneur is a lazy narcissist. What if I decided to open a flower shop or a restaurant, or a bed and breakfast? Would there be a single person who assumed I was just a ‘lazy narcissist’ who wasn’t ‘good enough’ to work for 1-800-Flowers, manage a McDonald’s, or clean rooms at a Hilton?”
http://zoewinters.wordpress.com/2010/09/18/lazy-narcissists/
Thank you for the tip on Etsy and the wish for good luck with my book! I am having a lot of fun with this whole thing. As far as Zoe’s experience with people thinking a self publisher is perhaps a lazy narcissist…….a lot of people just don’t understand anything other than the old 9-5 grind and “paying dues”. Often people are frightened to demonstrate their skills in anything outside the traditional environment of working for someone else which seems a great pity. Some of these same people are the most envious of anyone who works for themselves or even enjoys an after hours pursuit that allows them a bit of freedom, expression and enjoyment. Fortunately, I stopped paying attention to any of this many years ago. Anyway, there are those who have offered their “two cents worth” on that subject: owning and operating a successful flower shop is merely a “silly indulgence”, must be “just a hobby”, “couldn’t possibly make any money at it”! This just goes to show there is no shortage of individuals who will attempt to rain on your parade, for a variety of reasons, if given the opportunity. That’s why we “lazy” people have to keep our smiles, umbrellas and Wellies handy by!!!
Really? Even when you have something as tangibly real as a flower shop?
Well, it’s as you say, but I like your pluck! If you ever post pictures of your books anywhere, let me know — I love seeing what others are doing.
Cheers,
– Hamish
Hello! I came across your site while searching for a book press. I was quickly distracted 🙂 I’ve always wondered how to bind books using signatures, but couldn’t find a good reference. I’ve only ever used stab book binding but now that I’ve found your page I want try my hand at this method. Thank you for sharing this!
–Bev
Bev, I’m happy you found my article and the other resources on Jim’s website, and I hope they’re useful to you!
Since writing this article several years ago, I’ve been running a podcast on iTunes which goes into greater depth about — well, all of this stuff — and it also includes some videos in which I (attempt to) demonstrate the binding methods I use. It’s here:
http://www.hamishmacdonald.com/books/DIYbook.html
Cheers,
I’m very happy to find your site. Most of the basics I’ve already done in the past but it’s so good to see it explained and taking root as an option for people.
The method I use is to plunk my text into OpenOffice setup for A5 size pages (with a footer containing a page number). Then I save that as a PDF file (built in). I open the PDF in Acrobat and it has a booklet print mode where you can choose fronts/backs/duplex and it will impose the pages to whatever signature sheet count you set. I print from Acrobat to my laser printer the finished, imposed pages 4 to a sheet. This has been working great and is all free and easy to do.
Incidentally I’m in Thailand and printing photos on Fuji Crystal Archive matte paper here is very cheap. Whereas it’s $3+shpg for an 8×12 online, it’s the equivalent to 40 cents here. So I’m planning on doing some full-colour covers using this method and hand-perfect-binding them. I think I may spray mount them to card stock so they’re a bit stiffer and don’t show the Fuji imprint inside the cover. This could also be done with paper board for nice hard covers.
Brilliant, Chris! Congratulations. Sounds like you’ve figured out a good process for yourself there. I’ve love to see pictures of the finished product.
We need a gallery for this stuff, and a forum for hacks and solutions we’ve figured out!
Hamish,
Thanks for this article. I first read it years ago when I was trying to print and bind some ebooks for reading on the subway and I’m glad to see the discussion is still active.
My own bookbinding activity lead to a website and a few video demos posted up on Youtube. I had no idea it would become such a big thing for me.
I came up with my own version of a binding jig a few years ago and posted pictures of it on the site. Folks might find it inspiring for their own projects:
http://www.diybookbinding.com/diy-book-binding-equipment-binding-jig-for-perfect-bound-books/
Keep up the great work,
Andrew Seltz
Bimingham, Alabama USA
http://www.DIYBookbinding.com
http://www.DIYBookForum.com
Wow, your website has a ton of great information on it!
It’s funny, after lots of experimenting I’ve come back around to using exactly the same sort of jug you demonstrate. In fact, I think we’ve taken different routes to arrive at roughly the same place.
It’s great that you’ve taken the time to document so much of your process and share it so well on the site. And a forum for people to share what they’ve learned — I’ve wanted to see that for a long time.
Kudos, and I’ve bookmarked your site to point people to it.
All the best,
– Hamish
Erm, I meant “jig”. The bookbinding JUG is for when it goes horribly wrong.
Hamish,
Thanks for taking time to check out my site (I appreciate the feedback.) I am actually in the process of a major overhaul to make it more attractive and easier to navigate.
I was reviewing content and checking links when I ended up back here.
You have done some really excellent work over at your site and it is inspiring my thinking as I plan the revisions to DIYBookbinding.com.
If you ever find yourself in Birmingham, Alabama let me know.
Andrew Seltz
Birmingham, Alabama USA
http://www.DIYBookbinding.com
http://www.DIYBookForum.com
Cheers! Yeah, and I’m happy to find that I don’t feel proprietary about this stuff at all. We’re all just passionate about this thing, and about letting others know that they have every right — and an easy opportunity — to create what they want on their own terms.
We’ve covered a lot of similar material, but I love that you’ve taken the time to lay it out in a way that people can read and apply.
(It’s funny that I went the podcast route, because I’m much more of a reader than a listener. I guess I figured it was that or a book, and there are already lots of books on the subject. And here you’ve gone and found a whole other path.)
Every time the proprietary urge wells up in me (and it does) I remind myself how much of what I know is built on what I learned from other generous people.
When I was at your site I was really impressed with the comment at the bottom of your store page about the paper you use (that should be much more prominent on the page.) It gives a very compelling reason for me to choose to do business with you – because we share a common concern with reducing paper waste even though we like physical books.
My whole journey started because I was trying to print out marketing ebooks without wasting tons of paper. The first solution was full sized sheets of paper, a hole punch, and 3-ring binders.
BTW, if you hire a freelancer to transcribe your podcasts, you will have the source material for a really nice book. 🙂 You can self-publish and the whole thing will come full circle!
I’ve done the whole audio-to-transcript thing before and been very happy with the results.
Andrew Seltz
Birmingham, Alabama USA
http://www.DIYBookbinding.com
http://www.DIYBookForum.com
Good point: I can’t take credit for any of the techniques I use, only for my experimentation in combining them. And it’s awkward describing the process as if it’s a fixed thing, because I’m forever changing it in hopes of finding better and better ways to make books.
As for the recycled paper, that was a happy accident: I was simply searching for paper that looked like “paperback” paper instead of typing paper. Now that I’ve been working with it for a while, I do feel good about the ramifications of this choice — especially since, as you say, we’re working with a resource that shouldn’t be wasted.
(Of course, if someone wants to make the argument for e-books being more environmentally friendly, I would feel compelled to point out the costs of the plastics, precious metals, and the electricity used to charge the thing — nothing’s simple anymore!)
I also take your point about turning the podcast material into a book. Maybe one day! There are a lot of books on the subject already, though I find much of the self-publishing instruction out there is about non-fiction/how-to books. And the instruction on writing is usually about “How to create what publishing companies want and sell it to them”, which a) rarely works, and b) is perhaps not the most rewarding aim for a creative writer.
So perhaps I’ve got an original mix of stuff there. You know what tires me out most in thinking about such a project? Taking pictures and doing the page layout.
Hm. I think I already hear you saying “So delegate!”
I will not tell you to delegate (even though it can be a big boost for productivity.) Instead, I will offer to help. If you ever decide to turn what you have into a training course – I will help.
The bulk of my work is how-to and educational in nature. At least, in part, because it is much more lucrative than fiction (I’ve got 2 daughters and wife to support.)
I have a friend who has two historical fiction books published by Penguin and the advances on those books were poverty wages when you factor in the years of work Christy spent writing them. And, she still has to do most of the work when it comes to building an audience.
The irony is that most of her sales are Kindle editions and the hardcopy editions sell mostly through online booksellers. You don’t need a publishing house to access either sales channel (I’ve already published through Kindle and am working on a paperback through CreateSpace.)
Your combination of content is distinctive and I’m sure there is an audience for a workshop-style course based on it. I happen to be good at the bit about setting up membership sites, e-commerce, and marketing etc.
If you ever want to do something like that, let me know and we can talk in more detail.
Andrew Seltz
Birmingham, Alabama USA
http://www.DIYBookbinding.com
http://www.DIYBookForum.com
Oh yeah, I stress to people that the more you can take the need for money, validation, or any other form of “salvation” out of the equation, the happier you’ll be as an author. I have a copywriting job I really enjoy, so I get to be “a writer” yet by being an indie publisher I also get to have complete freedom to do what I like without getting that tangled up in need.
In short, I am my own patron, and it’s a path I’d recommend to anyone. It takes a shift in thinking, coming into line with the way zinesters approach their world, which is as a community rather than a marketplace.
With this article and my subsequent podcast, I guess my intention was to expose other people to the wonder I felt the first time Jim Munroe, creator of this site, showed me his first book — the one before the big Harper-Collins novel — which he’d printed and bound himself. And then I wanted to show others how easily they could get started.
I think there is room to make that more of a course — not purely for financial reasons, but also because that structure might support people to get their thing done. Balanced against all the other demands on our time, it’s difficult to start and complete a creative project, not just technically, but also in terms of momentum.
But the others don’t need to hear this stuff! I’ll get in touch with you through your site.
I really like the idea of being your own patron. A painting teacher of mine in college gave similar advice. He said, “if you want to be a painter, learn a trade!” If you need to make a living off of your art, you will likely lose your love of it. And, if you don’t love it, it is just work!
I guess it really comes down to setting the right expectations for yourself.
Binding your own books requires an element of passion, because it doesn’t make sense on a purely economic level. Crafting the physical expression of your idea is the final act of bringing it to life. I get that thrill every time a make a book – very satisfying.
Many of the people I meet who are doing a bookbinding project are actually parents who are home schooling their kids. I’ve taught my own daughters how to do it, and they love to make books of drawings. I like how it expands the boundaries of what they think they can do.
There are lots of people out there with lots of good reasons to make books. I am glad there are plenty of folks willing to help them get it done.
Andrew Seltz
Birmingham, Alabama USA
http://www.DIYBookbinding.com
http://www.DIYBookForum.com
I couldn’t contact you through your website, Andrew (shrewd!) Feel free to get in touch through mine, if you like (hamishmacdonald.com).
Cheers!
BTW, I just posted on your forum, and on my DIY Book blog, about a shortcut I found for folding pages faster, but without resorting to a paper-folding machine (which I’ve tried: they’re expensive and produce a crap result):
http://www.hamishmacdonald.com/books/DIYbook.html
Hi again,
Just wondering what your experience has been with stapling a book spine instead of gluing? I recently
came into possession of Stanley/Bostich heavy duty stapler capable of using up to 1/2 inch staples.
My thought is to take a piece of wood the same heigth
as the stapler platform and cut out the front width of the stapler and slide it in, that way avoid any bending of the spine that can occure otherwise while
stapling. Just wondering what your take is on that approach to binding, also how do staples hold up over time?
Thanks Hamish,
My first book was fairly short, but I went through an offset printer to do it, then started the “DIY Book” thing with number two and three. Number four was short again, so I tried to use a heavy-duty stapler to bind it at first because it was so much faster.
In the end, though, I stopped and switched back to regular perfect-binding because the staples (going through from front to back) pinched the pages together very tightly, making it an unusual amount of effort to hold the book open. It also meant I needed a really big gutter along the spine.
I did a similar thing as you described, cutting sheets of hard plastic about the size of the book then cutting out notches the width of the stapler. It worked well to keep the book from wiggling around. Then I used pliers to flatten the staples more before putting the cover on.
Like I said, though, I wasn’t happy with the end result and switched back to simply folding and gluing the pages.
Best of luck!
Hi i was wondering which guillotine you use, and how much did it cost?
This is a wonderful article, and now I’m excited about publishing my own books.
I was wondering, for the hardback books, is there a way to make personalized slip-on covers for them like hardback books in stores have?
I wouldn’t know what kind of paper you’d need or how to print it off.
You’re going to make your own books – now *I’m* excited!
Printing a dust jacket shouldn’t be a problem, depending on the size of your book. If you’re in North America, a Legal-sized sheet would likely cover anything. You might try the lightest-weight photo/inkjet paper you can find, though if you’re picturing that high-gloss finish on most commercial hardcovers, I’m afraid that’s a varnish applied after the fact. There are lots of very nice-looking books in stores, though, that have matte finishes; I’d aim for that first.
Good luck!
Thank you so much for the tips, I can’t wait to get started! I’ve found some great sites, that sell all kinds of binding tools. I was wondering, have you ever used beeswax on you’re thread? I was worried it might stain the paper as I was sewing.
Beeswax is the tradition, and I’ve used it without it staining the paper. But when it ran out, I switched to an Ikea tea-light – you know, those “billion in a bag” ones. It worked just as well to keep the thread moving throughout the holes and preventing it from tangling (somewhat). It’s also lasting forever, so it looks like that bag of tea-lights may outlive me.
I’m having a lot of trouble figuring out how to print my novel out in signatures. Is there a special way to do that?
Have a look at my podcast, specifically episode fifteen, where I talk about this in detail:
http://www.hamishmacdonald.com/books/DIYbook.php
(The article on this page is several years old now; the podcast is my subsequent effort to explain this whole process in greater detail.)
Hello Hamish,
My name is Mabel Escobar, and I’m self publishing a manga (Japanese comic) with a few friends of mine. Since we would have to self bind the books, I was searching how to bind books when I accidentally stumbled upon your website. And all I can say, thank you God!
Since traditionally, manga is published in perfect bound format, we’ll be doing it that way. But before anything, I would like to ask a few question.
1) Since this would be a manga, not a regular book, the art will be done on B4 paper. But since it will NOT be printed on B4 paper (it’s going to be scanned), what grade should we use? I was thinking A4, but I’m not 100% sure. The books will never be more than 120 pages, by the way. Manga volumes tend to be short because all of the work that goes into the art (God, my fingers hurt just thinking about it).
2) I clicked the link for the ISBN, but all I got was some weird search engine (T-T), so what would you suggest to get an ISBN code?
3) In your instructions, you said to cut the paper in half, but what orientation is the paper? Is it landscape? You also then go onto say fold it in half. This confuses me. Could you please explain this a bit more clearly for me. It’s really important that I understand this, because I don’t want any of the artwork to be cut of. *shudders*
4) How do you properly trim the edges if you don’t have a guillotine? (I’m not a 100% sure if I can afford one, and it would be kinda hard to reach one.)
5) Last question, I promise: I have an “All in One” Dell printer that’s at least 6-7 years old. Could I use this printer for my work? Or would you suggest a new one? (I do have access to another printer, a much newer model whose name escapes me.)
Gomen for all the questions.
Please and thank you for any advice/answer you can give me.
Sincerely,
Mabel E.
This is article is now quite old — over five years — and in the meantime I’ve created a much more comprehensive podcast with audios and videos that go into much greater detail than I did here. You can find it at:
http://bit.ly/DIYbook
As to your specific questions:
1) I’m not familiar with B4 paper, and I’m not sure what you mean by “grade”. Do you mean weight? It really depends what you want the end product to feel like, and the types of paper that are available where you are could be very different in measurements, weights, and brands to what’s available where I am. A lot of paper companies are very generous about sending out packages of samples, so that might be a way to get a feeling for what you’d like.
2) Here’s your link for ISBNs:
http://www.isbn-international.org/en/agencies.html
3) Again, the podcast does a better job of illustrating this. I meant that I use A4 paper, portrait orientation, cut across the middle (halfway down), then I fold the resulting A5 pages in half. Imposition software can ensure that your artwork is laid out so you can cut the pages without cutting into your artwork.
4) “How do you properly trim the edges if you don’t have a guillotine?” I’ve yet to find a good solution other than a guillotine or expensive bookbinder’s trimming equipment. I’ve seen instructions for using a heavy duty folding box-cutter sort of knife and slicing slowly and carefully along a metal ruler going just a few pages deep each time. If the book isn’t too thick, that could produce a decent edge.
5) Your printer is probably fine. (I haven’t met it, so it’s hard for me to say.) The trick will be using a good quality paper; that always helps an inkjet do a much better job!
I hope that helps. Good luck with your project!
Oops! Sorry, the ISBN link above should be:
http://www.isbn-international.org/agency
…and then choose your country from the pop-up menu on that page.
Dear Hamish.
Thank you for a thorough, fun and informational walk through the process
of making your own books. I’m at writing a serial of children’s books, a poetry
collection and my first novel, and I had no intention of giving up the control to
a publishing company, so I created my own. And now you have provided me
with the inspiration and know-how to make the books myself.
Lovely stuff, great craic.
Go raibh míle maith agat.
I’ll send you the first copy. 🙂
Regards Camán
Camán, you’re most welcome! That’s really gratifying, to hear of that you’ve done your own thing, rather than following the industry advice to and tailor censor yourself in the hopes of producing something generically “saleable”.
(P.S. I have a sneaking suspicion we’re countrymen!)
Hi Hamish.
Almost. 🙂
Just across the little water.
I’m part Irish.
I’m about to get going with my first try at binding a hard cover publication.
Going to have a go at the lyrics from my first album and have it “on offer”
on my web site if it turns out well.
Then I’m going to put the poetry collection together and see how that goes.
I’ll keep you updated.
Wish me luck.
Reg. Camán
Great! And good luck. Post a link here when you’re finished: I rarely get to see what people do with these ideas, and I’d really like to.
Dear Hamish,
Thank you for the advice. It was really helpful. ^_^ Especially on the part on how to cut the paper, since that truly confused me. Now I know what to do when we make our manga.
Arigato Hamish-Sensei
Mabel E.
You’re very welcome, Mabel. I’d love to see the end result! Come back and paste in a link to the work when you’re done!
Cheers.
Have you done a cost per page analysis of the do-it-yourself route vs. what least expensive printing would cost?
My reservation is that I become a manual laborer in what should be a more passive income stream….
I haven’t done the per-unit math because:
a) It would be depressing.
b) It’s hard to account for factors like my time and materials I use for other things, too.
c) That isn’t why I’m doing this.
You’ve obviously recognised that this is a model that doesn’t scale well. If somehow I faced a huge demand for one of my titles, I’d naturally consider using an offset or print-on-demand service.
As for passive income, I would really dissuade anyone from thinking of writing or publishing in those terms. Even enormous corporations with dedicated specialist teams have a difficult time making a profit out of this business. It really has to be done for the love of it, without attachment to outcomes, I believe.
Rather than “manual labourer”, I’d use the term “craftsperson”. Gradually, with the rise of indie maker fairs and websites like Etsy, it seems people are coming to value and be willing to pay a premium for real things made by real people, but there’s always the inevitable comparison with similar commercial goods.
In the end, I’d say that if you want to make money in your spare time, do anything else instead of this.
I agree with Hamish. If not for the bookbinding equipment I produce, I wouldn’t make squat at bookbinding. I would scarcely be able to afford a second-hand cardboard box to live in.
You have to do this for the love of it. Consider the wonder in the faces of those who handle your books. ‘You really made this?’
I’m not a touchy-feely guy, but it’s a nice feeling.
Additionally, if your books hit big and you had an overwhelming demand / volume for them, would you continue to handcraft at that point or use volume printer?
Thanks Hamish.
I wrote three guitar books for the love of the writing and the subject matter, so I think my reasons for doing it were genuine but now have completed works and the question of how/whether to send out into the world. Using intermediaries on low-volume runs is fairly expensive and the idea of doing-it-yourself is appealing if only to avoid the brain damage of filtering through yet another person’s process and cost structure.
I did look into the xerox with duplex printing and binding equipment after coming across your posts.
The idea of controlling the outcome is valuable for its own sake independent of whether you make more or less and ‘craft’ is a good perspective on ‘labor’.
Thanks for your thoughts.
Hello Hamish,
This website is great! I’ve never bound a book, but I decided to make one – a really small one – as a Christmas present this year.
When I’m thinking about it now, thought, I’m just not sure if I chose the right approach: I want to use cardstock paper for the book’s pages. But I wonder – is that kind of paper too heavy?
I also followed advice of someone at a crafts store and bought bookbinding glue… I thought that I can just glue the pages together with that and then glue the covers to the book, using cloth for the book’s spine (again, using the bookbinding glue). But now I wonder whether it’s naive to think it would hold together without sewing the pages together before? What do you think?
Thank you for your help!
Barbora
Hi, Barbora. Yeah, card stock would make for a very thick and difficult to bind book. I can’t imagine card would be great to write on, either. Any nice writing paper will do! The bulk and protection for the pages will come from the cover.
“Bookbinding glue” is really just thick PVA — the same white craft glue you can buy anywhere. The more expensive kinds are just more rubbery when they dry, which makes for a nice, flexible spine (and also works very well for making tear-off notepads!).
What you’re talking about, gluing the pages together without sewing them is called “perfect binding” — so you intuited from first principles the most commonly used form of commercial binding! It works with a hard cover, but not especially well, as it doesn’t feel quite right feel in the hand (it opens a little strangely).
Great to hear that you’ve discovered bookbinding, though. Hand-bound books make for excellent Christmas presents!
Hi,
Just came across your site while looking for other info on bookbinding (the learning never stops!!). I thought you and everyone else might be interested in seeing my first ever book (actually a booklet ‘cos of its size).
(I used the tutorial for making my book found here: http://davethedesigner.net/booktut/ – a very good visual tutorial with lots of pictures)
The learning curver was very, very steep as I was under pressure to get this done within a short amount of time. I started from scratch in Dec ’09 and finished in Feb ’10. A couple of mistakes were made, namely that the info where I got this from (see above) was for a cloth covered book so used exactly the steps I was shown. So the ivory cardstock that the book covers are glued to was not needed and it makes the book hard to open completely (also partly due to a small bead of glue drying on the upper and lower edges of the book block which prevented the end papers from being placed snug against the spine of the book).
The software I used for laying out the book was a freeware product called Scribus found here: http://www.scribus.net/canvas/Scribus
It is a very powerful program and takes a little getting used to (since it does NOT work like a word processor) , but once you do get used to it the time taken to create your pages drops considerably (after you have set the page attributes you can copy the page indefinately and use it for all your pages – then you just copy your text over). You can then save the whole document as a pdf file which is cool (at a high resolution too – 600dpi).
The next thing I did, imposition or laying out the individual signatures, I did by using a free website service here:
http://imposeonline.com/
The only problem with this site is you have to understand what you are doing. I didn’t and created a few failed pdf files. Which is no problem as you just start from scratch. It allows you to create a pdf file based on the number of signatures you have and the total number of pages in your book. It can also let you make a pdf file of a book based on a different way of putting the book together (not using signatures for example). By the way, your pdf file must be created with pdf version 1.4 or before (which is Adobe 5.0). So you may have to find a way to ‘downgrade’ your file if it has been created with Adobe 6 or above or with any of the pdf printers out there using the higher version (1.5 or 1.6). This is something I am looking into now, as I found the problem is now very common (who has such old software????)
Anyway, I then went to my local Fedex/Kinko copy shop and had them laser print the pdf on both sides of paper I supplied (100% linen stock). Took over three hours as their machine kept on altering the position of the second page (I had printed the pdf with register marks -which is done through the imposeonline website). But eventually this was done for about $13 (which was amazing as they only charged for the pages that I used in the book – we wasted over 100 pages trying to get them lined up on both sides of a page).
After the book was sown together I then went and had the edges guillotened at my local Office Depot copy dept.
I bought the leather from a seller on eBay ( peggysuealso ) for about $24. PVA glue can be purchased from Hobby Lobby (if you are from the USA), but it is not where the regular glues are. You have to hunt for it. The sales clerks won’t know what you are talking about so just look in the craft sections thouroughly. Otherwise you can get charged quite a hefty amount for something which is very common in England.
A good site for learning about creating leather bound books is here:
http://www.edenworkshops.com/
for how to make the corners:
http://www.edenworkshops.com/images/leather%20corners.pdf
I also used this source for paper and glue (before I found the glue in Hobby Lobby): http://www.paper-source.com/
I hope this helps, and thanks Hamish for your article, new info of links, materials, etc.
And one last thing,…. there is no better feeling in the world than holding a book that you have made yourself. It feels bloody awesome!
and this source for bone folders, paper, book board etc:
http://www.hollanders.com/
Thanks for being so generous in sharing all the resources you found. Only one thing was missing, and that’s a look at your end result!
Happily, you included a link in your comment attribution:
http://matrixfiles.com/book/book2.html
I have to say, that’s really lovely work! Your book is a thing of beauty.
Thanks Hamish.
I saw that I had left out the URL but didn’t see any way of editing my post, so thanks for putting the link in your one.
I must say that most of my learning came from
a) wanting to make something special for my girlfriend’s birthday (and what better way than to write a 40 verse poem and then bind it into a book!)
b) the people who created web sites to show others how to do this.
What I posted just about covers every resource that I used myself.
Your site is another one that I will be using and referring to again.
I am going to be starting a new project and have a few thoughts on radically changing how I will make my book (as there are so many techniques out there, I have thought of bringing some modern materials into the mix) so that it’s quicker, cheaper and easier to make (time constriants again!!). I will take pics and post them and then put a link here.
Sounds like you’ve caught the bug! It’s a pursuit that never ends, yet keeps being rewarding at every new level you reach.
I hear you about combining methods, too: a lot of the instructions out there demonstrate “classical” bookbinding techniques, which have a lot of extraneous, fiddly steps. My interest from the get-go has always been to achieve a practical result — a medium for transferring content or capturing ideas, rather than making show-pieces to sit in a display case somewhere.
Of course, it’s great when you can do what you’ve done, and make a book that’s both practical and beautiful.
Good luck!
nice work!
How could i make a book binding without folding? like a stack of fulls pages? if i punched the end wand sew it would i hold then? thanks for your inputs. bb
Hi! I am having problems finding a printer that duplexes smaller than A4 paper. Can you help me. I live in Australia.
Sorry, I live in Scotland, so I have no idea what’s available in Australia. From what I’ve seen, though, I doubt there are any home printers specifically designed to print on smaller paper than A4/US Letter.
In the past, I tried adjusting the paper tray of my laser printer to A5 and selected that as the paper size to print to, and it did sort of work, but the paper jammed far too frequently on the small sheets, so I went back to imposing my pages four-up on a sheet and cutting the sheet in half, as I described above.
I hope that helps!
Thank you. Is a laser printer just as good as a xerox phaser printer, if not what is the difference? I am having trouble in finding the best printer for the job, manuscript.
The Phaser printers use solid ink, kind of like a meltable crayon, to print in colour, whereas regular laser printers contain toner, a fine dust, either black or in colour, and then use lasers to electrostatically fuse it to the paper.
Which is best? I don’t know. I’ve never owned a Phaser, but I’d assume they’re expensive to run. I did own a second-hand colour laser printer at one point, and found it consumed a lot of pricey toner cartridges, and the images it printed had a shiny finish to them I didn’t like.
Ultimately, I went back to using an inkjet printer for my covers and an entry-level (grayscale) laser printer for my inside pages, and I’m perfectly happy with that result. For Christmas, my mum got a colour inkjet that even duplexes, which I wish mine did, and it’s just a basic consumer model.
I don’t know anything about the kind of job you’re doing or what size of a print run you’re looking at, but unless you’re setting up a full-scale publishing house, I’d suggest starting simple rather than breaking the bank on “ideal” equipment that’ll probably be overkill.
This is a great site, and as you’ve been keeping it up for so long, forgive me for not reading all the comments and if I’ve duplicated something already mentioned.
I work in a small print shop, where we try to help people create their own books, like this. I’m used to doing runs of 200-1000 of one book at a time. Therefore, I wanted to mention that when we do perfect binding, we glue a whole stack of books at a time, then take them apart to add the covers individually.
What we do is use two tall boards, nailed together to create a tall corner to flush up a stack of books. We stack our books with a slipsheet between each book (like a waxpaper or vellum cut to the same size as all the other sheets). Then, we flush them up against the corner, using a flat board on the third side and weight them down on the top. Then, you can brush your glue against the whole stack until you are ready to add your covers. Then, you unweight the stack, and slit each book apart with a blunted knife on either side of each slipsheet. Then, you can add your covers.
Also a not on printers. For those who want to do a few hundred in a run of single color ink printing, I would recommend you look into finding a used duplicator machine, like a risograph. There are often churches and community groups selling ones in decent shape (prices vary by models). Again, this isnt for those making small quantities of books but for those who want a better way to get their words out there.
Just food for thought. Im glad to see so many people doing this.
Thanks for those great tips, and for your unique perspective! I really like that board idea; I must remember that if I’m doing a whole bunch of books at once.
I’ve been looking into the practical side of running a Creative Commons print shop, and I have found that Scribus and Inkscape appear to be two powerful (and slick) open source programs. I haven’t diddled around with Scribus yet, but Inkscape was ridiculously fun to play around in and has smoother (entirely vector-based) graphics design than The Gimp. Scribus is for designing page layouts and you save them as PDFs.
http://www.scribus.net/canvas/Scribus
http://inkscape.org/
Otherwise, your description of adventures in self-publishing is overwhelmingly helpful and I am glad to have found it. Thank you!
A CC print-shop — what’s a beautiful idea!
Personally, I’ve found both Scribus and Inkscape to be a little too programmer-y, Java-y for me, but they’re definitely very powerful tools — and free, which is hard to beat. Happily, there’s an increasing number of inexpensive but very polished programs for graphics and layout, so we have lots of choice these days.
Best of luck with your self-publishing efforts, and do come back and show us what you produce! I’m currently reading a book created by a guy who listened to my podcast and used these ideas to publish his own novel, and I’ve learned things from his application of them — so it comes around, it goes around!
Betsy,
Hamish is correct. A creative commons printshop is an excelent idea. InkScape and Scribus are great tools for smaller projects like ‘zines, covers, and graphics. I tend to use other tools to do the bulk of my book typesetting/layout. TeX (rhymes with blech) and GUI wrappers for it like LyX work well for larger projects.
http://www.ctan.org
http://www.lyx.org
Another interesting tool is writer2latex. It converts OpenDocument format into other formats like LaTeX. This would allow people to edit their books using Open Office or Libre Office and then convert them to LaTeX for high quality typesetting.
http://writer2latex.sourceforge.net/
Happy Hacking!
Rick
This looks interesting:
http://www.sourcefabric.org/en/booktype
Booktype is a free, open source platform that produces beautiful, engaging books formatted for print, Amazon, iBooks and almost any ereader within minutes. Create books on your own or with others via an easy-to-use web interface. Build a community around your content with social tools and use the reach of mobile, tablet and ebook technology to engage new audiences.?
Yeah, it does! Although the website has a “download” link, that’s for downloading “the code”, which seems to then need to be installed on some kind of server and accessed through the web. I’m not sure what the process is from there, but I don’t think I’d like to trust making edits to a whole manuscript while refreshing pages and all that.
This is encouraging, though. Someday soon, someone will come up with the all-singing, all-dancing e-book and print book package, and it’ll fill a much-neglected gap.
Meanwhile, though, I’d like to say that I’ve been using Scrivener (http://www.literatureandlatte.com) to output e-books lately, and — aside from being a wonderful program for keeping all the files for a writing project in one place, letting you work in split-windows, and such — it exports ePub and Mobi files beautifully, with an automatic table of contents, cover art, and meta-data, too.
Greetings from Canada Hamish,
I came upon your site looking to find a alternative way to self publishing and was very happy to read about the different ways to go about it. Personally putting some elbow grease into printing and binding really adds that personal touch to months or years of writing work on novels/stories etc. 🙂
I’m currently still in the process of writing my novel but figured I could make a few sketchbooks on the side. There is something beautiful and natural about hard cover books, the feel is warm and comforting and a joy to tuck into on a rainy day next to the stove with a cup of tea. 🙂
Take care and thank you for sharing this information with us all.
Warmest Hugs
Crystal in Canada 🙂
Hello, Crystal, from Canada! (I’m here for a visit, writing from a motor inn nestled in the mountains in Blue River, BC.
I’m happy you found these instructions helpful, and, yes, hardcover books do have something special to them, don’t they? I keep making them for any old project — it’s just an excuse to try another one!
Just to clarify, though, this isn’t my site. It belongs to author/filmmaker/game designer/everything Jim Munroe. My site is hamishmacdonald.com (where I’ve posted the rest of what I’ve learned about bookbinding since writing this article).
Cheers!
Wonderful ideas! Can’t wait to try them.
Just a thought on your comments about the GIMP photo editing software. My experience has been that it’s what you’re used to. I haven’t ever used Photoshop, so when I learned to use the GIMP I had no idea what people meant by “idiosyncratic interface” and “hard to learn.” It seemed very logical to me, and I find it very easy to use.
On the other hand, I am the type of guy who will take a college class on Dreamweaver and do all my assignments with BlueGriffon. Or bind my own book.
I need help.. I have written my book and my manuscript is on a word document. I need to know step by step how I make the front and back cover for my paperback book. I have searched everywhere but I can’t seem to figure it out. Thanks in advance for any help that you can give me.
I’m afraid I can’t really describe the whole process in the space of a comment field. There’s material out there, though, and one of the best writers on the subject of book design is Joel Friedlander. Here are his articles on covers:
http://www.thebookdesigner.com/articles/cover-design/
He’s positioned himself as a “professional” designer, so has a bent toward the high-end design programs from Adobe. But you could use any of the programs mentioned here, like the Gimp or Scribus, or I use Apple’s Pages to lay out the covers and interiors of my books.
A “page layout” program is like Word, except it presents you with a blank canvas where you can place elements anywhere on the page. That’ll be your starting point. Then you’ll want to measure out the parts of your book as you want them printed out (the size of your cover and spine, for instance) and then use those dimensions in your page layout program.
One very important note: please make sure any graphics you use have a high “dots per inch” (DPI) print resolution — upwards of 200dpi — and not screen resolution (72 or 96dpi). This is the commonest mistake in DIY design, which results in stretched images have “pixellated” staircase-like edges. It’s really ugly, and ugly covers are one of the first targets indie-publishing haters like to get their jaws into.
Dear Hamish,
A happy day of designing the pages of my first music book took a nose dive when I tried sending PDF files to a printer – e-mail wouldn’t cooperate – so made the pictures into JPEGs, which the hallowed e-mail portal allowed through, only to find the printer couldn’t use JPEGs. After falling off yet another north-face-of-the-Eiger-learning-curve, I blew a fuse & thought, “Why don’t I print my own books?” I can’t tell you how delighted I was to find you at tea-time! You are already thinking and doing what crashed into my brain this afternoon! So thank you very much for taking the time and trouble to share your thoughts, knowledge and experiences with us. Greatly appreciated!
I’m very happy to be of service, Sheila! How exciting, that you’re walking down this path. No matter what you end up doing with print services or publishers or whatnot as a means of getting your work out, learning to bind your own books will mean you are never at anyone’s mercy and will always have complete creative freedom. Hooray!
Of course, as I’ve said a bunch of times before (though there are a jillion comments on here now, so I don’t blame anyone for skimming), since writing this article I went on to create a podcast with audios and videos about my whole writing, binding, and selling process, which you can find here:
http://www.hamishmacdonald.com/books/DIYbook.php
Good luck, and I’d love to see the books you produce!
Hamish,
I just wanted to leave a message to say thank you so very much. I cannot express the value which your article has given me. Unlike most of the commentators on here, I don’t yet have a finished book – in-fact, I’m yet to begin – but I had many worries about the cost of printing the books versus the evntual profits. I didn’t think it was possible to break even until I looked into self biniding. Your article has not only opened my eyes to the posibility of doing this further, it has confirmed to me that it’s the most cost effective way to go in market of self publishing that is so murkey.
By writing this article so clearly and freely, you really have done an amazing thing for aspiring authors.
Thank you!
Very nice tutorial! I can’t wait to try it out. I want to print and make a few copies of my book before I go for mass publishing. Hopefully I will manage to make a nice buck as as yours! 🙂
I recently bought a new Savin inkjet printer and immediately ran the ink out of the temporary ink cartridges. Has anybody experienced any success with the cheaper ink cartridges? I was considering trying this place – http://www.solanoink.com?? Has anybody bought from this store before?
Thankyou so much for this!!!! I’m in Australia and am embarking on a publishing venture, now a self publishing one thanks to your info 🙂 Lots for my brain to chomp on and I’m guessing I’ll be reading this a few more times yet, Thanks again 🙂
Thank-you for the effort that you have put into this description! We had eleven children, and lots of family stories & recipes to pass along. It would be lovely to make books for family and friends; and to see if anything comes of the effort after that! Thanks again.
Here in the US we have a store called Staples. I was quoted a price of about 9 dollars for something called “Ambassador Binding” for a one inch thick book. What is the difference between this and what you are doing at home? Thanks!!
https://www.facebook.com/TheWorkAround
Interesting article. I never thought about binding my books myself… might actually try it!
Budding book maker needs help!
Hello Everyone,
I am working towards making printed books of out of copyright classics and selling them.
I have acquired, perfect binding machine and cutting machine (CAIBA) and also fast heavy duty duplex printers (HP) but now I need help with two things.
1) How to print books on the duplex printer so that they come out as an A5 sized book… meaning I need help with something called imposition or something like that so that the pages come out correctly… my eBooks will be text (.txt) and pdf format.
2) How to print the cover? I ask this because including the spine, the total cover page size will be more than A4… so how do I manage the spine?
I appreciate your help.
Thanks!
First, do a serch for the word impose on this page and read what others have said about imposition.
Then go to Hamish MacDonald’s site:
http://www.hamishmacdonald.com/DIYbook.php
Pay particular attention to episodes 14 and 15…
Here are some other links I’ve found useful:
http://www.pmonta.com/etext/
http://www.sandroid.org/GutenMark/
http://www.tinaja.com/bod01.shtml
http://www.allvoices.com/contributed-news/8870184-how-to-bind-your-own-book
I think Chet Novicki has passed away, so getting any of his resources may be difficult.
Happy Hacking!
Rick
Hi Rick,
Thank you so much for the great response. I found the links very helpful. I did a search on “Impose” on the forum but it didn’t return any results. So, if you have more links about imposing please provide me with those.
I think I’m going to go ahead and give making one book a shot and I’ll came back here if I have questions.
Thanks again!
Mohan
Mohan,
Try doing your search without quotes.
Scroll to the top of this page, hit Ctrl f, and type in the word impose without quote marks…
Also, which software platform are you using?
Windows, Mac, Linux, or BSD?
This will help with software recommendations.
Rick
Yes, I did find some results for impose. However I’m still a bit confused. The previous link you gave me (http://www.pmonta.com/etext/) seems very interesting because when you look at the sample book provided (Sense and Sensibility) it has been perfectly imposed and is ready for print. But it doesn’t clearly state the tools he used…
My platform is Windows so if you can just lay out for me the steps I could follow starting form a normal text or pdf file to get to an imposed (ready for print on a duplex printer) pdf file then I’d be ever so grateful.
Also what I’d ideally like to achieve is to pickup the stack of printed A4 pages, cut it in half in the automatic paper cutter, pick up one half and put it on top of the other one and go to the binding machine… resulting in a perfect A5 (half of A4) sized book.
It would not be feasible for me to pickup and fold each page so the imposition needs to be so that when the A4 page is cut in half and one stacked on top of the other, it becomes one continuous pages.
I know I’m asking too much but I’d really appreciate the help.
Mohan
You might want to go here:
http://www.imposeonline.com/
I used this service to impose a small book ( http://www.matrixfiles.com/book/book.html ) and it was a bit difficult at first to wrap my head around the idea of imposition but the great this is it allows tons of options for to to achieve what you want. I had signatures in my book but all you want it seems is page 1 and 3 on the front page and 4 and 2 on the reverse (and the same on all the others). You can test a couple of page out (there are no limits to how many books you can impose) and the results can be had in minutes. Then when you have it the way you want you can impose the whole PDF file that you have, print it out (double sided following your printer instructions very carefully or go to your local printers and have it done) then cut the whole in half. You probably won’t be able to just stack one half on top of the other so you will need to collate the two halves, although I haven’t done anything like you are doing so I am assuming this just thinking this one through for a minute.
I hope this helps.
By the way the steps are very simple.
1) Finish your book in whatever program you are doing it in.
2) ‘Print’ it as a PDF file (use a pdf printer like Cute PDF found at http://cutepdf.com ) by choosing this printer in the printer dialogue box.
3) Go to http://imposeonline.com and register (doesn’t cost anything).
4) Read up and learn how to use the online tool then upload your file to have it imposed and emailed back to you (or saved as a download – can’t remember which). Basically you want these options chosen:
Step 1 Upload your file
Step 2 No
Step 3 Leave as given
Step 4 Yes
Step 5 Yes
Step 6 Perfect Bound (drop down menu – for paperback style book)
Step 7 Two up
Step 8
Number of forms to fill in will vary. For a 200 page book you will have 50 of these to fill in (Form 1, Form 2, Form 3, etc). You will fill it in this way (from visualizing what you want – the easy way):
Form 1 – On the left 1 then 3, on the right 4 then 2
Form 2 – On the left 5 then 7 then 8, etc
If you want you can actually impose your book in such a way that you will not have to collate after cutting in two. But you will need to work this way out on a piece of paper, as I did when I was doing this with my book, as you have to figure out what page will be where when you cut the stack in two – bearing in mind that it will depend which half you stack on top of the other. The order of pages will be different if you stack the left half on top of the right half to doing it the opposite way, so you need to decide that first (DO make a note of that!). Just thinking about this quickly this is the way you would impose with a view to putting the left half of the book on top for a 200 page book:
Form 1: on the left 1 then 101, on the right 102 then 2
Form 2: on the left 3 then 103, on the right 104 then 4
Form 3: on the left 5 then 105, on the right 106 then 6
You can easily see now the progression of numbers. You can try this with 10 pages to make sure I got it right (bearing in mind the you will have 1 then 6, then 7 and 2).
You may get blank pages which is part of the whole learning process. Where are they going to appear?
Anyway, I hope you get the gist of all this. Oh yes, continuing on with the Steps….
Step 9 Leave as given (0.6)
Step 10 Leave as given (0.6)
Step 11 No ( all you will doing is cutting the stack in two so there’s no complicated stuff going on)
Step 12 No
Click on the IMPOSE button below step 12.
Voila! Imposed book. (You will need to wait a few seconds/mins for the site to do its magic – then just follow instructions on getting the file onto your computer).
5) Print it out with your printer or your local print shop.
6) Cut your paper in half (and if necessary, collate the pages or..), stack the correct half on top of the other.
Good luck.
CAS, thanks for the info. It would have been very helpful if I had just one or two books to impose, but I have hundreds if not thousands to impose in the manner I had described so what I need is some kind of a tool that can easily do bulk or at least doesn’t need configuration for each one, once you set it up you should be able to just pass the books through it like a machine…
So if anyone out there knows of such a tool, please! Let me know! I’m waiting!
Thanks!
Mohan
Hi Mohan,
I don’t know of any software that will do what you ask. It seems though, that you may not understand imposing. For thousands of books to be imposed all at once they need to have the exact same number of pages otherwise the pages won’t appear in their proper place. A 98 page book will have Form 1 filled in differently (and all the other subsequent Forms too) than if it was a 100 page book.
For each book you would have to have the total number of pages which will give you the data for Form 1 and every other Form from that point on. So there would have to be a database created that had the details of all the PDFs: the number of pages for each PDF, the size of the pages, whether or not the book was to be a custom size, etc. Then that data would have to be plugged in to a program like the imposeonline program, with each PDF being saved with a title before going on to the next one. You are talking about a serious use of manpower. I know of NO shortcuts to doing what you want to do.
I don’t know of any program that has Artificial Intelligence capabilities in this area because you DO need a logical thought process administered by someone or something tho do what you want.
Don’t forget that ALL commercially available programs at the moment are dumber than Humans (i.e. tell a program to turn the computer on or off and you will never get that done unless it is a pre-configured script that a Human has programmed.
So whichever way you look at you are looking at a serious amount of Human work to do this.
Ok… if automated tools aren’t going to be available, at least there should be a desktop version of the imposeonline website so that you don’t have to waste time uploading then downloading the pdf files… do you know of such a tool?
Thanks again!
No.
Thanks… your posting have been really helpful. If you do come across any new information, please let me know!
Mohan
There are several open-source imposition tools around, most of which are command-line driven and which ask for good preparation on behalf of the user. A list can be seen here for example:
*http://wiki.scribus.net/canvas/Imposition_tools*
I use pstops occasionally.
multivalent works with PDF-files:
*http://multivalent.sourceforge.net/Tools/pdf/Impose.html*
Bookletimposer is implemented as a commandline and GTK+ interface to
pdfimposer, a reusable python module built on top of pyPdf.
Bookletimposer and pdfimposer are both free software released under the GNU
General Public License. Downloads and more information are available at:
*http://kjo.herbesfolles.org/bookletimposer/*
MohaN
This is a bit of a paradigm shift, so it may take you a while to wrap your brain around it. A few years back a few of us came up with an alternative imposition technique we coined the “band saw method.” It involves printing two copies of each book 2-up with a copy of each page on the facing page, but inverted so they share a common spine. After you print out your book and cut the pages in half, you have two book blocks.
This technique is page count agnostic and lends itself to scripting.
Happy Hacking!
Rick
Can you please describe the method a bit more… I’m not sure I quite understand it.
Thanks!
It’s a bit complicated, but here goes…
I created a custom Linux shell script that looks like this:
#!/bin/bash
pdflatex=/usr/bin/pdflatex
infile="$1"
tmpdir="/tmp/$$"
mkdir "$tmpdir"
cp "$infile" "$tmpdir/in.pdf"
cd "$tmpdir"
$pdflatex \\batchmode \
'\documentclass[a4paper,landscape]{book}\
\usepackage{pdfpages}\
\begin{document}\
\includepdf[pages=-,trim=10mm 18mm 10mm 18mm,doublepagestwist*,nup=2]{in.pdf}\
\end{document}'2>&1 > /dev/null
I name the script mk_a4cut.sh, make it executable using chmod 755 mk_a4cut.sh, then feed it the pdf book file formatted for a5 paper as follows:
./mk_a4cut.sh some_book.pdf
Something similar might be possible using a powershell script on windows after installing MiKTeX from miktex.org…
You may have to adjust the parameters given to the trim command on the next to the last line of the script in order to get your margins just right.
Hope this helps more than it hurts 🙂
Hey i’m looking into setting up a perfect binding press, mainly as a hobby than anything else but there is one thing that is bugging me.
Why fold the pages?
I have pretty much everything else worked out, designed my own binding press and such, but why does the guide say to fold the pages? The size I intend to use is 5″X7.5″, theoretically I could print reverse sided and cute the stack down the middle and trim, but is this not suggested?
If I printed A4, cut in half and folded the side would be much smaller than desired. If I printed A4 and folded then trimmed then technically 2 pages (4 pages including reversed side) would be bound together, is this the intent?
The only issue I might see with the cut in half and trim is there could be a weakness in the spine, but since I have not yet experimented with this I do not know for sure, but I would like to know the purpose of folding the pages if anyone could explain it for me.
Thanks.
I’ve completed my book about oil painting techniques. Most of the inside pages need color reproductions of paintings and demos. What would be the best way to home print such book regarding use of software, printer, special glossy paper or illustrated color cover?
Thank you.
I’ve made hand bound photobooks of fine art portfolios for many years in limited editions of 25. One thing not mentioned. Quarter bound & other hand made books, using fabric & decorative papers, are a work of art in themselves. Each page of a photobook, made of high quality art paper has the same scaled value as a similar print. These things are not lost to book collectors and museums. I’ve sold these photobooks, including a pair of white gloves used for handling.
Reading the comments, most of you are beyond my point of preparation. I can’t believe I came from a newspaper and then a printing business creating everything- but still am like a caterpillar in a beach party. I’m just formatting the book which are not going to be for sale but family. Because i am an illustrator, its hard to work the details of preparing the books. But i believe i have the right printers- one large format that prints both sides. My goal is for 6×9 trim size.
QUESTION Should i take 2-3 double printed pages and find a binding company who can say- ‘you are on the right track’ -give him the printed pages and then let him perfect bind the books? I want to be brave like your followers but this will take years of ‘your’ confidence to finish.. The cost to have to send a 96 pg pdf completed (without dust-cover- i can do that) is $500 for 5 copies in Toronto…. its just kookoo Any advice from anyone?
I’ve completed my book about oil painting techniques. Most of the inside pages need color reproductions of paintings and demos. What would be the best way to home print such book regarding use of software, printer, special glossy paper or illustrated color cover? Thanks for sharing………………
Great article. However, all the links that I clicked on sent me to what seemed like spam sites or hacked sites. I’d encourage the author to double check that this site hasn’t been hacked.
Aside from that disappointment, I really appreciated this article. There were a few items I felt were confusing, for example getting a paper folding machine but still cutting the paper. I think more clarification would be helpful, and probably some actual pictures of the process, or video, to further clarify the steps.
All in all I appreciated this article. It’s given me confidence that perhaps I can make my own books from home as well!
This article is about fifteen years old, and I don’t maintain the site, so… I’m afraid it’s past its best before date.
Since writing this, I did go on to create a DIY Book podcast — which is, itself, a bit long in the tooth, but in case you might find something helpful in it it, you can find it here:
https://hame.land/diybook.html